• Steel Soldiers now has a few new forums, read more about it at: New Munitions Forums!

  • Microsoft MSN, Live, Hotmail, Outlook email users may not be receiving emails. We are working to resolve this issue. Please add support@steelsoldiers.com to your trusted contacts.

CUCV 1986 M1008 - In a Real Pickle - Bad Heads - Need Advice

cucvrus

Well-known member
11,474
10,437
113
Location
Jonestown Pennsylvania
I wish I could help more. That is what I found. I never heard of 6.2 diesel heads being different. But I do NOT claim to know all about this subject. I looked at several sources and they list them for a 1984 K30 with a 6.2. They are going to be the ones to get. I would not be afraid of heads made in Canada or China. I get parts from all over the world. Unless you ask many times you don't know where parts are made. Many times it don't matter. I buy brand new GM vehicles that have parts made all over the world. They work fine. I am just not as fussy about where things are made. I have more concerns about fit and function. I have a 22 year old Cadillac and the speakers were made in China when I removed them. World market. Free trade I guess. I thought NAPA sold new heads for the 6.2. I know Autozone did. i had a friend buy a set a few years back. He is still plowing snow and hauling dirt with his K30. Good Luck. I think I will hang onto my crate heads. They mean more to me then the new ones are selling for. The crates would make a nice table top for the man cave.
 

scottladdy

Member
538
8
18
Location
CT
I wish I could help more. That is what I found. I never heard of 6.2 diesel heads being different. But I do NOT claim to know all about this subject. I looked at several sources and they list them for a 1984 K30 with a 6.2. They are going to be the ones to get. I would not be afraid of heads made in Canada or China. I get parts from all over the world. Unless you ask many times you don't know where parts are made. Many times it don't matter. I buy brand new GM vehicles that have parts made all over the world. They work fine. I am just not as fussy about where things are made. I have more concerns about fit and function. I have a 22 year old Cadillac and the speakers were made in China when I removed them. World market. Free trade I guess. I thought NAPA sold new heads for the 6.2. I know Autozone did. i had a friend buy a set a few years back. He is still plowing snow and hauling dirt with his K30. Good Luck. I think I will hang onto my crate heads. They mean more to me then the new ones are selling for. The crates would make a nice table top for the man cave.
Here is my understanding, please chime in if anything is inaccurate. 6.2 and 6.5 heads are interchangeable with the following considerations:
  1. 6.5 Turbo heads have a different angle on the injectors. This was to increase the clearance for the turbo. Generally you can use the 6.2 injector lines on the 6.5 but going the other was is more challenging as the 6.5 lines are shorter.
  2. Center mount turbo heads use a different intake manifold which had a different mounting bolt angle in the heads. I believe 60 degrees vs 90 for the "regular" heads.
  3. The precups are different.
 

cucvrus

Well-known member
11,474
10,437
113
Location
Jonestown Pennsylvania
I don't know about all that. But I did buy 3 1999 G-vans (school bus cutaways)that had 6.5 turbo diesels in them. I pulled the engine from one and the heads were different and the turbo was at a different location. I needed an engine from a pick up or suburban. Long story short when scrap went up a few years back they went to thru the crusher engines and all. Not worth the hassle when I did not need any engines for G vans. I did manage to sell the one 6.5 short block and that went in a pick up but the heads,turbo and intake went in the scrap dumpster. As far as what fits. I never ventured further then my own collection and a few HMMWV complete engines that they scrap for no reason.
 

Commander5993

Active member
Steel Soldiers Supporter
Decision Made:

Just wanted to post an update with the decision that I made on what route to take on getting our "daily driver" M1008 back up and running.
We first looked at getting one of the new updated AMG Optimizer or the AMG P400 blocks.... those engines sound like real quality motors... but $7-$8k is a lot of money to put into an engine for a truck that we only have about $9-$10k in total.

So next, as I posted in my other thread "86' M1008 - Contemplating Chevy 350 engine swap", I thought about changing to a different "stock" engine, like a chevy 350 or 383. It would have been nice to have the newer upgraded block and heads, let alone the extra power that would have came with an engine upgrade. But in the end after looking at many different engine and parts options, with all the needed parts and by the time everything was said and done it was still going to be $4-$5k. (Yes, I could have shaved off some of this by finding a "donor" engine etc)

So... this brings me to my decision. I ended up buying a pair of 6.5L heads from a company called Odessa Cylinderhead out of Florida. These heads are all new castings but with rebuilt parts (valves, springs etc). TBH the main reason we ended up taking this route... well #1 we need to get our truck back up to driving condition as we need it... but #2 I purchased this Pair of Heads for $500 for Both Heads including shipping. Plus they send a prepaid shipping label to return the cores, and yes they will accept all cores even if they are cracked etc, so long as they have all the parts there, and they don't charge an upfront core charge. This has been by far the best price I've been able to find anywhere, even for just regular rebuilt heads.
Link to that ebay ad: https://goo.gl/Px6gbQ

(Looking at their ads again.... they do have brand new heads with all brand new parts (valves, springs etc) for $100 more... https://goo.gl/hpkJs8 - I have contacted them to see if I can switch to those since the others apparently haven't shipped yet...)

Also I contacted Odessa with a few questions to make sure these were the correct heads for this engine and a few other things, and always got a reply back in less than a day, usually in just a few hours.

I hope that these heads work out great and I don't have any issues down the road. But if I ever do I will update this thread.


Since I've got these heads ordered, I have of course also ordered all new felpro gaskets for everything, new felpro head bolts, 180 degree thermostat, injector return lines, oil pan gasket, and even a new mechanical fuel lift pump while I'm at it. I wouldn't mind having IP rebuilt... but it was working fine so I hate to spend $400 more if it's not needed. But I am going to clean the injectors while I have them out, as that is something I can do. Might not be as good as sending them out, but again not really having any issues with them either.

Also after a lot of thought... as General Cucvrus suggested, I'm not going to pull and rebuild the block. I don't believe there is any issues with it, as there was no odd noises, no oil consumption, not even any leaks or other issues previously. Instead I'm going to look everything over, install the new heads, and get it back on the road. This isn't the normal "approach" I usually take when doing any kind of repair or even fabrication work, but right now in this situation it's the route I need.


What is the general thought line on using Copper Spray-A-Gasket Hi-Temp Adhesive Sealant?? Especially since I'm not having the block resurfaced? I'm going to clean the block surface very carefully with Shop 3M Roloc Discs. After of course stuffing rags down into all the passages and cylinders.

Should the Copper Spray be used on: Head gaskets? Intake? And exhaust gaskets?
I know a lot of guys used to use it on every gasket they installed. It still seems to be recommended by a lot of people today, even on many newer engines.


Any other recommendations or advice on "things to check" or "things to do" either before or during re-assembly??


Thanks Everyone for All the Help, Information, and Advice! [thumbzup] [thumbzup]

----------------------------------------------

EDIT:

***I am in need of the #7 (rear driver side) fuel injection line. When I was removing them, the nut on this line was froze onto the injector, and instead of breaking the nut loose, it broke the injector loose instead. I ended up having to cut the line (as it was going to twist it into if I didn't) and pull the injector and all out. I was able to get it off the injector later on the bench. I've been searching for one, but haven't had much luck, other than US Diesel Parts... but they want $70 for just the one line :shock: and I'm not even sure it is the correct one.

If I can't find one cheaper, I wonder if that new "soft" nickel copper brake line that you can bend by hand, which autozone and other parts stores are carrying, could be used with the original end pieces?


***Also something else I just thought about... this is a 6.2L block, and I'm installing 6.5L heads... would the 6.2L gaskets (Fel-Pro 8726 PT) be correct? Or should have I gotten the 6.5L gaskets (Fel-Pro 9701 PT) ?? :???:
As far as looking at photos of them, they are nearly identical, except the 6.2L gasket has 4 rounded corners, and the 6.5L gasket has 3 rounded corners and 1 square corner. And in the square corner there is a small hole present in the 6.5L gasket, where the 6.2L gasket does not have a hole in that spot. Other than that all other holes and spacing seem to be exactly the same. However, thickness, what it is made of, etc I do not know about or if any of that would make a difference.
 
Last edited:

Commander5993

Active member
Steel Soldiers Supporter
Ok... this might be a dumb question... but why on earth does the TM list the head bolts ("cap screws" :roll:) torque specs at: 1st round 20lbs - 2nd round 50lbs - 3rd round 1/4 Turn! What??!! :shock:

I've never seen a head bolt that wasn't specifically torqued to a predetermined spec. "1/4 Turn" is to general, the bolts wont be even pressure across the head.

I searched SS and found an older thread where someone was asking the same thing. They decided to do a "1/4 turn" on the first bolt, use their torque wrench to find out what torque spec that it was set at. Then they set all the other head bolts to that same spec. Wouldn't that be better??

Whats the current consensus on this?


cucvrus

Well-known member
11,474
10,437
113
Location
Jonestown Pennsylvania
Because they are torque to yield bolts and that way they are evenly tightened and evenly sealing and compressing the head gasket. Also you must follow the correct torque sequence.
 

cucvrus

Well-known member
11,474
10,437
113
Location
Jonestown Pennsylvania
I thought there were 3 Ftlb torques and then the 1/4 turn. I did hundreds of 6.2 heads and it is easy to do the 1/4 turn. Much easier if the engine is out of the vehicle. But still doable in the engine room. And make sure you replace the head bolts. Do NOT use them over. You will be wasting your time on the whole job reusing the head bolts. Good Luck.
 

Commander5993

Active member
Steel Soldiers Supporter
Because they are torque to yield bolts and that way they are evenly tightened and evenly sealing and compressing the head gasket. Also you must follow the correct torque sequence.
But how are they evenly tightened if they are not the same torque spec?

I thought there were 3 Ftlb torques and then the 1/4 turn. I did hundreds of 6.2 heads and it is easy to do the 1/4 turn. Much easier if the engine is out of the vehicle. But still doable in the engine room. And make sure you replace the head bolts. Do NOT use them over. You will be wasting your time on the whole job reusing the head bolts. Good Luck.
3ft lbs?

Yeah I know you can't reuse tty head bolts. I have two sets of all new fel-pro head bolts.
Getting ready to install the heads today, which is why I'm pondering the torque specs.
 

cucvrus

Well-known member
11,474
10,437
113
Location
Jonestown Pennsylvania
They are all tightened in the correct sequence and they are evenly torqued as you progress with the torqueing. At the first torque you are evenly seating the head and gasket and then the second you are evenly seating again. The third torque and the 1/4 turn are the final tightening and sealing/seating sequence. I didn't design any of this. I just follow instructions. I think the sequence and instructions are also in the Fel-pro head bolts box. That is what I always use. Just go at it follow the instructions and you will be golden. I am assuming the heads have been checked and gone over. Good Luck.
 

cucvrus

Well-known member
11,474
10,437
113
Location
Jonestown Pennsylvania
Sorry to hear that. I know the heads never got any heavier but as I got older they sure felt like it. And under the hood. I don't do that alone anymore. Sorry for your misfortune. Good Luck. Get a helper or cut the head off of 2 old head bolts and finger tighten them as alignment rods. just a thought.
 

Commander5993

Active member
Steel Soldiers Supporter
Sorry to hear that. I know the heads never got any heavier but as I got older they sure felt like it. And under the hood. I don't do that alone anymore. Sorry for your misfortune. Good Luck. Get a helper or cut the head off of 2 old head bolts and finger tighten them as alignment rods. just a thought.
Yeah, oreily is supposed to have me another gasket in the morning, at least better than 3 days from amazon. Just a 60 mile round trip...

I was using one old bolt with the head cut off and slot cut in it, as an "alignment guide pin". I had two of them, but I could only use one in the front of the block, as if I put another in the center or further back, I could not get the head down low enough before it touched the pin, to go under the "flange" or whatever you want to call where the two sections of the firewall comes together right there at the corner of the block on the drivers side.

I was using a rope hoist to lower it down, as I didn't' trust myself trying to hold the weight and get it correctly aligned it in the tight space without tearing up the gasket... so much for that working out :roll:
But the real reason it happened was because I had already attached the exhaust manifold (as I pulled the head with the manifold still attached when disassembling), and the stud at the exit of the manifold is what caught the gasket.

In any case, I went ahead and used my other gasket to re-try the driver side head, afterI removed the exhaust manifold. I got it on there... but good grief...

I have to ask, were there CUCV's (M1008 specifically) that did *Not* come with the 6.2L engine? In other words, some other kind of engine?
Because at this point, I honestly don't believe that this was the original type engine for this truck. As it just fits so tight its ridiculous, I don't even know if I can get the exhaust manifold on after the head is installed. as there is so little room between the manifold and the truck frame... I don't know if I can get the bolts in. Guess I'll find out tomorrow.

Further, according to TM 9-2815-237-34 pg 2-13 (page 31 of the pdf file) these exhaust manifolds are for the "turbo" model... and this sadly is not a turbo engine.

Also, on the drivers side head to get the very last head bolt in, which was the one closest to the firewall, in the bottom corner of the head above the exhaust port. After covering the head and block with a heavy leather welding apron, I had to use a cheap chinese plasma cutter to remove about 2 1/2" of the "flange" part of the firewall. As without doing this, there was no way to get the head bolt into the head. As the bolt hit the firewall before it would align to drop into the bolt hole in the head.

When I had removed the head during disassembly, I had to leave the original bolt unscrewed but sitting in the head as I could not get it out due to it hitting the firewall. Which made it a pain to get the head lifted out as the bolt kept catching on the block. I had intended to drop the new head bolt into that bolt hole in the new head before I installed it, but forgot... And I was not about to remove all the bolts (even though they are only hand tight) and pull the head again.... besides risking another head gasket getting messed up.

I haven't seen anybody else complaining about this, so I'm guessing this is unique to this truck. Which again makes me think that the 6.2L was not what was originally in this truck.
Now if you had pulled the engine, done all the work, then dropped it back in the truck, then this wouldn't have been an issue. So apparently that is how it was last done. However I know a lot of guys here on SS has pulled the heads and reinstalled them without removing the block, and I haven't seen anyone complaining about how the firewall was designed in 3 parts, and how the "flange" projects out right near the corner of the drivers side head.

You heard anything like this before?
 

cucvrus

Well-known member
11,474
10,437
113
Location
Jonestown Pennsylvania
Have you looked closely at your motor mounts? Description your giving sounds like the motor mounts are sunken and worn out. Changing heads is Not my favorite thing to do under the hood. But I never had to cut away at the cab. Report back your findings. How close is the dipstick tube stud to the frame? any tell tale signs of the stud chattering against the frame in that area?
 

richingalveston

Well-known member
1,715
120
63
Location
galveston/Texas
it is pretty easy to get the inner fenders out. With jack stands and front tires off and inner fender out (battery's and trays have to be removed) you can stand next to the motor.
outer fender comes off easy also but not necessary. On drivers side the brake lines and booster are in your way some but it is better than breaking your back bending over the fenders.

If you have a bunch of rust then you may not want to go this route but if the inner fenders are in good shape it is only a few bolts.

also check motor mounts and jack the back of the tranny up.

good luck

Rich
 

Commander5993

Active member
Steel Soldiers Supporter
Have you looked closely at your motor mounts? Description your giving sounds like the motor mounts are sunken and worn out. Changing heads is Not my favorite thing to do under the hood. But I never had to cut away at the cab. Report back your findings. How close is the dipstick tube stud to the frame? any tell tale signs of the stud chattering against the frame in that area?
:doh: I can't believe I didn't even think about the motor mounts... That could definitely be the issue. Thank You for pointing that out Cucvrus.
As far as noise, no hadn't heard any knocking chattering or anything that you would expect with bad mounts.
I also had not seen any "extra" movement in the engine when the motor was revved a bit or something. But I don't have a habit of revving the engine when under the hood.

Can't tell you how close the dipstick tube is to the frame at the moment, as I don't have it on, even if I did, I don't have the exhaust manifold on either, which the dipstick bolts onto the manifold stud.

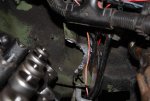
I did take a couple photos just now, and am attaching them below.

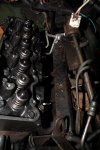
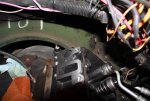
One is showing where I cut out a half circle in the "flange" of the firewall.
firewall 2.jpg


The other shows the head and how close it is to the frame
head-frame.jpg


and then the back showing how close the head is the firewall.
head firewall.jpg


Probably can't tell much from them though.


I will check the motor mounts tomorrow afternoon or so, whenever I get back from oreilies to pick up the head gasket. Since I'm going to the town there, probably make a few other stops.

At this point, I will probably go ahead and change the mounts. As it just about has to be what is causing the issues.

Are there any "upgraded" mounts for these trucks?
I used to always replace the stock mounts with the Polyurethane mounts on other vehicles I've had. Seem to work well.
 

Commander5993

Active member
Steel Soldiers Supporter
it is pretty easy to get the inner fenders out. With jack stands and front tires off and inner fender out (battery's and trays have to be removed) you can stand next to the motor.
outer fender comes off easy also but not necessary. On drivers side the brake lines and booster are in your way some but it is better than breaking your back bending over the fenders.

If you have a bunch of rust then you may not want to go this route but if the inner fenders are in good shape it is only a few bolts.

also check motor mounts and jack the back of the tranny up.

good luck

Rich

I might just take your suggestion Rich, that would be better than trying to bend over the fenders.
We did get the driver side head sit in place, so I may not do that side. And yes the booster is a pain to work around, but I really didn't want to take all that off.

Will be checking all mounts sometime tomorrow, probably just going to replace them all even if they dont "seem" to need it.
 

cucvrus

Well-known member
11,474
10,437
113
Location
Jonestown Pennsylvania
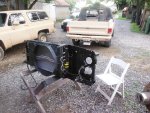
As I grew older I grew smarter in some aspects. I now remove the engine to do any type of major work. I consider head gaskets major work. it is so easy to remove the engine and change out all the seals and gaskets while you are in there. I still change rear main seals in the truck but heads and head gaskets the engine comes out. I mean if you are going to take the inner fender aprons out. It would take less time to remove the engine. I can have an engine out of a CUCV in about 3 hours. As long as the engine is not HOT. Then even then it just takes a little longer to work carefully. But If the engine is out the motor mounts can be changed and even with no motor stand everything is right in front of you. I sit on a folding chair and work on the engines with a table next to me for tools and refreshments. Try that under the hood. I changed my share of heads under the hood. No More. It opens up so many opportunities to clean and repair and only cost $100. for all the seals/gaskets and a little or same amount of time. Good Luck.
 

Commander5993

Active member
Steel Soldiers Supporter
As I grew older I grew smarter in some aspects. I now remove the engine to do any type of major work. I consider head gaskets major work. it is so easy to remove the engine and change out all the seals and gaskets while you are in there. I still change rear main seals in the truck but heads and head gaskets the engine comes out. I mean if you are going to take the inner fender aprons out. It would take less time to remove the engine. I can have an engine out of a CUCV in about 3 hours. As long as the engine is not HOT. Then even then it just takes a little longer to work carefully. But If the engine is out the motor mounts can be changed and even with no motor stand everything is right in front of you. I sit on a folding chair and work on the engines with a table next to me for tools and refreshments. Try that under the hood. I changed my share of heads under the hood. No More. It opens up so many opportunities to clean and repair and only cost $100. for all the seals/gaskets and a little or same amount of time. Good Luck.
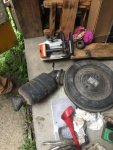
Yeah, at this point, I wish I had just went ahead and pulled the engine.
If I had a cherry picker I probably would have pulled it, but I could still have done it with a come-along and then rolled the truck out from underneath it back outside.
Oh well now...
 

cucvrus

Well-known member
11,474
10,437
113
Location
Jonestown Pennsylvania
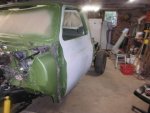
DSCF3413.jpg20403648_1390146244354771_1834782401_nsilencer.jpgDSCF3415.jpgI understand. I just discovered that it makes it so much easier to sit on my folding chair and work on the engine while it is on the floor. Not that I am lazy. I just like the comfort and find it easier to do the job 100%. I have the white folding wedding chair that I take everywhere. The wooden folding stool that I keep in Terminus M1009 with the white folding chair. And in the shop the leather covered office chair bottom on wheels. Like I said NOT lazy just trying to make it easier on the old body. I sat and reassembled the core support and also the door hinges and door adjustment. With the engine out and the heads off. I lay a piece of 3/4" plywood down and flip the engine upside down. Remove the oil pan and change the rear main seal. Stand the engine on its rear and change the timing cover gaskets and front main seal. Put a new water pump on and then lay it upside down and install the oil pan with all new gasket and seals. Punch out the freeze/expansion plugs if you wish and change them right there. Clean the starter holes painted everything and reassemble with the exhaust manifolds and intake and reinstall. Something to think about. I have a Northern hydraulics crane for about 30 years. It is a storage pain but I just take it apart and stow it in an area seldom visited. It is out on loan at this time. I wish I could loan my cab cart out to more people. That is a real joy to use and makes life much easier then working on the cab attached to the frame. Good Luck. Keep up posted. I did post the part numbers for the Energy Suspension motor mount insets. They are posted on my Easter Find M1008 thread.
 
Top
AdBlock Detected

We get it, advertisements are annoying!

Sure, ad-blocking software does a great job at blocking ads, but it also blocks useful features of our website like our supporting vendors. Their ads help keep Steel Soldiers going. Please consider disabling your ad blockers for the site. Thanks!

I've Disabled AdBlock
No Thanks