• Steel Soldiers now has a few new forums, read more about it at: New Munitions Forums!

  • Microsoft MSN, Live, Hotmail, Outlook email users may not be receiving emails. We are working to resolve this issue. Please add support@steelsoldiers.com to your trusted contacts.

CUCVRUS Repair Projects

Keith_J

Well-known member
3,657
1,323
113
Location
Schertz TX
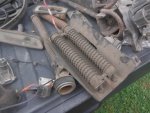
Things are really hot and dry here. I saw a groundhog sneaking around and drinking water out of the chicken feeder and then it was eating the scratch grain. It was 94* in the barn semi-shaded. View attachment 873961 View attachment 873962 I worked on my Honda tractor. This is a well-built machine that has served me well for the past 30 years. Water cooled 2-cylinder OHC and sounds like a car when running. View attachment 873963The deck was stuffed and packed with grass and the blades need sharpened. I keep an extra set-in stock at all times. View attachment 873964 Not bad for an old tractor. View attachment 873965 I was going to punish myself and run to Lowes for some wood in the M1028 but changed my mind quickly when I remembered no A/C. I drove the Trail Boss. Take Care and Be Safe.
I've repaired a few of them. Far better than the MTD models in design. AYP are a bit better than MTD.
 

jplace1011

Well-known member
462
489
63
Location
Santa Ana, CA
I've repaired a few of them. Far better than the MTD models in design. AYP are a bit better than MTD.
@cucvrus

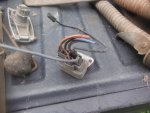
Rick I replaced the Wiper Blade Motor and Cleaned and Lubbed all the moving parts that are under the arms. I also cleaned up the Plugs that go into the Motor.

Before and After Photos:


The Nut that goes onto the Motor that attaches the Arm piece to the Back of the motor doesn’t go down a very far. I’m assuming that’s because of the gap needed for the Arm Piece to fit. Not sure if that matters? I tightened it as much as I could as well.


Something still isn’t right. Is it maybe the Switch inside attached to the Steering Wheel? Or something else??


Sent from my iPhone using Tapatalk
 

cucvrus

Well-known member
11,474
10,441
113
Location
Jonestown Pennsylvania
This may be a simple as the windshield is not wet and the wipers are squeegeed fast to the smooth wiper plane area of the windshield. Add some water to the glass with a hose and try that. Have someone spray the hose on the glass and you sit inside and run the wipers. Laugh. But give it a try. Wipers aren't designed to run on dry glass. And these older vehicles don't have the most powerful wiper motors like newer vehicles. Try it before you call me wrong. Good Luck.
 

ssdvc

Well-known member
971
639
93
Location
CT
jplace1011, I have redone my wiper system, including a new motor, adding another ground, new arms, blades etc. My wipers move at the same speed as yours in that video (and they did the same thing on my other 1009 too). I think, like Rick said, the motor just isn't the most powerful in Chevy's lineup. Like the blower motor for the heater (not really all that powerful), I wish there was an upgrade.
 

jplace1011

Well-known member
462
489
63
Location
Santa Ana, CA
jplace1011, I have redone my wiper system, including a new motor, adding another ground, new arms, blades etc. My wipers move at the same speed as yours in that video (and they did the same thing on my other 1009 too). I think, like Rick said, the motor just isn't the most powerful in Chevy's lineup. Like the blower motor for the heater (not really all that powerful), I wish there was an upgrade.
I took another look at the Ground Location notes. I thought this was interesting, Remove the Suppressor. I’ll try it out, why not.

Once my wife gets home I’ll also try turning them on with the hose hitting the windshield.

I’ll report back.


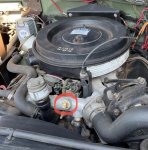
I’m assuming this is that Suppressor Plug.


Sent from my iPhone using Tapatalk
 

cucvrus

Well-known member
11,474
10,441
113
Location
Jonestown Pennsylvania
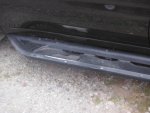
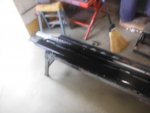
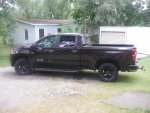
I was out sanding parts for my current build and the trim parts for my next build. I was tired of hand sanding parts and wanted to address the step bars on my Trail Boss. These are Genuine GM stainless steel steps. After 3 years and 8 months they are worn thru. I wouldn't mind but it reflects onto the door and has me doing a double take when I look at it. I removed the cover step and sanded it and painted it with some Krylon Fusion paint. Probably won't be a permanent fix but it will last until I need to spray it again. I am 1 year away from ordering a new truck, so I am happy with the use I got out of it. I was going to put adhesive non-skid on but that get dirty and never comes clean. Line X was another option. I think this will work fine. Not the best idea on GM's part. Oh Well. DSCF8780.JPG DSCF8781.JPG It still looks good after I washed it. You can fix a lot of stuff and keep things nice if you stay proactive on everything. Have a Great Week. DSCF8782.JPG
 

cucvrus

Well-known member
11,474
10,441
113
Location
Jonestown Pennsylvania
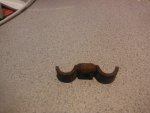
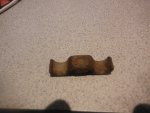
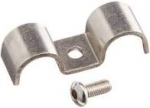
Today after work I went out for lunch right outside Indiantown Gap on the main road leading into the gap. The street name is Fisher Avenue. They are in the process of closing Indiantown Gap to public access. I rode the motorcycle over to the area that the main gate is being constructed and stopped at the heliport to look at the helicopters and the armor they have on display. I was walking in a stone lot and looked down on the ground and seen a familiar CUCV part. Anyone know what it is? I am going to attempt to restore it and hopefully put it back to use. Anyone know what it is and does anyone need one of these. I have in the past and made some, but this is an OEM one. I am going to see if the bolt is broken in the nut, or it is just packed with dirt. Have a Great Day. I am going out to work on my many projects. I have a return customer with one of my designs I built 7 years ago. Still ticking. Take Care. My find.
DSCF8787.JPG
DSCF8788.JPG
 

cucvrus

Well-known member
11,474
10,441
113
Location
Jonestown Pennsylvania
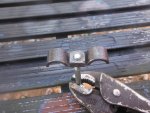
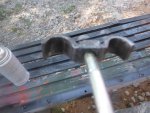
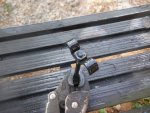
As dumb as it may sound, I was destined to save this hard-to-find part. DSCF8789.JPG I wire brushed it all over and tapped the 1/4 X 20 captured nut out. I oiled the threads and washed the part. DSCF8790.JPG I attached a bolt to it and clamped it in place for a few coats of paint.
DSCF8791.JPG
To me it was worth saving. I feel honored to have found it along the road and knowing it came from a CUCV is more the honor. Saving it from further degradation was worth the effort.
 

cucvrus

Well-known member
11,474
10,441
113
Location
Jonestown Pennsylvania
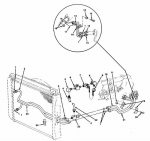
1661027868719.png1661027907541.png It holds the aluminum oil cooler lines to the fan shroud as it passes from the left side of the engine to the right side of the radiator. I made a few in the past. They are a part many just toss away same as the rear oil cooler line brackets. Many missing. The one I found and am showing is number 24 in front of the radiator for the diagram only. It goes on the plastic shroud to hold the lines in place. Loose rattling aluminum oil cooler lines is trouble waiting to happen.
 

cucvrus

Well-known member
11,474
10,441
113
Location
Jonestown Pennsylvania
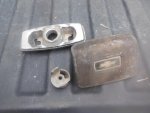
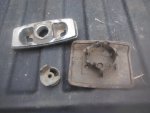
I believe that is a HMMWV coolant crossover manifold. I have brand new ones in the plastic. Do you like that? It does the same thing as the CUCV. It is far from the position to put a temperature gauge sending unit. Head temperature is the place you want to tap for an accurate reading of engine temperature. I was out checking my bonus buy box. The guy that had these parts had 2 CUCV's. I said HAD. They no longer exist. They may be a new KIA or Hyundai now but CUCV no more. He had an M1009 with a 6" lift. Rolled it and scrapped it. he also had an M1028 and he ruined the 6.2 and put a 454-gas engine in it. It backfired thru the carburetor and burnt to the ground in the parking lot of a truck stop off I78. He said he hates Chevys and only bought the CUCV's because he wanted a beater. My favorite parts. A complete starter relay pigtail for repairing a hack job. DSCF8812.JPG A nice set of resistors to add to my overflowing collection of resistors. DSCF8813.JPG A scrap M1009 rear window clutch and window crank bezel. And an OEM horn button with all the tabs in place. 2 old school fuel can nozzles. I liked the deal, and he was happy that he didn't have to load it all back up again.
 

Attachments

dougco1

Well-known member
Steel Soldiers Supporter
869
649
93
Location
Cooperstown NY
As dumb as it may sound, I was destined to save this hard-to-find part. View attachment 876675 I wire brushed it all over and tapped the 1/4 X 20 captured nut out. I oiled the threads and washed the part. View attachment 876676 I attached a bolt to it and clamped it in place for a few coats of paint.
View attachment 876677
To me it was worth saving. I feel honored to have found it along the road and knowing it came from a CUCV is more the honor. Saving it from further degradation was worth the effort.
Rick,
That is considered US property and you should do the right thing and return it.
 
Top
AdBlock Detected

We get it, advertisements are annoying!

Sure, ad-blocking software does a great job at blocking ads, but it also blocks useful features of our website like our supporting vendors. Their ads help keep Steel Soldiers going. Please consider disabling your ad blockers for the site. Thanks!

I've Disabled AdBlock
No Thanks