• Steel Soldiers now has a few new forums, read more about it at: New Munitions Forums!

  • Microsoft MSN, Live, Hotmail, Outlook email users may not be receiving emails. We are working to resolve this issue. Please add support@steelsoldiers.com to your trusted contacts.

HanksDeuce: 8" Lift, Bobbed, External Cage, A/C and more Project!

HanksDeuce

Well-known member
1,082
246
63
Location
Prairieville, LA
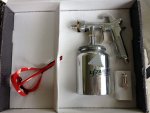
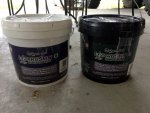
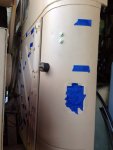
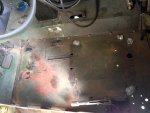
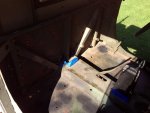
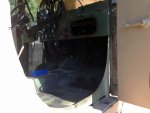
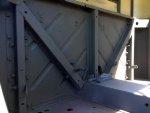
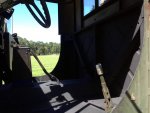
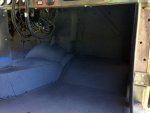
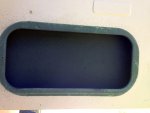
Here are a few pictures of the preparation and completion of the 2 Lizard Skin coating systems inside the cab. This was completed before the Vintage Air A/C was finished. I will upload all of the final A/C pictures tomorrow.

Comments:
- Lizard Skin Sound Control was put down first. Then 24 hour cure.
- Lizard Skin Ceramic Insulation was put down next. Then 24 hour cure.
- Air pressure was regulated at the gun to 60psi when the trigger was pulled.
- Make sure you adjust the gun tip to a wide spray pattern. Small circle will take forever to empty the gun pot.
- I did not use the 90 degree tip. That's mainly for inside fender wells. I only sprayed the inside of the cab.
 

Attachments

Another Ahab

Well-known member
18,007
4,579
113
Location
Alexandria, VA
Here are a few pictures of the preparation and completion of the 2 Lizard Skin coating systems inside the cab. This was completed before the Vintage Air A/C was finished. I will upload all of the final A/C pictures tomorrow.
I like your photo record; that's good stuff.

Do you put the product down just like it is out of the bucket, or do you have to thin it or anything?
 

HanksDeuce

Well-known member
1,082
246
63
Location
Prairieville, LA
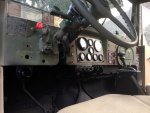
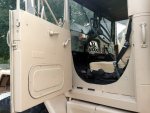
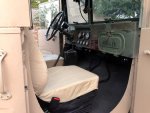
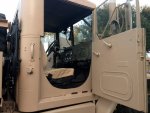
Below are pictures of the completed Vintage Air A/C + heat + defrost install. I also took time to touch-up the tan paint in places where the Lizard Skin 2 coating system overspray landed.

The last thing to do in the cab is to paint the dash. You can see that some of the dash plates were removed already in preparation for paint.

Comments:
-Both air ride seats were lowered so you could see more of the dash.
-Driver side loom contains all 12v/24v wiring to the auxiliary fuse boxes on the back of the cab.
-Passenger side loom contains all grounds to the fuse boxes.
-How about those tan floor vent covers? Nice touch, eh? My buddy told me they would look good like that. Glad I trusted him!
-Drove her tonight to the local mexican restaurant to watch LSU beat Florida. Had to turn the A/C down with this cold front! :D
 

Attachments

HanksDeuce

Well-known member
1,082
246
63
Location
Prairieville, LA
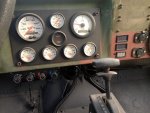
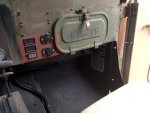
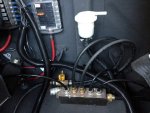
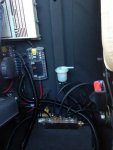
My transfer case started leaking a small puddle wherever I parked. I figured the vent was clogged. Yesterday afternoon before the LSU game I removed the floor plate between the 2 air ride seats. Although the vent wasn't clogged I don't like the design. Not sure what pressure it takes to raise the little pinched cap, but I ain't doing this job again. I replaced the cap with a barbed fitting in the inspection cover, length of transmission hose with 2 hose clamps, and a fuel filter mounted inside the cab on the back wall. I tested the fuel filter by blowing into it. To my amazement I pressurized the transfer case with my own lungs. I removed my mouth and could hear and feel air escaping.

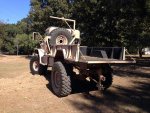
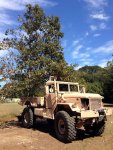
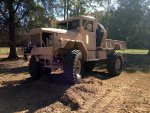
Took a Sunday drive to my mom's house. After some good old home cooking I used the deuce as a ladder to trim the low hanging branches on my mom's gravel road (1000 ft or so long). Took a minute to pose the deuce on a ground down stump. Left the tailgate down to empty the bed on the drive home.

Got home and no more transfer case leaks!

Comments:
-Air distribution manifold (left to right in the photos below = air ride passenger seat, front axle engagement cylinder, air chuck, Autometer air gauge in the dash, air ride driver seat)
 

Attachments

UPFINN

Member
231
4
18
Location
Ishpeming Michigan
Here are a few pictures of the preparation and completion of the 2 Lizard Skin coating systems inside the cab. This was completed before the Vintage Air A/C was finished. I will upload all of the final A/C pictures tomorrow.

Comments:
- Lizard Skin Sound Control was put down first. Then 24 hour cure.
- Lizard Skin Ceramic Insulation was put down next. Then 24 hour cure.
- Air pressure was regulated at the gun to 60psi when the trigger was pulled.
- Make sure you adjust the gun tip to a wide spray pattern. Small circle will take forever to empty the gun pot.
- I did not use the 90 degree tip. That's mainly for inside fender wells. I only sprayed the inside of the cab.
I am currently doing a similar project. Spraying a heat and noise reducer in the cab and top coating with bed liner. How much did the Lizard Skin reduce the sound?
 

HanksDeuce

Well-known member
1,082
246
63
Location
Prairieville, LA
Well, I still have to wear ear plugs. Free iPhone app says max 97 dB while driving with the windows/floor vents closed. My windows need to be adjusted to seal better, and I have a few firewall holes to plug. I can attest to the insulation working really well, but my hopes of ditching ear plugs for driving are dead. I doubt it's the exhaust contributing the most dB either. This Cummins engine is loud. The Allison AT545 doesn't help either! :shock:
 

UPFINN

Member
231
4
18
Location
Ishpeming Michigan
Well, I still have to wear ear plugs. Free iPhone app says max 97 dB while driving with the windows/floor vents closed. My windows need to be adjusted to seal better, and I have a few firewall holes to plug. I can attest to the insulation working really well, but my hopes of ditching ear plugs for driving are dead. I doubt it's the exhaust contributing the most dB either. This Cummins engine is loud. The Allison AT545 doesn't help either! :shock:
It looks like all together you put 4 gallons in the cab?

I have 1 gallon in the cab of the sound insulation, and 1 gallon of bed liner to go on top. On my truck I also sprayed the underside of the hood and engine bay sheet metal. I am hoping that will help. I have yet to drive it.
 

HanksDeuce

Well-known member
1,082
246
63
Location
Prairieville, LA
I didn't use all of the sound deadener (maybe a little over a gallon). I did take time to shoot every single bit of the ceramic insulation 2 gallon bucket.
 

robson1015

Active member
515
133
43
Location
New Concord, Ohio
Hank - That is one Bad-ass rig !! Excellent work and fabrications. Now all you need is a top shelf music system to listen to instead of the diesel. Great job all around, thanx for sharing - I really enjoyed this thread.
 

Another Ahab

Well-known member
18,007
4,579
113
Location
Alexandria, VA
Below are pictures of the completed Vintage Air A/C + heat + defrost install.
-How about those tan floor vent covers? Nice touch, eh? My buddy told me they would look good like that. Glad I trusted him!/QUOTE]

Brother, I'm telling you, for sure, that the whole ENTIRE rig is a "Nice Touch".

I mean you really set the bar high with your project here, HanksDeuce. She's a Beauty. :driver:
 

HanksDeuce

Well-known member
1,082
246
63
Location
Prairieville, LA
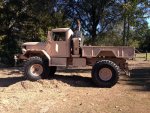
I'm typically grinning ear to ear the entire time I am behind the wheel of my bobbed deuce because she's so fun to drive. Well, today I grinned just a little more...

As I was driving to work this morning I rolled over the 1,000 mile mark on the odometer of my Autometer GPS speedometer since the Cummins 12 valve + Allison AT545 swap. The only repair I've had to complete so far was replacement of the electric Horton fan clutch on 07/19/15. The only true consumable so far has been the diesel sucked out of the fuel tank and burned in the engine. No oil change yet. Tranny fluid & coolant are good to go for a while.

I look forward to many more thousands of miles and grins to go along with more seat time. Now that I have air conditioning and heat maybe more people can enjoy my deuce alongside me? :naner:
 

HanksDeuce

Well-known member
1,082
246
63
Location
Prairieville, LA
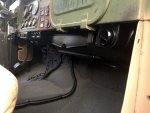
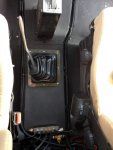
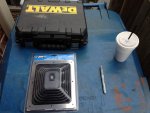
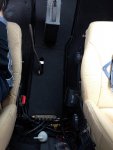
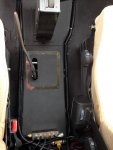
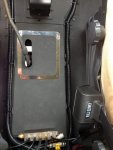
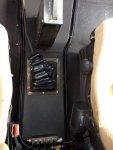
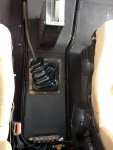
I got tired of feeling hot air rushing past my right side sometimes as I drove down the highway with the air conditioning running in my deuce. A brief search of the interwebz led me to BunkerofDoom.com where fellow Steel Soldier moderator OPCOM provided pics and a part number for a Mr. Gasket shifter boot kit. No real fabbing details here because it's a no brainer. I didn't have to read a TM or nuthin'. Don't forget the sweet tea during assembly!

Comments:
- Mr. Gasket Shifter Boot (O'Reilly's part #9649) was $25
- No sealer required
- Totally eliminated hot air gusts from the floor
- OPCOM's last forum activity was January 2015?
 

Attachments

Top
AdBlock Detected

We get it, advertisements are annoying!

Sure, ad-blocking software does a great job at blocking ads, but it also blocks useful features of our website like our supporting vendors. Their ads help keep Steel Soldiers going. Please consider disabling your ad blockers for the site. Thanks!

I've Disabled AdBlock
No Thanks