• Steel Soldiers now has a few new forums, read more about it at: New Munitions Forums!

  • Microsoft MSN, Live, Hotmail, Outlook email users may not be receiving emails. We are working to resolve this issue. Please add support@steelsoldiers.com to your trusted contacts.

HanksDeuce: 8" Lift, Bobbed, External Cage, A/C and more Project!

HanksDeuce

Well-known member
1,081
242
63
Location
Prairieville, LA
Here's a quick (vertical!) video where I'm checking the gear mesh alignment before tightening down the side adjusting nuts. I didn't change any of the gears so I just slowly turned each side adjustment nut until the differential assembly was centered on the wear marks of the bottom (bevel) gear.

https://youtu.be/ez2gEjkMKBI
 

HanksDeuce

Well-known member
1,081
242
63
Location
Prairieville, LA
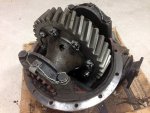
Finished the rear locker install today! Manhandled the rear differential into the axle housing with a new gasket and some Permatex 81182 (Gear Oil RTV Gasket Maker) lightly smeared on both sides of the new gasket. Oddly enough Section 10-3 of TM 9-2320-361-34 (page 10-5) doesn't mention a torque value for the differential housing nuts. It just says to "alternately tighten nuts". I guess you have to infer it from the typical bolt torque chart. By my interpretation I went with 41 ft-lbs for a Grade 5 "lubricated" fine thread nut (7/16-20). Handy chart [here].

My website will be updated soon with a full write-up on the rear locker install.

Also, check out my thread on Steel Soldiers for installing the rear locker step-by-step in case you are crazy enough to tackle this for your M35A2.
http://www.steelsoldiers.com/showth...ling-an-Ouverson-Locker-in-your-Rockwell-Axle

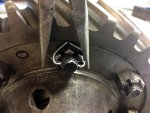
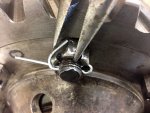
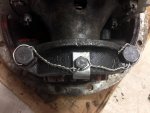
I decided against safety wire on the ring gear nuts due to internal clearance issues with the differential housing. Any place that I tried to tuck the twisted end of the safety wire scraped on the inside of the housing. Cotter pins installed properly should provide just as much protection.


Notes on final pictures:
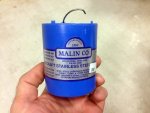
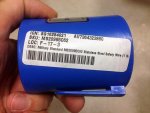
- 0.062" Safety wire is from SkyGeek (added to materials list)
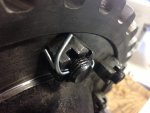
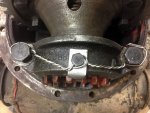
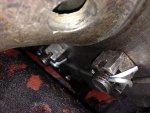
- Researched internet for "safety wire", "lock wire" on proper methods. Decided on "Example 1" of the attached safety wire examples for the bearing cap bolts.
- Bearing cap and lock tab are a 3-bolt setup for safety wire. See small picture for typical wiring method.
- Cotter pins are MUCH easier to install on ring gear nuts than safety wire.
- Almost any way I tried to safety wire the ring gear nuts still left some slack which was inadequate.
 

Attachments

HanksDeuce

Well-known member
1,081
242
63
Location
Prairieville, LA
How'd you pick the .062" wire size?
I measured the original safety wire that came out of the rear differential assembly (bearing caps and ring gear nuts), and it came out to be 0.062".

Here's a cross reference from the TM for bathroom reading where I verified the wire I purchased as sufficient.
1. Open TM TM9-2320-361-34 and flip to Section 10-6 (page 224 of 766). The last entry under "Materials/Parts" is Safety wire. It sends you to (Appendix C, Item 30).
2. Turn to Appendix C-5 (page 719 of 766). Item 30 is listed as NSN 9505-00-198-912, "WIRE, NON-ELECTRICAL: (80244) 22-W-1642-125, 1 Pound".
3. Search Google for NSN 9505-00-198-912 comes up with this page: http://www.wwww.nsn-now.com/Indexing/ViewDetail.aspx?QString=9505001989125.
4. The page in Step 3 above lists the wire as 0.063" nominal, annealed steel. The wire I bought was the closest I could find to it.
 
Last edited:

rustystud

Well-known member
9,266
2,962
113
Location
Woodinville, Washington
Finished the rear locker install today! Manhandled the rear differential into the axle housing with a new gasket and some Permatex 81182 (Gear Oil RTV Gasket Maker) lightly smeared on both sides of the new gasket. Oddly enough Section 10-3 of TM 9-2320-361-34 (page 10-5) doesn't mention a torque value for the differential housing nuts. It just says to "alternately tighten nuts". I guess you have to infer it from the typical bolt torque chart. By my interpretation I went with 41 ft-lbs for a Grade 5 "lubricated" fine thread nut (7/16-20). Handy chart [here].

My website will be updated soon with a full write-up on the rear locker install.

Also, check out my thread on Steel Soldiers for installing the rear locker step-by-step in case you are crazy enough to tackle this for your M35A2.
http://www.steelsoldiers.com/showth...ling-an-Ouverson-Locker-in-your-Rockwell-Axle

I decided against safety wire on the ring gear nuts due to internal clearance issues with the differential housing. Any place that I tried to tuck the twisted end of the safety wire scraped on the inside of the housing. Cotter pins installed properly should provide just as much protection.


Notes on final pictures:
- 0.062" Safety wire is from SkyGeek (added to materials list)
- Researched internet for "safety wire", "lock wire" on proper methods. Decided on "Example 1" of the attached safety wire examples for the bearing cap bolts.
- Bearing cap and lock tab are a 3-bolt setup for safety wire. See small picture for typical wiring method.
- Cotter pins are MUCH easier to install on ring gear nuts than safety wire.
- Almost any way I tried to safety wire the ring gear nuts still left some slack which was inadequate.
Cotter pins work fine just more expensive then wire. That's the only reason the manufactures went with wire. I have rebuilt many differentials just using cotter pins until the boss said I was wasting money.
 

Another Ahab

Well-known member
17,995
4,547
113
Location
Alexandria, VA
Cotter pins work fine just more expensive then wire. That's the only reason the manufactures went with wire. I have rebuilt many differentials just using cotter pins until the boss said I was wasting money.
I get it that they cost more, but it's a stretch to say "more expensive" isn't it; I mean it's like pennies in difference (+/-), right?
 

Another Ahab

Well-known member
17,995
4,547
113
Location
Alexandria, VA
Here's a cross reference from the TM for bathroom reading where I verified the wire I purchased as sufficient.
1. Open TM TM9-2320-361-34 and flip to Section 10-6 (page 224 of 766). The last entry under "Materials/Parts" is Safety wire. It sends you to (Appendix C, Item 30).
2. Turn to Appendix C-5 (page 719 of 766). Item 30 is listed as NSN 9505-00-198-912, "WIRE, NON-ELECTRICAL: (80244) 22-W-1642-125, 1 Pound".
3. Search Google for NSN 9505-00-198-912 comes up with this page:
4. The page in Step 3 above lists the wire as 0.063" nominal, annealed steel. The wire I bought was the closest I could find to it.
Impressive, HanksDeuce!
Brother, you sure do all your homework, and spelling it out here to help out, too. [thumbzup]:driver:
 
Last edited:

rustystud

Well-known member
9,266
2,962
113
Location
Woodinville, Washington
I get it that they cost more, but it's a stretch to say "more expensive" isn't it; I mean it's like pennies in difference (+/-), right?
Good quality cotter pins are around $0.25 ea. while a spool of safety wire can be 50ft long and cost $10.00 . So for every differential you rebuild you just added $3.00 or more to the cost of a rebuild compared to a $0.01 . After a few hundred rebuilds you cost the company $300.00 to $600.00 more. I know as I got the lecture !
 

HanksDeuce

Well-known member
1,081
242
63
Location
Prairieville, LA
So I finally got my bobbed deuce back on the road tonight after repairs from the great flood and the Ouverson rear locker install. She's been down since August 16th. Wow! Work has been the biggest reason for procrastination. The end-of-year push started in early September, and it's still going strong. I guess it's good to be busy instead of the alternative.

Weird, though, I can't really feel the locker at all (which I think is a good thing). I thought this thing would pop and shift like an angry bear back there, but I may have felt one slight shift in 40 miles of city driving. Heck, the shift could have been a leaf spring? Since the tires are still muddy from the rescue operations I might find a place to test rear traction a bit. No deep water for a while. If I was in charge of a motor pool that would be a different story. :D

I tried changing my driving habits based on research into the "detroit" style lockers. No accelerating in turns. If I'm at a redlight making a turn I just keep the throttle steady through the turn. Once I get into a straight I floor it.

Does anybody have any other tips on driving with a "detroit" style rear locker?
 

HanksDeuce

Well-known member
1,081
242
63
Location
Prairieville, LA
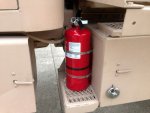
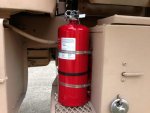
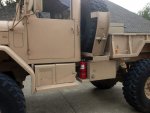
I finally added a 10 pound fire extinguisher to my bobber. The most appropriate place I found was underneath the spare tire rack on a deck plate next to the side toolbox. Drilled (4) holes in the side toolbox and a few minutes later voila!

Notes:
- The pictures don't show it, but the (2) easy release clamps are on the deuce frame side of the extinguisher.
- Pull the (2) easy release clamps from behind and the extinguisher comes off in 3-5 seconds.
- I mounted it this way so that the average person thinks they can't steal my extinguisher in a few seconds.
- I don't need to cover the extinguisher from the elements because my bobber spends 99% of its life in my shop now.
- I picked up this extinguisher from Lowe's for $69.95.
 

Attachments

red

Active member
1,988
25
38
Location
Eagle Mountain/Utah
Weird, though, I can't really feel the locker at all (which I think is a good thing). I thought this thing would pop and shift like an angry bear back there, but I may have felt one slight shift in 40 miles of city driving. Heck, the shift could have been a leaf spring? Since the tires are still muddy from the rescue operations I might find a place to test rear traction a bit. No deep water for a while. If I was in charge of a motor pool that would be a different story. :D

I tried changing my driving habits based on research into the "detroit" style lockers. No accelerating in turns. If I'm at a redlight making a turn I just keep the throttle steady through the turn. Once I get into a straight I floor it.

Does anybody have any other tips on driving with a "detroit" style rear locker?
The longer the vehicle wheelbase the less the locker quirks are noticeable. The less weight over the rear axle makes a difference as well. My old 79 k5 blazer had a locker in the rear and when unloaded there was no quirks to deal with. Hooked up a car hauler trailer behind it which put more weight on the rear axle and it was certainly noticeable.

Just take your foot off the throttle or be easy on it when turning, nothing else to really adjust.
 

rustystud

Well-known member
9,266
2,962
113
Location
Woodinville, Washington
The longer the vehicle wheelbase the less the locker quirks are noticeable. The less weight over the rear axle makes a difference as well. My old 79 k5 blazer had a locker in the rear and when unloaded there was no quirks to deal with. Hooked up a car hauler trailer behind it which put more weight on the rear axle and it was certainly noticeable.

Just take your foot off the throttle or be easy on it when turning, nothing else to really adjust.
I would add that when your getting ready to "jump" on it after making your turn, that your truck has gone straight a few feet. This will eliminate the "slack" in your gear train and allow the "locker" to reengage fully. If you don't get the locker to fully reengage before hammering down you can start breaking parts.
 

HanksDeuce

Well-known member
1,081
242
63
Location
Prairieville, LA
Have you ever had that "pucker factor" moment while driving your pride and joy down the interstate when you think something horrible went wrong with the engine? I didn't think that the Cummins 12 valve (6BT) engine had suffered a catastrophic failure, but I noticed something wasn't right with the oil pressure gauge. You see, as I drive my bobbed deuce I check the gauges basically almost every mile. A lot can happen in 5,280 feet while driving at speed. You have to keep your eye on the gauges to make sure things are going well with the engine/batteries, especially on a highly modified vehicle like this. A stock vehicle not so much. Nothing goes wrong with Hondas, right?

While driving at top speed (56 mph) down the interstate I glanced down and the oil pressure gauge was no longer reading 75 psig like it should. Instead it started slowly dropping, then steady, then dropping, then bouncing around. Once it started bouncing around I knew the culprit was that the electric sender was going out. One negative to running solid poly engine mounts is that it vibrates a lot more than an engine that has rubber mounts that dampen the vibrations. The bourdon tube used in the electric oil pressure sender is susceptible to those increased vibrations, and after some time the vibrations kill it. Well, after 3400 miles with those solid motor mounts my electric oil pressure gauge sender died. I was only a few miles from home, and no other gauges were showing signs of engine issues.

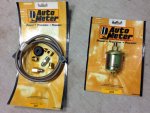
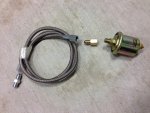
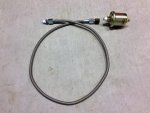
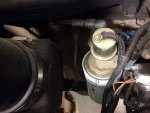
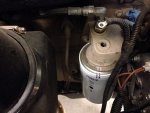
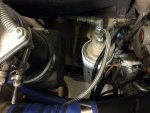
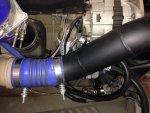
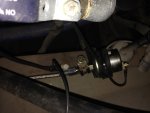
Once at home I ordered the replacement electric oil pressure sender and a hose kit (both by Autometer) over the phone at my local O'Reilly's auto parts. Three days later my parts came in and no shipping charges. Very easy install as you can see in the pictures. Make sure to use teflon tape on the NPT (pipe thread) fittings, but not on the JIC flare end fittings. To increase the life of the replacement electric oil pressure sender I wrapped it in a thick foam and secured it to the deuce frame rail with a cushion clamp and single 3/8" bolt. I connected the same wiring ring terminal, started the deuce, and BAM! 75 psig again.
 

Attachments

clinto

Moderator, wonderful human being & practicing Deuc
Staff member
Administrator
Super Moderator
Steel Soldiers Supporter
Supporting Vendor
12,596
1,131
113
Location
Athens, Ga.
So is your truck still 24V? Is the oil pressure gauge the stock one? Because if an aftermarket sending unit would work with the factory gauge, that would be fantastic, since the Newstar sending units are beyond worthless.
 

HanksDeuce

Well-known member
1,081
242
63
Location
Prairieville, LA
So is your truck still 24V? Is the oil pressure gauge the stock one? Because if an aftermarket sending unit would work with the factory gauge, that would be fantastic, since the Newstar sending units are beyond worthless.
My truck is half 24v and half 12v. I have a 24v alternator and starter, but Vanner equalizer and (2) fuse panels for 12v / 24v accessories. All of my gauges are Autometer 12v with their respective sending units.

Here's a direct post link showing my gauges and the Vanner equalizer that gets me to 12v.
 

HanksDeuce

Well-known member
1,081
242
63
Location
Prairieville, LA
Tack on another $302 of repairs from damage caused by the August 2016 Great Louisiana Flood. I went to crank my deuce last Saturday in my air conditioned garage, but it turned over a few times (1-2 seconds) and ground to a halt. A voltage meter on the batteries checked out within spec. Maybe a dead cell? I didn't have time to troubleshoot, so I took my racecar to lunch instead.

Fast forward to this afternoon. I removed the 24v Starter + Alternator, and I brought them to P&R Electric in Baton Rouge. About 30 seconds on the test bench and Mr. Marshall informed me that the starter was kaput. Turns out the flood water had made it's way into the starter housing, but some of it didn't make it back out. There was a small area with a sludge film build-up, and that probably caused arcing and the death of my starter. No idea why it took 7 months for the sludge to finally kill the starter? It never gave me problems until last Saturday? Weird.

$302 for a new starter. The alternator was fine, and there isn't an upgrade from 70 amps within the same frame size. Basically, I wanted to increase my alternator output to around 100 amps for future widgits. Unfortunately I'm stuck with 70 amps unless I "massage" the intercooler piping on the passenger side of the engine bay.

I got home, put the new starter and old alternator on. Fired right up on the first crank. God I love that sound. Just needs a whistler...
 

plym49

Well-known member
1,164
171
63
Location
TX USA
The alternator was fine, and there isn't an upgrade from 70 amps within the same frame size. Basically, I wanted to increase my alternator output to around 100 amps for future widgits. Unfortunately I'm stuck with 70 amps unless I "massage" the intercooler piping on the passenger side of the engine bay.
70 amps at 24 volts equals 140 amps at 12 volts, so do you still need more? BTW your truck is awesome. :)
 
Top