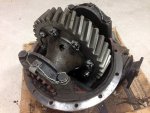
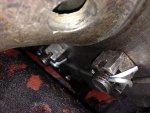
Finished the rear locker install today! Manhandled the rear differential into the axle housing with a new gasket and some Permatex 81182 (Gear Oil RTV Gasket Maker) lightly smeared on both sides of the new gasket. Oddly enough Section 10-3 of TM 9-2320-361-34 (page 10-5) doesn't mention a torque value for the differential housing nuts. It just says to "alternately tighten nuts". I guess you have to infer it from the typical bolt torque chart. By my interpretation I went with 41 ft-lbs for a Grade 5 "lubricated" fine thread nut (7/16-20). Handy chart [
here].
My website will be updated soon with a full write-up on the rear locker install.
Also, check out my thread on Steel Soldiers for installing the rear locker step-by-step in case you are crazy enough to tackle this for your M35A2.
http://www.steelsoldiers.com/showth...ling-an-Ouverson-Locker-in-your-Rockwell-Axle
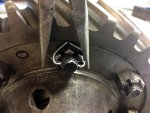
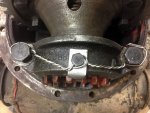
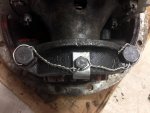
I decided against safety wire on the ring gear nuts due to internal clearance issues with the differential housing. Any place that I tried to tuck the twisted end of the safety wire scraped on the inside of the housing. Cotter pins installed properly should provide just as much protection.
Notes on final pictures:
- 0.062" Safety wire is from SkyGeek (added to materials list)
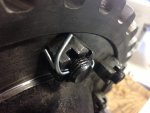
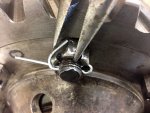
- Researched internet for "safety wire", "lock wire" on proper methods. Decided on "Example 1" of the attached safety wire examples for the bearing cap bolts.
- Bearing cap and lock tab are a 3-bolt setup for safety wire. See small picture for typical wiring method.
- Cotter pins are MUCH easier to install on ring gear nuts than safety wire.
- Almost any way I tried to safety wire the ring gear nuts still left some slack which was inadequate.