• Steel Soldiers now has a few new forums, read more about it at: New Munitions Forums!

  • Microsoft MSN, Live, Hotmail, Outlook email users may not be receiving emails. We are working to resolve this issue. Please add support@steelsoldiers.com to your trusted contacts.

How not to install a Duramax in a M998

Mogman

Moderator
Staff member
Moderator
Steel Soldiers Supporter
7,017
9,694
113
Location
Papalote, TX
Well hopefully this will not be the epitaph for this project, I thought a thread with the progress and possible pitfalls that lay ahead might be interesting to someone, constructive criticism, hints and comments from actual experience will be of course welcome.

Some of this has been told before but thought I would include the preface to this project.
I purchased a 2008 2500HD that had been rolled at least twice, so hard in fact all the motor mounts broke and the engine/trans/transfer went on a "walk about" but fortunately I have not seen any detectable serious damage.
When purchasing a salvage vehicle unless you are able to do a detailed inspection is is pretty much a crap shoot, SO when the donor was rolled off the wrecker and I was able to peel off enough of the body to inspect the engine I was pleasantly surprised at how nice it was and how well it test ran. It was packed with performance additions, Fleece turbo and Fleece CP-3 pump, it was set up for DSP-5 and the engine had been "built" at one time or another so even though it test ran fine the future is somewhat uncertain as with just about any used drive train, I have no intention of building a "hot rod" so the DSP-5 will say in "stock" position, the #5 position is "high idle" which might be useful for winching etc, having the complete vehicle helps insure I have all the "little" stuff like electronic gas pedal etc.
I also picked up a floor shift transfer case so I will not have to use the BCM (body control module) which is what controls the electronic version of the transfer case,

You still have to deal with 2 computers, the ECM (engine control module) and the TCM (transmission control module)

The mechanical part of the installation seems pretty straight forward, the electronic end of it is the daunting task.

There is a multitude of sensors the TCM and ECM need to do there task, THEN one normally has to add to that all the sensors the operator needs to monitor the engine (at least this seems to be the way most are doing it)

While I am not planning on "copying" anyone this crazy dude named "Johnny Magic" was showing off a conversion a friend had done and they modified the dash panel to accept the factory GM instrument cluster, this solves many problems while adding just a few, you have all the basic instruments tach, speedo (which can be "calibrated") etc, the DIC "driver information center" will be available to see any errors that pop up, but requires more work for my sheet metal guy, but this is the basic plan, the wiring harness mods cost around $500 or more and I have not found anyone willing to include the cluster wiring yet, I could add this later if I decide to get a third party to do the basic harness work. The vehicle harness will also have to be fabricated as using the factory harness is pretty much out of the question.

EDIT: turns out the LMM uses the BCM (body control module) to drive the instrument cluster unlike the earlier models so I replaced all the gauges with stepper motor type gauges and also re-wired the entire truck from headlights to tail lights and ended up using the shift on the fly TC with the TCCM.
I should have used the BCM because the LMM has the cruise control in the BCM, also manual shifting, high idle is in the BCM, I used a aftermarket fly by wire cruise control, all this is in the LBZ ECM, they had to make room in the ECM for pollution control on the LMM, next conversion will be a LBZ.

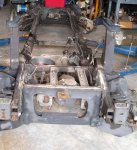
Picked up a really clean M998 with a bad motor that is an excellent donor for this project, I have 12K hubs and axles that will be installed so tomorrow the OEM engine/trans/transfer is being pulled and the project will actually begin.

Another thing that must be dealt with is the ECM/TCM programming, this MUST be done and there are two basic ways to deal with it.
1, have someone else program it, I have seen this running from $350-500 and of course if anything is missed it must be pulled and sent back or an additinal $2-300 for a downloadable programming device so the original programmer can make changes and send them to you.
2, buy your own programmer for $1200 that comes with two ECM and two TCM VIN licenses, since I already have a Duramax tow vehicle and a second M998 that may get converted at some future time this was my choice

So as you can see there is ALREADY allot to think out and do, I will post pictures as I go and name sources of the items I use.
20200531_100143.jpg
 
Last edited:

TOBASH

Father, Surgeon, Cantankerous Grouch
Steel Soldiers Supporter
Supporting Vendor
3,596
3,518
113
Location
Brooklyn, NY
Diesel engines and trannies with computers...Awesome. :/

I hate Cummins conversions but a mechanical Cummins makes more and more sense when you see just how much wiring and reprogramming is needed with a Dumamax/Allison conversion.

Thanks for posting. Really amazing stuff you're doing.

Please keep posting.
 

WillWagner

The Person You Were Warned About As A Child
Super Moderator
Steel Soldiers Supporter
8,546
2,786
113
Location
Monrovia, Ca.
You gonna have the DPF programmed out of it? Think there will be enough room up front for the cooling stack? The Duramax needs more cooling as well as a charge air cooler and a HMMWV stock, is pretty tight. Looking forward to seeing this project, it is what I did the last 15 years of my professional career, old mechanical replaced by newest, latest and greatest drive by wire, but tried to keep it looking and everything in place as it was prior to the re-power to keep the operator happy.
 

Mogman

Moderator
Staff member
Moderator
Steel Soldiers Supporter
7,017
9,694
113
Location
Papalote, TX
You gonna have the DPF programmed out of it? Think there will be enough room up front for the cooling stack? The Duramax needs more cooling as well as a charge air cooler and a HMMWV stock, is pretty tight. Looking forward to seeing this project, it is what I did the last 15 years of my professional career, old mechanical replaced by newest, latest and greatest drive by wire, but tried to keep it looking and everything in place as it was prior to the re-power to keep the operator happy.
I cannot make any comments on emissions stuff, I have not researched enough to know what can be deleted when installing a newer engine in an older vehicle.
Yes the stack will be a challenge and I have not found an intercooler yet.
I hope to stab the power pack tomorrow and see how the motor mounts work, I am taking a little different route and not sure yet how it will go.
 

Mogman

Moderator
Staff member
Moderator
Steel Soldiers Supporter
7,017
9,694
113
Location
Papalote, TX
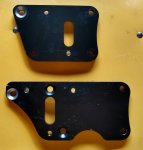
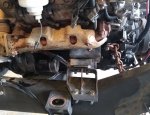
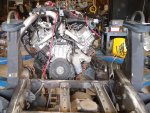
OK so I got the engine set into the chassis today, I decided to give the mount adapters made by Hi Tech Classics a try, they basically adapt the Duramax to the three hole mounts used on just about all GM vehicles in the 80s-90s,,, More or less, some adjustments will need to be made, but at $80 shipped even failure would not be a big deal, and the 6.2L has the same three hole castings as the rest, those guys are dropping 700HP plus Duramax engines in just about everything including Impalas
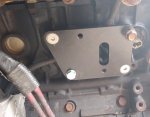
IMG_20201026_114437536_HDR.jpg as you can see I had to counter sink a couple additional bolts to the two it came with because the HMMWV mounts are totally different than the civi. mounts, also I counter sunk the wrong hole on the upper (passenger side) mount, oh well back to the milling machine, plenty of flat head bolts must have been suffering from low blood sugar..
IMG_20201026_123927048.jpg So this is what the drivers side looked like bolted up.
IMG_20201026_124003303.jpg And the passenger side with the additional flat head bolt, notice on this side one of the three mounting bolt goes through the adapter into the block so I had a bolt threaded in while I put the Loctite 638 on the adapter bolts.

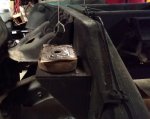
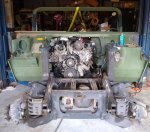
I knew there was going to be a certain amount of miss-alignment so I unbolted the passenger side mount and just laid it on the frame pad while dropping the engine in.
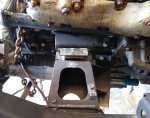
IMG_20201027_154832329.jpg So the driver side is in place to be secured.
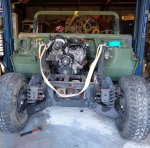
IMG_20201027_154853775.jpg The passenger side has some alignment issues that would need to be worked out IF this is the way I decide to go, but at least it is siting in the chassis..

IMG_20201027_154843738.jpg It is pretty clear with this view how far offset the HMMWV engine is
 
Last edited:

WillWagner

The Person You Were Warned About As A Child
Super Moderator
Steel Soldiers Supporter
8,546
2,786
113
Location
Monrovia, Ca.
Looks good. How many miles were/are on it? Just an FYI, the W/P likes to fail at around 120k AND, in stock form, the oil cooler pipe will not go back INTO the oil cooler due to the mount being taller than the opening in the cooler, it will come out, but not back in.....the ear on the mount is higher than the port on the oil cooler so the pipe will not go back into the cooler. SO, before you get it permanently mounted, make sure the oil cooler pipe will be able to be removed and replaced with the mount on, engine in, maybe renew things before you get it up and running. When I did mine...for the 2nd time due to a casting flaw that let oil leak around the o-ring to block seal, I had to remove the mount from the engine, trim the mount and re-install things, just because I was paranoid about disturbing the oil cooler o-ring twice and not replacing it. Oh yeah, do stats too. They like to fail and get rid of the ELC coolant, go to a normal glycol coolant...I like Cummins/Fleetguard.
 

Mogman

Moderator
Staff member
Moderator
Steel Soldiers Supporter
7,017
9,694
113
Location
Papalote, TX
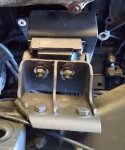
Well I got the front mounts "finished" today, I had to move the bolt holes in the passenger side mount about 7/8" it is a little hard to see the original hole in the adapter
IMG_20201102_160320367.jpg
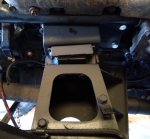
The left side was right on so went together as is,
IMG_20201102_160204090.jpg
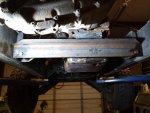
Starting to fabricate the rear cross member, I am using a piece of 3X3X0.25 angle, handy having the original broken mount to work with so I can slide the rear of the transfer case from one side to the other, at this time the rear u joint is in the same place vertically and horizontally but of course a little farther back than the original, I am going to test fit the fuel tank tomorrow to see if it will have clearance and may adjust the rear position if needed.
IMG_20201102_160540885.jpg

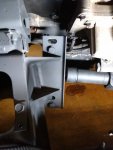
I did have to move the front drive shaft support bearing down a little to get clearance for the middle u joint.
As it turns out the front half of the HMMWV shaft combined with the front shaft off of the donor truck are a perfect length, so a S44 to 1310 conversion u joint is winging its way to Papalote as we speak!
IMG_20201102_160929953.jpg
Good thing to, the rear shaft even only being 23" long is going to set me back over 3 Benjamins as it is...
 

Mogman

Moderator
Staff member
Moderator
Steel Soldiers Supporter
7,017
9,694
113
Location
Papalote, TX
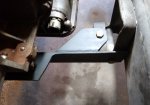
While trial fitting the fuel tank it was obvious the tank and I were not on the same page as far as the cross member goes, so I had to do a little clearance work, I also added the top mount which was planned from the beginning, the other side got the same top mount or "gusset" if you will.
Crossmember.jpg
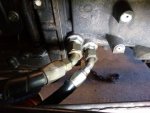
I am going to try using the original engine oil cooler for the transmission, so I bought some "conversion" fittings that changed the trans. from the o-ring and clip GM original style to AN-10/JIC-10 (same thing as the original fittings) I will probably have to use 90deg crimp fittings at the trans.
Cooler lines.jpg
Right now I just have one line looped to keep crap out...
 
Last edited:
Mogman

Moderator
Staff member
Moderator
Steel Soldiers Supporter
7,017
9,694
113
Location
Papalote, TX
I got the chance to try fit the body today, I have it set at a little under 3" of body lift, I had ordered 2" pucks but that may have been a little over optimistic.
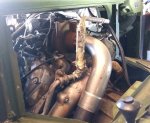
The fitting on top of the turbo is pretty darn close to the cowling and I have the plate off that covers the defroster duct waiting on some wire to run to the heater motor, I am fabing up a 3" down pipe and plan to wrap the entire exhaust and install a turbo blanket

I REALLY wanted to limit the amount of body lift needed as IMHO a 3" body lift with stock tires looks like crap AND with bad knees, back and being somewhat vertically challenged means getting in and out will be a PITA without some kind of step, but it will be what it will be....

It does look like a standard turbo doghouse will take care of the interior side and for the rest it looks like there will be no other clearance issues

Body first fit.jpg

Turbo clearance.jpg
doghouse.jpg
 

nattieleather

Well-known member
1,883
145
63
Location
Cleveland, OH
Just wondering if you could split the difference between 3" and 2" and go like 2.5". The extra half an inch might help with getting in and out. I'm just wondering is all.
 

Mogman

Moderator
Staff member
Moderator
Steel Soldiers Supporter
7,017
9,694
113
Location
Papalote, TX
Just wondering if you could split the difference between 3" and 2" and go like 2.5". The extra half an inch might help with getting in and out. I'm just wondering is all.
The 2" pucks may eventually get here, I am going to try real hard to clearance the problem areas and try for 2", yes every 1/2" would help, we will see
 

Mogman

Moderator
Staff member
Moderator
Steel Soldiers Supporter
7,017
9,694
113
Location
Papalote, TX
So I have managed to make enough clearance to go with a 2" body lift, finished the rear cross member today so now the motor is all tightened down in the chassis, sort of a minor milestone I guess
IMG_20201205_133311704.jpg
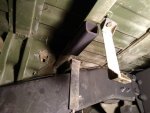
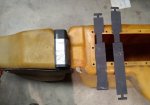
I also set the fuel tank up for a 2" drop so I can have clearance (not much) for the drive shaft, I used 2" square tubing, on the rear I just extended the straps by adding longer bolts, I also drilled the body and drilled and tapped the tubing and bolted it to the body, one less thing to have to deal with while installing the tank.
IMG_20201205_133156427.jpg
On the front I extended the straps 2" and just taped the tubing to the drive shaft shield, there is nowhere for it to go once the tank is installed.
IMG_20201205_133246421.jpg
I do now need to cut away a small amount of the body mount that is now in the way of the fill pipe, the AirDog has a return hose that goes into a T in the fill pipe so there will be a couple things going on there.
I will be starting on the body wiring for the tail lights and fuel gauge, installing the 4 speed shifter and it's associated wiring which is just a couple of the things that must be done before the body is permanently mated to the chassis, a couple of nuts suspended by strings from the body mounts make aligning the body to chassis a relatively easy task.
IMG_20201205_135902074.jpg
 

Mogman

Moderator
Staff member
Moderator
Steel Soldiers Supporter
7,017
9,694
113
Location
Papalote, TX
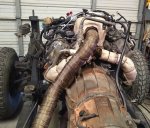
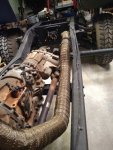
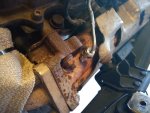
I finished the exhaust system today, I went in a different direction than most. The original exhaust for the donor truck had a 3" down pipe from the turbo and then a 3 1/2" system to the back bumper (the actual donor truck had a stainless 4" system which is going on my tow vehicle) anyhow I had a bunch of mandrel bent pipe that was bought for another project that ended up going a different direction so I am going to see if I can get away with a 3" system, the original 3 1/2" system had a particulate filter, a catalytic converter and a muffler, none of which is on the M998 and it was longer also, I am also wrapping, actually double wrapping the exhaust which will keep more heat in the pipe allowing it to flow better, I also installed a turbo blanket and up pipe blankets, hopefully this and the heat/sound barrier I am installing will help the cab heat situation. I see most conversions using 4" pipe and wonder how they are going to access the sift linkage etc.
IMG_20201209_151820849.jpg
IMG_20201209_151844699.jpg
I also cut down the transmission dipstick tube and drilled/tapped and installed the EGT thermocouple, much easier before the body goes on
IMG_20201209_155209785.jpg
 

Mogman

Moderator
Staff member
Moderator
Steel Soldiers Supporter
7,017
9,694
113
Location
Papalote, TX
I Got the body bolted down to the chassis today, I had finished the new wire harness to the tail lights and trailer plug, made some clearance for the steering shaft and the new wiring runs to the heater and windshield (I am moving the switch to the dash and eliminating the contacts as the windshield will not be folded down, we did settle on a 2" body lift.
I have made some good progress on lowering the engine profile, I have swapped the turbo intake horn and oil fill pipe to a 2005 year model
On the chassis.jpg

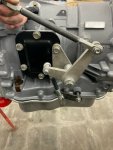
I am trying out one of these transmission shift converters, I was dissapointed as it came with no hardware, bolts nuts etc, fortunately the 6.6L alt bolt was perfect for the bellcrank pivot bolt and I had some of them as I am planning a dual alternator setup with a 24V converted alternator.
It also came with no instructions, it is not tracking correctly at this time, aligned with the shifter (new 4sp. shifter) and transmission in neutral the transmission goes into park before the shifter is fully into its detent at the park position, but this might be fixable and it does shift smoothly.
3.jpg

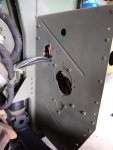
I lowered the hole in the body for the steering shaft by 1" and made a cover for the gas pedal hole, also made a cover for the Diag. hole since I pulled the complete harness and am building the body harness from scratch.
Steering Clearance.jpg
Next will be the rebuilding/modification of the fuel tank...
 
Last edited:
m1010plowboy

Well-known member
Steel Soldiers Supporter
3,924
2,766
83
Location
Edmonton, Canada
I enjoy watching these builds more than anything else so thanks for sharing the adventure. You're not that far from turning a key and that's exciting. A creative fella up north here wedged one in an M211 and he's real happy with the power in the 16,000 lb 6x6. I can only imagine the pull you'll get in a lighter vehicle. Get'er done, sleep later.

dendiesel.jpg
 

TOBASH

Father, Surgeon, Cantankerous Grouch
Steel Soldiers Supporter
Supporting Vendor
3,596
3,518
113
Location
Brooklyn, NY
I'm excited to see what finally happens with your rig. You will have one kick @$$ machine!

Me, I'm gonna install my Whipple and be done with it, but you went for the full meal deal. Your work is truly awesome!
 

Mogman

Moderator
Staff member
Moderator
Steel Soldiers Supporter
7,017
9,694
113
Location
Papalote, TX
Getting the instruments started today, all real trucks should have needles, having said that all the gauges I am using are solid state running stepper motors, more accurate than the old galvanometer gauges of yore, all of the gauges are programmable for different temp sending units, fuel level float etc. pretty cool.
The GPS speedo has the high beam and turn signal indicators included, the three lamps are for "brakes" (park and fail) oil pressure (oil pressure sending unit has dual "outputs") and MIL (malfunction indicator light) the fuel gauge also has a low fuel warning at 5%

I have several other gauges to install, EGT, Trans temp, 24V voltmeter and air pressure, I am going to make a cover plate for the left side of the dash to cover the old light switch hole etc, am not sure if I am going to install the other 4 gauges there or just switches, I may go to a pod for on top of the dash as they are easy to see there.....

The drive shaft shop called just before they went on holiday but I missed it, I assume it means the my shaft is ready to ship, and tomorrow the last fuel line I need to install the fuel tank should arrive.
IMG_20210103_145825012.jpg
 
Last edited:
Top
AdBlock Detected

We get it, advertisements are annoying!

Sure, ad-blocking software does a great job at blocking ads, but it also blocks useful features of our website like our supporting vendors. Their ads help keep Steel Soldiers going. Please consider disabling your ad blockers for the site. Thanks!

I've Disabled AdBlock
No Thanks