• Steel Soldiers now has a few new forums, read more about it at: New Munitions Forums!

  • Microsoft MSN, Live, Hotmail, Outlook email users may not be receiving emails. We are working to resolve this issue. Please add support@steelsoldiers.com to your trusted contacts.

Kinda got carried away..... M1028 rebuild

Karl kostman

Well-known member
Steel Soldiers Supporter
2,308
893
113
Location
Fargo ND
Sharecropper I means NO disrespect and I say this because I did it with my Deuce, you learn in this hobby many things one of my earliest lessons taught me to NEVER DO THIS AGAIN!!!!! I presently have probably the most beautiful Deuce in the Midwest and have close to 20K into it not counting hundreds of hours of my time and its true value is what, maybe 14K on a really great day?
Good luck!
Karl
 

Sharecropper

Well-known member
Steel Soldiers Supporter
1,836
989
113
Location
Paris KY
Sharecropper I means NO disrespect and I say this because I did it with my Deuce, you learn in this hobby many things one of my earliest lessons taught me to NEVER DO THIS AGAIN!!!!! I presently have probably the most beautiful Deuce in the Midwest and have close to 20K into it not counting hundreds of hours of my time and its true value is what, maybe 14K on a really great day?
Good luck!
Karl
Karl -

No disrespect taken. I am having fun spending my daughter's inheritance.
 

Sharecropper

Well-known member
Steel Soldiers Supporter
1,836
989
113
Location
Paris KY
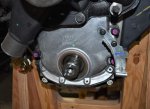
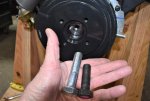
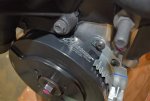
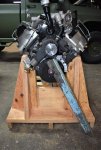
Got my Fluidampr harmonic balancer installed. Getting the stock GEP unit off was easy with a puller which I already had. Installing the Fluidamp was another adventure in itself. I first lightly greased the shaft and inner seal per the instructions, and then slid the Fluidampr onto the crank snout to align the key. Fluidampr makes this easy with a slightly larger diameter of the hole on the back side to allow for finger indexing to engage the key on the snout with the keyway in the balancer. But then I realized that the factory bolt was not long enough to engage enough threads to comfortably tighten the damper onto the shaft. The factory bolt is a M16-1.5x50 metric fine thread, and I can assure everyone that Tractor Supply does not carry any fine thread metric bolts. So I ordered a new longer M16-1.5x70mm bolt from McMaster-Carr yesterday and it was delivered this morning. This made it easy to tighten the balancer up to where it was supposed to go, but then I had the issue of how to apply 200 foot-pounds of torque to the bolt. I had already installed my transmission dust cover, and did not want to take it back off to wedge the flex plate (nor did I want to stress the flex plate), so I decided to fabricate a King Kong spanner wrench which bolts to the pulley holes in the balancer and wedges itself against the floor. I named this special wrench the Sharecropper-Matic. Once I got the spanner wrench bolted on, it was a simple matter to torque the snout bolt to 200 foot pounds. By the way I did use blue Lok-tight on the bolt threads.

Here are a few photos -
 

Attachments

Last edited:

Sharecropper

Well-known member
Steel Soldiers Supporter
1,836
989
113
Location
Paris KY
The pics look good mike. So far what is your opinion of them? How is the quality? Do they look heavy duty? Do you think they will last?
Ken I continue to be impressed with Stan's Headers. The head-side of the manifold flange shows a continuous weld around each tube and ground flat, as well as a rough porting of the inside of each tube to closely match the head ports. Outstanding workmanship in my opinion.
 

Attachments

ken

Active member
Steel Soldiers Supporter
2,479
25
38
Location
Houston Texas
Thanks Mike, Looks like they were worth the money. I found you a IP nipple this morning I'll send it out on Monday.
 

ridenby

Member
144
18
18
Location
Frankfort,Ky
Ironic that you asked Ken. I actually just test-fit the headers to make sure the starter cleared. Here are a few photos -
That looks like a large package. Guess you are going to trim frame and body to install? It just looks like there is not a snowballs chance of it dropping in.
 

Sharecropper

Well-known member
Steel Soldiers Supporter
1,836
989
113
Location
Paris KY
That looks like a large package. Guess you are going to trim frame and body to install? It just looks like there is not a snowballs chance of it dropping in.
The P400 6.5 will bolt right in with no alterations. I have the snowballs that wil make it through hail.
 

Sharecropper

Well-known member
Steel Soldiers Supporter
1,836
989
113
Location
Paris KY
That looks like a large package. Guess you are going to trim frame and body to install? It just looks like there is not a snowballs chance of it dropping in.
I see you are in Frankfort. If you would like to make the 40-mile trip to Paris, I will extend an invitation to inspect the P400 in person.
 

Sharecropper

Well-known member
Steel Soldiers Supporter
1,836
989
113
Location
Paris KY
I fear the 1/4" Header flange is simply to thin. I suspect you will have warping and exhaust gas leaks. For me 3/8" would be minimum. Your build is amazing. Your work and attention to detail says allot. Thank you for this thread.
Thanks for the compliments. That 1/4" header flange will work just fine. The truck will only be driven on Sunday afternoons to the Piggly Wiggly.
 

Attachments

Sharecropper

Well-known member
Steel Soldiers Supporter
1,836
989
113
Location
Paris KY
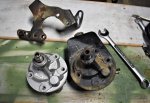
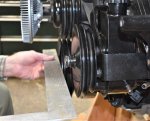
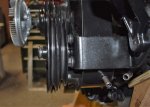
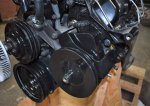
Update - obtained a used CUCV power steering unit and rebuilt it. Ordered the USA-made Delphi pump from PSE. Popped out the used pump, cleaned everything, and then installed the new pump into the reservoir tank. If you plan to do this, make certain that you clean off all the old paint, rust, etc from the perimeter of the old pump rim. I took a piece of Scotch-brite and polished the landing surface of the old reservoir, as any foreign anything will result in a leak. I greased the new o-ring around the new pump, and also smeared a little grease around the 3 sealing washers on the back of the new pump which seals the pump to the back of the reservoir. Getting the new pump to snap into the reservoir was a little tricky at first, but then I used a pair of deep throat Vice Grips and pressed it all the way in. Made sure the 3 back sealing washers were still in place and then installed the back bolts and pressure fitting. Taped up all the sensitive areas and bead-blasted the whole thing, and then shot some engine black paint on it. Once I figured everything out, it was pretty easy. The large bracket must be re-installed onto the new pump before the pulley can be pressed on. You must use a special power steering pump puller/press to install the pulley. I bought one on Amazon and it worked like a champ to get the original pulley off and then press it back on the new pump. A word of caution - when reinstalling the assembly back onto the engine, make certain the power steering pulley aligns with the crankcase and water pump pulleys. I had to add a washer behind the adjusting bolt closest to the crankcase pulley to make these align. I suppose that may be the reason people are wearing out belts so often, and maybe the reason for squealing belts. I took a straight edge and calipers and mic'ed the distance and sure nuff, had to add a washer. Now they are all aligned. Here are a few photos -
 

Attachments

Glockfan

Member
274
16
18
Location
Brigham City, Utah
Just caught up with all posts since November. This has to be about the finest M1028 on the planet. Regarding spending your daughter's inheritance Mike, it is not hers until she inherits it. We work to enjoy the fruits of our labor. It addition to occupying your time and having fun with your build, you have impacted me and countless others with this thread alone. Looking at that brand new P400 puts a smile on my face. You really can't assign a monetary value to happiness and enjoying life. There will always be a part of you in my truck. I am sure that in another 10-15 years, I will likely pass my truck to my son. By the time he gets it, it will have been a part of his life since he was five years old. He loves my old truck and it will one day be his.

You know, they say, "What we have obtained too cheaply, we esteem too lightly." These trucks represent who we are and all the money, work, and time we put into them is very personal. I know a lot about "Mike G." without having ever met him and your daughter is lucky to have you as a father. If I were her, your truck is the one item that I would consider priceless in the inheritance. Money comes and goes and it is just money...

Here is one of the latest pics of "The Money Pit" as my wife calls it, or "elPito" as my 10-year old son calls it...

elPito.jpg

Thank you for taking the time to keep us entertained and I look forward to seeing how your truck progresses.
 

Sharecropper

Well-known member
Steel Soldiers Supporter
1,836
989
113
Location
Paris KY
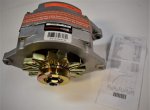
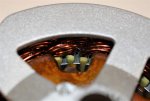
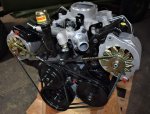
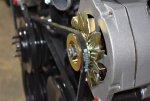
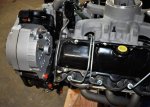
Got the Wilson remanufactured Delco 27Si alternators installed, along with new pulleys, fans, and Gates belts. I decided to go with remanufactured alternators instead of rebuilding used OEM units myself. I purchased a pair of used CUCV units from a vendor on this site with the intention of rebuilding them, and even purchased the rebuild kits, but when the used alternators arrived I had my doubts. I cracked open the cases and the rotors and stators were rusted beyond recognition. I then realized that I could indeed "rebuild" them, but the rotors and stators could not be rebuilt. So I began a search for new replacement units, and called Delco direct. I was told that the 27Si model was no longer available and that Delco could not offer a new replacement. The fellow at Delco then suggested I contact Wilson Auto Electric in Daphne, Alabama http://www.wilsonautoelectric.com/ , which I did, and was told that Wilson offers completely remanufactured Delco 27Si alternators through NAPA. I then called my local NAPA, and obtained a price of $203 each with core exchange. I ordered 2. So glad I went this route instead of trying to rebuild used units. The Wilson remanufactured alternators look brand new inside and out. I now have a pair of rebuild kits for sale at a bargain if anyone is interested.

The Wilson units came without pulleys and fans. I purchased these from Tuff Stuff Performance in Cleveland, Ohio https://www.tuffstuffperformance.com/

Waiting on a Derale #17120 fan. As soon as this comes in and is installed, the front end will be finished.
 

Attachments

Sharecropper

Well-known member
Steel Soldiers Supporter
1,836
989
113
Location
Paris KY
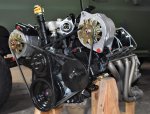
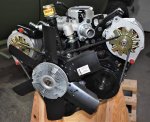
The new Derale 17120 fan arrived and got it installed. The front of the P400 is now finished. All that is left is to finish fabricating the bracket for the Spinner centrifugal oil filter and a small bracket to stabilize the custom fuel line to the FFM, and a few odds and ends. Everything on the engine is either new or remanufactured, with the exception of the infamous TV cable bracket. After completing the engine, I will then focus on truck-related things like a custom AutoMeter gauge cluster, aviation pre-oiler, and auxillary oil/transmission coolers. I also have a brand new NOS 4000 RPM GM tach to install, as well as adding a factory auxillary right-side fuel tank and related piping. Whew. Been on this thing 9 years. Still a ways to go.
 

Attachments

Tinstar

Super Moderator
Super Moderator
Steel Soldiers Supporter
4,292
1,779
113
Location
Edmond, Oklahoma
With all that $$ invested, I’m surprised you don’t have the manifold intake covered to prevent any FOD from getting inside.
 
Top
AdBlock Detected

We get it, advertisements are annoying!

Sure, ad-blocking software does a great job at blocking ads, but it also blocks useful features of our website like our supporting vendors. Their ads help keep Steel Soldiers going. Please consider disabling your ad blockers for the site. Thanks!

I've Disabled AdBlock
No Thanks