• Steel Soldiers now has a few new forums, read more about it at: New Munitions Forums!

  • Microsoft MSN, Live, Hotmail, Outlook email users may not be receiving emails. We are working to resolve this issue. Please add support@steelsoldiers.com to your trusted contacts.


Kinda got carried away..... M1028 rebuild

Sharecropper

Well-known member
Steel Soldiers Supporter
1,814
942
113
Location
Paris KY
There has been a void on this site without your presence Sharecropper.
I trust all went well with your surgery and your recovery is is going well.
Please chime in with some updates if you can.
Ok here’s an update - the surgery was last Tuesday 6/8 at Louisville’s Norton Spinal Hospital. Everything went as expected and I stayed in the hospital exactly one week and was discharged this past Monday 6/14. I had 4 vertebrae in my neck which had rotated into my spinal cord and would have eventually caused paralysis. So the doctors cut those vertebrae out completely and secured my spine with some screws. I am now in a neck brace and must wear the brace for 4-6 weeks until everything grows back together I have plenty of pain meds so I feel just fine. Thanks to everyone for your thoughts and prayers through this ordeal.
Now the good news - on Monday 6/7, the day before I went into the hospital, I wire-transferred 50% of the money for the Supercharger to Bullet in Australia. The engineer at Bullet I’ve been working with indicated that they would need to cast a new aluminum intake which would take about 4-6 weeks, so I figured this could be happening the same time my neck heals up. They have inventory of the intake without the intercooler, however the model which accommodates the intercooler was out of stock. The intercooler is a special aluminum radiator which fits into the intake just below the blower. There is an inlet and outlet fitting milled into the rear of the intake casting, onto which standard 3/4” heater hoses are attached and routed through a 24-volt water pump through another radiator which mounts in the front grille of the truck. There is also a small coolant reservoir and vent cap included in the kit. All parts are off-the-shelf and readily available. The kit will be shipped with a 60 mm snout pulley which will provide 11-15 pounds of boost throughout the entire rpm range, even at idle. Boost can be increased by simply changing the diameter of the snout pulley, however after extensive discussions with the engineer at Bullet, we decided on a 60 mm pulley and 11-15 pounds of boost even though my P400 can handle more.
The engineer at Bullet also said that I would need a marine pump and injectors to reach to the 300 hp capability of my P400. For this I reached out to Jeff Huhndorf at Hucksdorf Diesel in Franklin,Wisconsin. I’ve used Hucksdorf for all my pump work for the past 10-12 years with excellent results. These guys really know their stuff. After discussing with Jeff what I was doing with the supercharger, he recommended building a DB2 5437 pump and setting the fuel to satisfy a fuel flow for 250 hp with the capability of being turned up to 300 hp. That way I could set the fuel based on what my P400 would need. Since this would be uncharted territory and had never been done before, the 5437 marine pump would provide the capability of setting it to whatever it needed to be. He also recommended a set of .330 marine injectors, which I agreed.

Guys this should be a fun project. Once I get healed up and get back to working on the truck I will photo document the whole process.
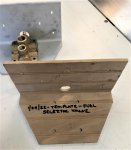
I almost forgot - my body shop friend will be starting on the bed and fender painting next week. Barry McFadden did an outstanding job enlarging the wheel well openings and adding the M1009 fuel door on the passenger side. I still need to mount and plumb the new tanks but that shouldn’t take long. I’ll keep you guys up to speed on my progress as I move along.
 
Last edited:

nattieleather

Well-known member
1,884
134
63
Location
Cleveland, OH
Rest and heal up SC. We want to see your build, but not at the risk of you being in chair the rest of your life. So do as the docs and the health care people say and get back into the pink!
 

Sharecropper

Well-known member
Steel Soldiers Supporter
1,814
942
113
Location
Paris KY
OK I am finally ready to get back on my rebuild after a serious operation last June and a long recovery/recuperation. A quick update -

The P400 / 700R4 / NP241 is still on my engine stand. The aircraft pre-oiler pump has been plumbed with the suction line attached to the passenger-side of the cast aluminum P400 oil pan. I fabricated a mock firewall in order to temporarily mount the pump in the general location that it will be mounted after drivetrain installation. The pressure side of the pump travels through a check valve and then is routed to the large orifice above the OEM oil filter on the driver's side. The pre-oiler pump is 24-volt and will be powered via a momentary switch on the dash. The switch will be energized while the glow-plugs are warming up, thereby flooding all bearing surfaces with oil prior to cranking.

The OEM transfer case shifter has been discarded and replaced with the new cable shifter. I am preparing to cut the small rectangular hole in the cab floor beside the driver's seat to mount the shifter. I will also fabricate, shape, and install a piece of body metal over the OEM shifter hole sealed with GM body sealer/adhesive. The NP241 transfer case was rebuilt and improved by Mark Bendler at Kodiak Truck. It already has the slip joint eliminator from Tom Woods in Utah. After the drivetrain and new driveshaft have been installed, I may elect to mount a disc brake rotor to the flange for an extra emergency brake.

The Supercharger from Bullet in Australia is here and ready to be mounted on the P400. The supercharger has a special cast aluminum intake which replaces the OEM intake, on which the blower mounts. There is an intercooler between the intake and blower which will be plumbed to a radiator mounted in front of the grill. The coolant in the intercooler system is circulated with a 24-volt constant-duty pump with a reservoir. The blower snout extends out to the front of the engine and just clears the throttle bracket and oil fill tube. The OEM fan and clutch will be removed to make way for the crankshaft-mounted 6-rib pulley which will drive the 70 mm snout pulley. This snout pulley will cause the blower to produce 5 pounds of boost at idle and 15 at 2100 rpm. The engineer at Bullet recommended an injection pump to provide sufficient fuel flow to satisfy a minimum of 250 HP. I consulted with Jeff Hunsdorf at Huckstorf Diesel in Franklin Wisconsin, who I consider to be one of the most knowledgeable experts of diesel injection science. Jeff recommended a DB2-5437 pump, which is a marine unit with larger capacity. I purchased a 5437 core from Gib Goodrich at DieselCore in Katy, Texas. I then sent this core to Jeff at Huckstorf, who completely rebuilt it with a new .330 head and rotor and then calibrated it to flow sufficient fuel to satisfy 250 HP. Jeff indicated that the 5437 pump with the .330 head and rotor can be turned up, if necessary, to satisfy 300 HP. So I am good-to-go on the pump. My P400 currently has a Db2-4911 pump which was also completely rebuilt by Jeff Hunsdorf and set to delivery sufficient fuel flow for 200 HP. When I install the Supercharger, I will remove the 4911 pump and place it on my spare parts rack and then install the 5437 pump. After I get the truck back on the road and can see how it runs and feels, I can turn the fuel up if necessary. The engineer at Bullet indicated that the Supercharger with the 70 mm snout pulley mounted on a new P400 could possibly produce upwards of 300 HP, but we will just have to see. I plan to start at the 250 HP settings and play with the timing to get it where I want it, and then see if the engine can eat a little more fuel.

The new Spectre auxiliary fuel tank has been mounted. I cleaned and undercoated the cab bottom before I raised it in position. I was amazed at how clean and rust-free my cab bottom was. It was absolutely like new. I am cleaning and painting the frame as I go. I will now drop the OEM tank and clean/paint that side.

The bed is on saw-horses waiting on my body man to get here to re-paint the sides. I removed the bed and had the wheel wells opened up as described in Post #383
https://www.steelsoldiers.com/threads/kinda-got-carried-away-m1028-rebuild.54469/post-2362501 . I also had a pair of perfect CUCV front fenders opened up at the same time. As soon as I have all the frame parts cleaned and painted, and my body man has the bed sides re-painted, the bed will be reinstalled. I have a Class 4 hitch that I will bolt on before the bed goes back on.

I am ordering the Sherpa 17,000 winch and behind-the-bumper mount today. Thanks to Mad Texan for his assistance with this.

Well, the final saga begins. It has been eleven years since I decided to replace the hood on my truck. Hopefully I can finish this time before something else happens. Stay tuned, more coming.
 

Sharecropper

Well-known member
Steel Soldiers Supporter
1,814
942
113
Location
Paris KY
Finally getting back to work on my M1028. Throughout the whole 12-year process my goal has been to eliminate as many possible points of failure as possible. Whenever I can substitute something which is manual-operated instead of electronically-operated, that is what I do. So, when I decided to install the saddle tank on the passenger side, I also wanted to install a manual tank-selector valve instead of relying on the OEM electronic valve which came from GM on new trucks with dual tanks. I had already purchased a GROCO #FV-65038 six-port valve, which is a marine valve with both supply-and-return ports for diesel. After contemplating a possible location for this valve, I decided to mount it under the bed exactly in the middle between the bucket seats. This required a special bracket to be built which could be mounted to the bed securely and strongly. I first fabricated a plywood mock-up to make sure my design would work, and when it did, I then ordered a piece of 1/4" x 5" x 5" aluminum angle from McMaster Carr. I then replicated the plywood design to the aluminum angle. After again making sure this design and location would work, I drilled the angle to accommodate the mounting bolts and valve stem. I then determined exactly where I wanted the valve stem and handle to be located, and drilled a pilot hole through the bed floor from underneath. I then enlarged the hole to accommodate a rubber grommet to seal the hole around the valve stem, and then drilled six mounting holes through the cab floor. I use all stainless fasteners to eliminate any possibility of rusting. I bead-blasted the aluminum bracket to provide good paint adhesion and painted it black. Next I mounted the valve and pushed the stem up from the bottom through the grommet hole, and then secured the whole thing with the stainless fasteners. All I had to do then was to plumb the supply and return hoses from both tanks to this valve, and then plumb the valve to the OEM lines on the passenger side frame which runs up the engine. I purged the valve and new lines with my vacuum pump prior to attaching the rubber lines to the OEM lines. I am happy with the results. Next I will wire a switch on the dash to change the tank signal from one tank to the other in order to read the fuel level in each tank. More on that in the next post.

IMG_4702.jpg IMG_4700.jpg IMG_4695.jpg IMG_4696.jpg IMG_4697.jpg IMG_4698.jpg IMG_4738.jpg IMG_4869.jpg IMG_4882.jpg
 

Attachments

Mullaney

Well-known member
Steel Soldiers Supporter
Supporting Vendor
7,251
18,782
113
Location
Charlotte NC
Finally getting back to work on my M1028. Throughout the whole 12-year process my goal has been to eliminate as many possible points of failure as possible. Whenever I can substitute something which is manual-operated instead of electronically-operated, that is what I do. So, when I decided to install the saddle tank on the passenger side, I also wanted to install a manual tank-selector valve instead of relying on the OEM electronic valve which came from GM on new trucks with dual tanks. I had already purchased a GROCO #FV-65038 six-port valve, which is a marine valve with both supply-and-return ports for diesel. After contemplating a possible location for this valve, I decided to mount it under the bed exactly in the middle between the bucket seats. This required a special bracket to be built which could be mounted to the bed securely and strongly. I first fabricated a plywood mock-up to make sure my design would work, and when it did, I then ordered a piece of 1/4" x 5" x 5" aluminum angle from McMaster Carr. I then replicated the plywood design to the aluminum angle. After again making sure this design and location would work, I drilled the angle to accommodate the mounting bolts and valve stem. I then determined exactly where I wanted the valve stem and handle to be located, and drilled a pilot hole through the bed floor from underneath. I then enlarged the hole to accommodate a rubber grommet to seal the hole around the valve stem, and then drilled six mounting holes through the cab floor. I use all stainless fasteners to eliminate any possibility of rusting. I bead-blasted the aluminum bracket to provide good paint adhesion and painted it black. Next I mounted the valve and pushed the stem up from the bottom through the grommet hole, and then secured the whole thing with the stainless fasteners. All I had to do then was to plumb the supply and return hoses from both tanks to this valve, and then plumb the valve to the OEM lines on the passenger side frame which runs up the engine. I purged the valve and new lines with my vacuum pump prior to attaching the rubber lines to the OEM lines. I am happy with the results. Next I will wire a switch on the dash to change the tank signal from one tank to the other in order to read the fuel level in each tank. More on that in the next post.

View attachment 860727 View attachment 860728 View attachment 860729 View attachment 860730 View attachment 860731 View attachment 860732 View attachment 860733 View attachment 860734 View attachment 860735
.
Nice modeling and the finished install looks really awesome!
Reliability on a manual switch or valve just can't be beat!

.
 

Sharecropper

Well-known member
Steel Soldiers Supporter
1,814
942
113
Location
Paris KY
While I am waiting on my body-shop guy to shoot the final coat of paint on the bed, I decided to cut the hole in the cab floor to mount the new cable shifter. Got the hole cut and verified that the shifter will fit and cable will work, and now I am lightly sanding the cab floor in preparation of a new coat of paint. After that dries, I will install 80-mil KilMat sound deadener. I will install the KilMat around the area where the new shifter will go, and then install the shifter & cable to the TC so I can remove the OEM TC linkage and lever. I have a good piece of sheet metal (Thanks Rick) which I will form, seal and install over the OEM shifter hole, and then continue the KilMat across the transmission hump. After I get the KilMat completed, I plan on installing carpet - that's right, you read that correctly, CARPET. My goal is to make the cab as quiet and as insulated as possible in preparation of the new Vintage Air Conditioning. To help protect the new carpet, I plan to fabricate custom rubber mats. Stay tuned for more photos.

IMG_4980.jpgPhoto taken from drivers side door. IMG_4979.jpgPhoto taken from under the truck.
 

tim292stro

Well-known member
2,118
39
48
Location
S.F. Bay Area/California
Just want to put this out here: https://800nonoise.com/product/acoustical-floormats/ (no affiliation, no compensation) they have a 383 green (and 686 tan) textured vinyl composite floor material by the roll. I had been going this way with the M1009(s) to give a quiet decoupled limp loaded mass on resilient padding foam over a KillMat/Dynamat damped floor pan and firewall, which still would be cleanable with a hose. SEM does custom colors for their flexible vinyl/fabric/carpet paint, and once upon a time I had sent them the FS-595 (now SAE) color swatches to match. This was before they got purchased a while back.
 

Sharecropper

Well-known member
Steel Soldiers Supporter
1,814
942
113
Location
Paris KY
Just want to put this out here: https://800nonoise.com/product/acoustical-floormats/ (no affiliation, no compensation) they have a 383 green (and 686 tan) textured vinyl composite floor material by the roll. I had been going this way with the M1009(s) to give a quiet decoupled limp loaded mass on resilient padding foam over a KillMat/Dynamat damped floor pan and firewall, which still would be cleanable with a hose. SEM does custom colors for their flexible vinyl/fabric/carpet paint, and once upon a time I had sent them the FS-595 (now SAE) color swatches to match. This was before they got purchased a while back.
Interesting. Thanks. I just now requested a sample of the 383 Green mat.
 

PHOENIX-GER

Well-known member
Steel Soldiers Supporter
416
870
93
Location
Germany
.... I decided to cut the hole in the cab floor to mount the new cable shifter....
My wife always say don't make holes in the truck ... 😅 I will do my best to convince her and I already know that she is watching closely what I am "destroying". We plan also a second tank. If I don't want to start all over again now is the right time to do so
 

Sharecropper

Well-known member
Steel Soldiers Supporter
1,814
942
113
Location
Paris KY
My pace is picking up. Got the cab floor cleaned and the Kilmat installed. The Kilmat was somewhat difficult to cut all the pieces around the contours of the cab floor, but I thoroughly enjoyed it. Because I am abandoning the transfer case lever and linkage and replacing the assembly with a cable shifter, I had to fabricate a cover to close-up the hole. I got a flat piece of OEM fender side from CUCVRUS (thanks Rick!) and cut/drilled it to replace the shifter linkage. I used stainless 1/4-20 round-head bolts to fasten the cover to the original bracket which is under the cab. There is a slight detent at the front of the cab floor through which the 4WD light wiring goes through, and the new cover worked perfectly to allow the wire to traverse without pinching. Next up - carpeting!

IMG_4981.jpgIMG_4983.jpgIMG_4982.jpgIMG_4990.jpgIMG_4992.jpgIMG_4993.jpg
 

PHOENIX-GER

Well-known member
Steel Soldiers Supporter
416
870
93
Location
Germany
Looks very good
When you build for yourself, you approach things very differently, especially in the details.
We always come up with new ideas during the rebuild, and as a result we also implement them differently.
 

Sharecropper

Well-known member
Steel Soldiers Supporter
1,814
942
113
Location
Paris KY
Got the carpet installed over the KilMat. What a difference! Close the doors, and you can actually hear yourself think with the engine running. Still need to install the door panels but those will be easy. The carpet on the kick panels needed to be glued-in-place, so I shot 2 coats of 3M spray contact adhesive on their backs before aligning them and press-rolling them on. I had to bend the lever on the cable shifter slightly to provide a little more clearance between the shifter knob and the side of the MRAP seat. My 20-ton finger press mage that easy. I threw-away the plastic door sills (I hate those things) and bought reproduction 2-piece aluminum sills from LMC. They were nice, but I couldn't stand the shiny-ness, so I bead-blasted them and painted them with Rust-O-Leum flat black, then shot 2 coats of matte clear on top of that. My hardware store had some stainless sheet metal screws with black powder coating on the heads, so this worked perfect to hold the door sills in place. The screws went back into the original holes in the cab floor, then a shot of GM rubberized undercoating sealed them on the underside. In the photo, the handle for the fuel tank valve can be seen towards the rear of the cab, and the wire sticking up in the middle is the circuit for the heated seat elements going in before cold weather. More on this later.

IMG_5035.jpg
IMG_5044 (2).jpgIMG_5040 (2).jpg
 

Sharecropper

Well-known member
Steel Soldiers Supporter
1,814
942
113
Location
Paris KY
I'm coming down the home stretch on the interior. Got the new gauge cluster completed and installed. None of the gauges are hooked up yet, that will be done when the new P400 powertrain goes in later in the summer. The carpet set fit like a glove, even the piece for the rear cab wall. For the console, I purchased a center console kit for a Tahoe PPV (Police Patrol Vehicle) and fabricated a custom steel bracket, bolted to the seat bolts in the cab floor, to hold it in place in the front. The back of the console simply sits on the level package rack behind the seats. Worked perfect. I moved the console towards the passenger side an inch or so to provide sufficient room to operate the new cable shifter. In preparation for the Vintage Air, I went ahead and fit the new vents into the dash and instrument bezel. Had to relocate the black-out switches down into the steel dash to make room for the outboard vent, and had to relocate the amp gauge down into the bracket for the diagnostic port. I completely removed the diagnostic wiring harness and this opened a 2" hole in the firewall, into which I plan to fabricate a custom rubber grommet to seal all the leads from the new gauges.

IMG_5089.jpg
IMG_5091.jpg
IMG_5058.jpgIMG_5069.jpg
IMG_5083.jpg
IMG_5084.jpg
 

Sharecropper

Well-known member
Steel Soldiers Supporter
1,814
942
113
Location
Paris KY
Here's where I relocated the blackout switches to make room for the outboard A/C vent. To accommodate the top vent, I moved the amp gauge down into the diagnostic port bracket. The custom 4-gang switch panel fit perfectly into the radio cut-out, but instead of attaching them to the plastic instrument bezel, I fabricated a 1/8" aluminum plate that is fastened to the steel dash frame, and then fit the switches into the plate. That way, the instrument bezel can be removed without having to deal with removing the switches. The LED lights in the radio knob holes worked perfect also, the orange LED on the left is illuminated when the glow plugs are energized and the blue LED on the right will be illuminated when the pre-oiler pump is energized.

IMG_4941.jpgIMG_5053.jpgIMG_5052.jpgIMG_4942.jpgIMG_5051.jpg
 
Top
AdBlock Detected

We get it, advertisements are annoying!

Sure, ad-blocking software does a great job at blocking ads, but it also blocks useful features of our website like our supporting vendors. Their ads help keep Steel Soldiers going. Please consider disabling your ad blockers for the site. Thanks!

I've Disabled AdBlock
No Thanks