• Steel Soldiers now has a few new forums, read more about it at: New Munitions Forums!

  • Microsoft MSN, Live, Hotmail, Outlook email users may not be receiving emails. We are working to resolve this issue. Please add support@steelsoldiers.com to your trusted contacts.

M1007 - CUCV Suburban Clone Build Thread

Barrman

Well-known member
5,265
1,779
113
Location
Giddings, Texas
With gasoline engines I used to use a timing light to get to spec and then a vacuum gauge to tweak to highest vacuum from that. I know too far advanced will cause hot start issues and maybe pinging with a gas engine. What I don’t know and have not been able to find out is what happens to a diesel if the timing is too far advanced?

I think the butt dyno and mirror smoke check test drive method is great. That is how I do gas timing and carb jetting. I know the bad effects of too much timing, too much gas or too little gas. Spark plug reading helps with that too.

All I can use on the diesel is sound which is very subjective, boost, egt and cold starting. That led me to timing methods and specifications. Which is my current learning experience.
 

Barrman

Well-known member
5,265
1,779
113
Location
Giddings, Texas
Change a word or the order of the words for a search and things not seen before sometimes pop up. That happened to me yesterday. This is a very technical article about diesel timing theory:


It also answers the questions I had about why the DB2 pump retards the timing 10° between idle and 1800 rpm. Which seems so counter intuitive. It is because as pressure and heat build under load the flame builds to full ignition faster than not under load. Basically a diesel advances ignition just by the properties of the fuel under pressure with everything else being the same. Except everything else is never the same.
 

ballencd

Active member
198
78
28
Location
Columbus, NC
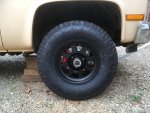
Barrman, Quick question on your tires and cutting of the fenders.....I just finished installing H3 brakes and Method 8.5x17" 0mm offset on my 1991 Suburban...V1500, 5.7 TBI, NP241, 3.42 gears. The tires are very close to the fenders on a turn....like 3/8" clearance. The tires are Nitto Terra Grappler G2 Lt285/75/R17.... 33.8x11.5". Can you show a picture of how you cut the fenders to clear your tires? I have no lift from factory at this time and would like to stay as close to factory as I can but still need the tires not to rub in turns and especially when stressed. I also don't really want to cut the fenders but would rather do that then to add lift. I think in one of your entries you spoke of installing the three leaf M1009 front springs vs the two leaf the V1500 has and had no change in lift. Did I read that right? I have been thinking about putting M1009 springs in my Burb but "no change in lift" would not help with my clearance problem.
Also....You stated that the (ORD??) reverse shackle change on your M1007 helped the ride. Can you comment more on that.

By the way, I loved your build of your Suburban and have just read it in its entirety in the last 2 days. It took a long time but very enjoyable. I drove a M1009 for 18 years as a daily driver and sold it a few years back when the kids started complaining of the pain to get in the back and the no A/C issue. I bought a 1988 V10 and then a 1991 V1500 both with the 5.7 TBI but I have totally missed my 6.2. I am slowly building up the 91 into a M1007. Eventually I want to change it to a manual and diesel but not today. I do have a set on M1009 bumpers and a brush guard ready to go on but really like the M1008 bumper you put on the back of yours so that is another dilemma.

Thanks

ballencd
IMG_2982.JPG
 

Barrman

Well-known member
5,265
1,779
113
Location
Giddings, Texas
I like that brake conversion and have tried to figure out a way to do it with 8 lug rotors.

I had a 2wd 1984 Diesel 3/4 ton Suburban before the Cowdog 4x4 3/4 ton. I was also driving my M1009 daily. I never drove the Cowdog with stock suspension. So, all I can do is compare the ride of a 2wd, M1009 and the Cowdog as I built it. The 2wd was just front end float and I didn't like that at all. Which is why I really, really wanted to get the Cowdog finished.

A M1009 with coil over shocks to me has a ride easily compared to a rocking horse. The short wheel base has you moving front to back in the seat on bumpy roads but just fine on smooth interstates. One of my other M1009 trucks with worn out probably stock shocks is actually a smoother ride on back roads. I don't notice the rocking horse thing at least.

Add at least 1000 pounds and a few feet of wheel base and you get a 4x4 solid axle 3/4 ton ride. So much more stable, no bouncing of the front end, very much a feeling of total control and to me a much more comfortable ride. Highway is also more stable. All of this at the loss of the billy goat M1009 turn on a dime and go through any hole feeling. I think your 1/2 ton will ride a little more floaty than my 3/4 ton.

If I was to do it again. I would have bought the ORD springs for all 4 corners with the least amount of lift possible. That reverse arch front spring just with the heavy diesel up front and a sharp bump more than a few inches tall at speed above 10 mph or a speed bump at any speed.

I will look for pictures of how I cut the fenders. I cut them at the front and rear of the wheel opening. 3 leaf M1009 front springs with an ORD add an inch in front with ORD 2-1/2" rear shackle flip. The 3 leaf spring swap did not increase the height of the truck at all. The extra 1-1/2" rear manipulation compared to the front pretty much just made the truck level since the rear of these things dragged when stock and just settled more over the years.
 

ballencd

Active member
198
78
28
Location
Columbus, NC
Barrman,

Thanks for the response. Do you find that the ORD Rear Shackle Flip did anything to the ride....? Same / Better / Worse? Or just lifted it a little. I do like the level look vs front high. I will look into the add an inch lift for the front. i don't think a complete lift kit is in my budget at the time.

Looking forward to seeing pictures if you find them. I don't use this for off roading but don't like to get stuck in snow, mud or wet grass and occasionally get out in the woods on logging roads but nothing heavy. i just don't want the tires rubbing when I am turning and hit a bump.

The brake upgrade is probably doable on an 8 lug axle. I think Christian Wilson has a solution for an 8 lug wheel. Contact him him at : wilsonmech@sbcglobal.net

I stayed with the 6 lug since I don't do any heavy off roading and thought in the long term it would be way more efficient with the lighter running gear and the 10 bolt axles worked fine in the M1009 for me for years. The brake change was fairly straight forward but there were several issues. I had to buy wheels and tires before getting the brakes/rotors installed because the new calipers would not fit inside my factory wheels. Once the brakes were installed I couldn't go back to the old because the wheels would not fit anymore. The wheel/tire company said the wheels would fit my burb but they did not before the rotor move from behind the hub to in front of the hub as they hit the tie rod ends with the factory brake setup. I had to install new studs to clear the rotor change and the thicker wheels. After all that the tires rub a little if I am not careful. The brakes do much better than what I had and I am hoping to get them even better when I install a hydro brake setup. Coming soon. All in all, I am very happy with the brakes and would do it again in a heartbeat.

ballencd
 

Barrman

Well-known member
5,265
1,779
113
Location
Giddings, Texas
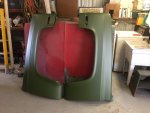
I found I actually didn't take any pictures while cutting the fenders. So I have the pictures of the truck already posted that show the fenders on it and I have this picture of after I painted them:

16-10-07.CDK20 front fenders painted.JPG
 

ballencd

Active member
198
78
28
Location
Columbus, NC
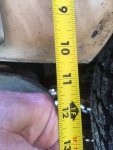
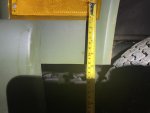
That looks like you cut straight across the front of the fender parallel with the ground and took off quite a bit. I'm showing about 10.5" from screw on side marker. What do you have left from the screw? I think mine is hitting more on the rear of the fender butI can't tell you even cut your rear from the picture.
IMG_3118.JPG
Maybe I could use the ORD 1" zero rate and bump the axle forward an inch after cutting the front off like you have done. ...?? I'm going to look into that for sure. That looks fairly simple to cut the front.
 

Barrman

Well-known member
5,265
1,779
113
Location
Giddings, Texas
I will have to measure from the screw hole of the side marker light tonight to get that dimension.

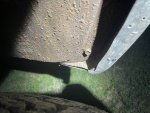
If you look real close at the rear there is an angle cut off visible from the outside. Most of the cutting was on the inner part. I will try and take pictures of that too.

I did not move my axle from the stock location. I probably didn't need the add an inch for tire clearance once I cut the fenders. The inch was added to make the truck level. That is why I suggested new springs all around. ORD doesn't offer "just a smidge" of rear lift with any of their shackle flips.
 

Barrman

Well-known member
5,265
1,779
113
Location
Giddings, Texas
I didn’t get a chance until after dark tonight. I think I got what you wanted. Look closely at the rear of the fender cut. To me that is the most important. I have never had it rub with 315/75R17 BFG tires. C4C5E25B-6129-4D74-91D6-3355764B73B1.jpeg
D4C68F11-4E90-4998-B9C1-2428ABE32B4C.jpeg
 

ballencd

Active member
198
78
28
Location
Columbus, NC
I will compare your pictures to my fender first thing in the morning. I think the rear is where I am rubbing now so will look closely there. Thanks for taking the time. I appreciate it! Have a good evening.
 

chevymike

Well-known member
597
463
63
Location
San Diego, CA
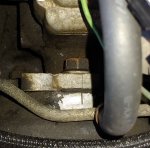
Mike - timing too advanced or retarded will indeed impact performance. Have you looked at the timing marks on your pump? If not, shine a light down in front of the pump and see if the 2 timing lines line up. My ‘85 civi as well as my current M1028 seem to have the best power with the timing advanced the thickness of 2 marks towards the drivers side. To find the sweet spot, you can follow the procedure outlined in my previous post and gradually advance the pump. There are 3 nuts holding the pump to the engine and these are a bear to get to, but with the correct wrench you can access all 3. Start with the 2 lines lined up and drive it around the block. Then advance the timing by rotating the pump towards the drivers side the thickness of the line. Tighten the top nut securely and drive around the block to see how it feels. Then repeat the process and rotate the pump towards the drivers side another line thickness and see how that feels. Once you find the pump position with the best power, tighten all 3 nuts. I will predict you will find the best power when the line on the pump is past the line on the engine approximately 1/16” inch. Give this a try. It cost nothing.
@Sharecropper had time to take a look and took a pic. Looks like it is advanced about what you describe. Haven't had time to try to do any adjustments and test drive.

0404211636a (2).jpg
 

Sharecropper

Well-known member
Steel Soldiers Supporter
1,836
987
113
Location
Paris KY
@Sharecropper had time to take a look and took a pic. Looks like it is advanced about what you describe. Haven't had time to try to do any adjustments and test drive.

View attachment 830554
That looks about right to start with, however I believe it could be advanced slightly more. If there is wear between the timing gear and the cam gear, and I would assume there would be if your engine is original, the existing timing would not be not much different than TDC. I suggest you loosen all 3 nuts and advance the pump another 1/16", which will be equivalent to 2 or 3 line thicknesses, then re-torque the nuts and try it. I will predict that you will hear the difference before you even get on the road. But be careful not to advance it too much, just find that sweet spot. try this and let us know how it feels and drives.

Hope this helps.
 

Skinny

Well-known member
2,130
488
83
Location
Portsmouth, NH
How much does your spare tire wobble if you grab it and try to move it?

I just made a carrier and I have nothing to compare it to.

Sent from my SM-T380 using Tapatalk
 

Barrman

Well-known member
5,265
1,779
113
Location
Giddings, Texas
My spare doesn't wobble at all. I have the red handled over center locking lever at the end of the arm and a spring loaded locking pin at the bearing. Is that what you were asking?
 

Barrman

Well-known member
5,265
1,779
113
Location
Giddings, Texas
Busy times since I updated the Cowdog saga last. A week or so after the last post the a/c stopped cooling. Well, the front wasn't cooling but the rear a/c still was. Ice was forming at the orifice right at the entrance to the evaporator so I became convinced the orifice was either blown or clogged. Those of you that have read this entire thread might remember that I have a blue Ford orifice tube in this truck to compensate for running R-134A in a R-12 system. The blue Ford orifice is .068" in diameter compared to the white GM orifice which is .072"

The rear a/c has an expansion valve and except for sharing the compressor, condenser and lines is separate. I knew my guess was wrong as soon as I hooked up the machine to evacuate the system. Out of 64 ounces supposed to be in. Only 28 were recovered. I had a leak!

I had installed the blue Ford orifice 4 years ago to help low compressor speed cooling. Basically so it would be colder at the vent when I was in stop and go traffic compared to just cold going down the highway. Ford also has a red orifice that is .062" diameter. I decided to swap that in since I thought the orifice was my issue before I realized it was probably just low refrigerant. No leak was detected using vacuum so I had to charge it up and do a soapy water spray bottle bubble check. A crack in a weld on the O'Reilly's new when I built the truck cross flow condenser was found. It had a lifetime warranty and they honored it.

New condenser, red Ford orifice tube installed and 64 ounces of R-134a later I thought I was set. Jennifer and I had to move some furniture for her mom in Houston in May. We took the Cowdog with a M101 trailer with a cargo cover on since rain was expected. We had below 40° at the center vent driving down there in the morning. Once we loaded up though it was 95° outside with about the same humidity. It wouldn't get below 70° at the vent in traffic and barely below 55° after 100 miles of straight highway driving. The red Ford orifice was not an improvement.

So, just to cover all the bases I decided to put a stock white GM orifice tube in. It is .072" diameter. Below 85° outside temp it did ok but never really pulled the vent temp down below 50° even on the highway. I went back to a blue Ford .068" like I had for the previous 4 years and get 40° at the center vent if it is below 85° outside. Above that it will creep up to around 48-50° at the vent when it is around 100° outside. Which really isn't that bad for a system designed 50 years ago using a refrigerant not even thought of at the time of the design and a compressor that probably is just a tad too small for my dual ac system.

Then my son Colton graduated college, got a job, got married and bought a house in about a 6 week span. The Cowdog racked up the miles and did great moving junk all over Texas.
 

Skinny

Well-known member
2,130
488
83
Location
Portsmouth, NH
Busy times since I updated the Cowdog saga last. A week or so after the last post the a/c stopped cooling. Well, the front wasn't cooling but the rear a/c still was. Ice was forming at the orifice right at the entrance to the evaporator so I became convinced the orifice was either blown or clogged. Those of you that have read this entire thread might remember that I have a blue Ford orifice tube in this truck to compensate for running R-134A in a R-12 system. The blue Ford orifice is .068" in diameter compared to the white GM orifice which is .072"

The rear a/c has an expansion valve and except for sharing the compressor, condenser and lines is separate. I knew my guess was wrong as soon as I hooked up the machine to evacuate the system. Out of 64 ounces supposed to be in. Only 28 were recovered. I had a leak!

I had installed the blue Ford orifice 4 years ago to help low compressor speed cooling. Basically so it would be colder at the vent when I was in stop and go traffic compared to just cold going down the highway. Ford also has a red orifice that is .062" diameter. I decided to swap that in since I thought the orifice was my issue before I realized it was probably just low refrigerant. No leak was detected using vacuum so I had to charge it up and do a soapy water spray bottle bubble check. A crack in a weld on the O'Reilly's new when I built the truck cross flow condenser was found. It had a lifetime warranty and they honored it.

New condenser, red Ford orifice tube installed and 64 ounces of R-134a later I thought I was set. Jennifer and I had to move some furniture for her mom in Houston in May. We took the Cowdog with a M101 trailer with a cargo cover on since rain was expected. We had below 40° at the center vent driving down there in the morning. Once we loaded up though it was 95° outside with about the same humidity. It wouldn't get below 70° at the vent in traffic and barely below 55° after 100 miles of straight highway driving. The red Ford orifice was not an improvement.

So, just to cover all the bases I decided to put a stock white GM orifice tube in. It is .072" diameter. Below 85° outside temp it did ok but never really pulled the vent temp down below 50° even on the highway. I went back to a blue Ford .068" like I had for the previous 4 years and get 40° at the center vent if it is below 85° outside. Above that it will creep up to around 48-50° at the vent when it is around 100° outside. Which really isn't that bad for a system designed 50 years ago using a refrigerant not even thought of at the time of the design and a compressor that probably is just a tad too small for my dual ac system.

Then my son Colton graduated college, got a job, got married and bought a house in about a 6 week span. The Cowdog racked up the miles and did great moving junk all over Texas.
I have a stock orifice and it blows fine under load. Then again I'm in New England. How are your rear line condition? I rebuilt the front AC on my Burb during the engine swap and eliminated the rear. I'm thinking of refurbing it but the lines going to the back and the ones going up to the evaporator look pretty old and dry rotted. Probably expensive to run all new hose out back.

I'm thinking of doing a separate rear 12v compressor so it can run off battery power. Those are only 5k btu but may be just as expensive as buying new rear lines. Still haven't tackled the rear AC. If I do crack the system open again I may want to run that Ford orifice as you suggest. Do you have a stock condenser or have you found a direct fit cross flow one?
 

Mullaney

Well-known member
Steel Soldiers Supporter
Supporting Vendor
7,712
19,755
113
Location
Charlotte NC
I have a stock orifice and it blows fine under load. Then again I'm in New England. How are your rear line condition? I rebuilt the front AC on my Burb during the engine swap and eliminated the rear. I'm thinking of refurbing it but the lines going to the back and the ones going up to the evaporator look pretty old and dry rotted. Probably expensive to run all new hose out back.

I'm thinking of doing a separate rear 12v compressor so it can run off battery power. Those are only 5k btu but may be just as expensive as buying new rear lines. Still haven't tackled the rear AC. If I do crack the system open again I may want to run that Ford orifice as you suggest. Do you have a stock condenser or have you found a direct fit cross flow one?
.
My 89 Suburban with rear AC would cause everybody riding with me to ask for a blanket! Plain factory stuff and when the old air compressor died, the new one with the newfangled freon was a bolt-in fix. New dryer and a couple of other small parts and it worked almost as well.

I was being a busy-body, so I looked on ePay. Seems that a set of rear lines would be $400. Sounds DANG EXPENSIVE to me. The local fix it shop for hydraulic hose has Synflex on their mobile trucks. My guess is that if you had the tools to vacuum the refrigerant and gave them an "empty" air conditioning system - their cost - installed would be less. Definitely worth considering...
 

Skinny

Well-known member
2,130
488
83
Location
Portsmouth, NH
I have everything including a crimper. I built the system in my M1031 from scratch using a backhoe evaporator. I'm wondering if I ran hose all the way to the back if ir will be ok. Thats a lot of rubber.

Sent from my SM-T380 using Tapatalk
 

Mullaney

Well-known member
Steel Soldiers Supporter
Supporting Vendor
7,712
19,755
113
Location
Charlotte NC
I have everything including a crimper. I built the system in my M1031 from scratch using a backhoe evaporator. I'm wondering if I ran hose all the way to the back if ir will be ok. Thats a lot of rubber.

Sent from my SM-T380 using Tapatalk
.
The hose in mine looks like a "regular" old AC hose. Doesn't look special at all to me. Not plastic like Synflex but that would work too - and that stuff supports 3000psi. Like you said, it is a long run all the way out to the back but at 30+ years old mine still makes lots of cold air. Hoses look clean and crack free on mine.
 

Barrman

Well-known member
5,265
1,779
113
Location
Giddings, Texas
I have the O’Reilly’s 1987 Suburban condenser. It is cross flow and fit. However, I have a CUCV front valence so I have to assume it is the same as the civilian truck for condenser mounts. I hate to assume though.

85° is the cut off for between super cold front and rear to around 50 in the front and still cold in the rear. above 95 and I am happy to get below 55 front and rear. I think my problem is caused by a compressor that is just a bit too small. It is a Sanden 508 which fit my serpentine mount. 8.4 cubic inches. The stock GM unit for the dual ac Suburban is over 10 cubic inches. My high side pressure has never been as high by a wide margin as what the book says it should be. Another option I have yet to explore is a possibly partially failed expansion valve at the rear. If it is not closing all the way it could keep the refrigerant flowing faster to the rear and not building psi at the front which is where the pressures are taken. It works good enough that I have put this issue on the back burner for now.

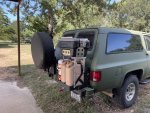
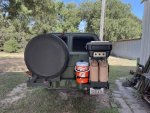
I did get to pretty much finish my passenger side swing away carrier in August.

EA84AAB8-0359-4E54-9694-BB7B52CE97DA.jpeg0F6F416E-3F13-4095-8BCC-7046B66D88EE.jpeg
 
Top
AdBlock Detected

We get it, advertisements are annoying!

Sure, ad-blocking software does a great job at blocking ads, but it also blocks useful features of our website like our supporting vendors. Their ads help keep Steel Soldiers going. Please consider disabling your ad blockers for the site. Thanks!

I've Disabled AdBlock
No Thanks