GPrez
Member
- 208
- 0
- 16
- Location
- Mt. Airy, MD
I have not seen any threads with small lifts and smaller tires so I figured I would document and take pics along the way. Of course some of this was completed before I made that decision, but here goes.
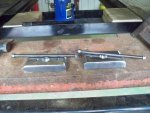
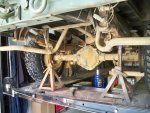
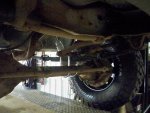
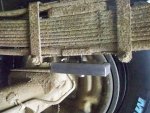
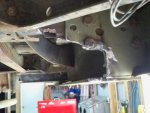
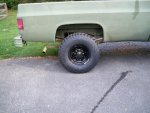
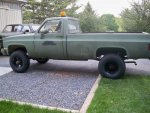
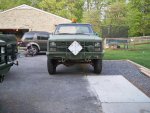
Items competed thus far: Tuff Country 2" lift springs in front, Tuff Country Shocks, 1" Zero Rates in the rear, Black Rock Wheels, and BF Goodrich 255 x 85 x 16 KM2 Mud Terrains.
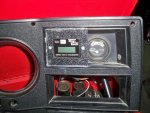
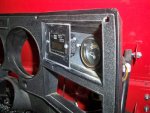
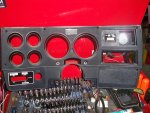
Items on the list or en route: Class V receiver, trailer brake controller, brake lines, Doghead Mod, resistor bypass, electrical items from CUCV electric, overhead console w/speakers & radio, tiny tach, insulate & carpet the interior, reupolstered seat, and new paint.
I am also considering adding a Gear Vendors overdrive, but want to spend a little time behind the wheel before investing in one.
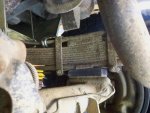
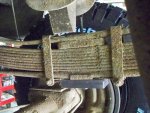
Mechanically everything seems to be fine except for my left front hub is not unlocking.
I purchased the lift items from Off Road Design based on numerous recommendations I read for them. I was a little disappointed that they were apparently unfamiliar with the requirements for parts for the CUCV chevy's and they were very slow returning phone calls. The front springs were fine, but the zero rates were a problem. They sent the wrong U-bolts and the new center pins were way too short. I ended up purchasing both items elsewhere. The products I did receive were very nice. Keep this in mind if you order from them.
It's a good height for me and 2" up front and 1" in the back leveled out the truck. I wanted a little extra clearance, but didn't want to go to crazy cause I'm getting old and having to jump in is not as much fun as it used to be.
Items competed thus far: Tuff Country 2" lift springs in front, Tuff Country Shocks, 1" Zero Rates in the rear, Black Rock Wheels, and BF Goodrich 255 x 85 x 16 KM2 Mud Terrains.
Items on the list or en route: Class V receiver, trailer brake controller, brake lines, Doghead Mod, resistor bypass, electrical items from CUCV electric, overhead console w/speakers & radio, tiny tach, insulate & carpet the interior, reupolstered seat, and new paint.
I am also considering adding a Gear Vendors overdrive, but want to spend a little time behind the wheel before investing in one.
Mechanically everything seems to be fine except for my left front hub is not unlocking.
I purchased the lift items from Off Road Design based on numerous recommendations I read for them. I was a little disappointed that they were apparently unfamiliar with the requirements for parts for the CUCV chevy's and they were very slow returning phone calls. The front springs were fine, but the zero rates were a problem. They sent the wrong U-bolts and the new center pins were way too short. I ended up purchasing both items elsewhere. The products I did receive were very nice. Keep this in mind if you order from them.
It's a good height for me and 2" up front and 1" in the back leveled out the truck. I wanted a little extra clearance, but didn't want to go to crazy cause I'm getting old and having to jump in is not as much fun as it used to be.
Attachments
-
 100.3 KB Views: 412
 -
 87.1 KB Views: 384
 -
 101.3 KB Views: 429
 -
 100.8 KB Views: 365
 -
 84.8 KB Views: 363
Last edited: