• Steel Soldiers now has a few new forums, read more about it at: New Munitions Forums!

  • Microsoft MSN, Live, Hotmail, Outlook email users may not be receiving emails. We are working to resolve this issue. Please add support@steelsoldiers.com to your trusted contacts.

M1078A1 "Pandora" Build | 2024-??? | ***Picture Heavy***

Ronmar

Well-known member
3,881
7,547
113
Location
Port angeles wa
I used the included gasket.

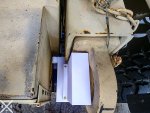
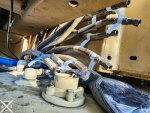
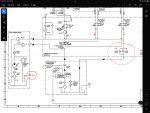
in place of the existing hand pump… Hmmm… Well the existing hand pump is sealed, and the way the valving in the control valve works, it will send all the fluid back toward the hand pump until it develops enough pressure in the sealed reservoir to overcome a 5psi check-valve to start allowing fluid to flow toward the Air/hydraulic pump(First pic). With a vented plug it will eventually overflow… so first step will be replacing the vented filler with a plug. You have to do something with it anyway as the vented plug points straight up and will collect water if the pump is installed out in the weather.

being sealed, the OEM hand pump will actually draw fluid from the AOP reservoir as it does not contain enough fluid in its tiny reservoir to fully lift the cab. I do not know if this pump will pull a vacuum past the control valve on the return side to draw fluid from the AOP reservoir while you are pumping, as the original does. Not a screaming big deal as the hand pump reservoir contains enough fluid to lift the cab, but if it is sealed, all the fluid may not return as the air gap it will create on top by not pulling fluid while pumping, will eventually pressurize and force fluid back to the AOP. So eventually the hand pump reservoir will empty…

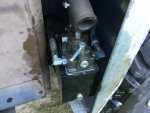
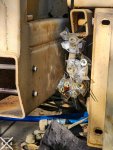
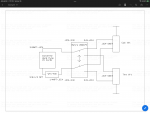
if you are just doing the 2 circuits, cab and tire crane, you could do away with the AOP and manifold entirely and use the hand pump and a selector valve to shift between cab and tire functions(second pic). Then a 2 position 3 way air valve for cab suspension control and you are in buisness…
IMG_3992.jpeg


IMG_3292.png
 

InvictusDecretum

Active member
108
210
43
Location
NC
I used the included gasket.

in place of the existing hand pump… Hmmm… Well the existing hand pump is sealed, and the way the valving in the control valve works, it will send all the fluid back toward the hand pump until it develops enough pressure in the sealed reservoir to overcome a 5psi check-valve to start allowing fluid to flow toward the Air/hydraulic pump(First pic). With a vented plug it will eventually overflow… so first step will be replacing the vented filler with a plug. You have to do something with it anyway as the vented plug points straight up and will collect water if the pump is installed out in the weather.

being sealed, the OEM hand pump will actually draw fluid from the AOP reservoir as it does not contain enough fluid in its tiny reservoir to fully lift the cab. I do not know if this pump will pull a vacuum past the control valve on the return side to draw fluid from the AOP reservoir while you are pumping, as the original does. Not a screaming big deal as the hand pump reservoir contains enough fluid to lift the cab, but if it is sealed, all the fluid may not return as the air gap it will create on top by not pulling fluid while pumping, will eventually pressurize and force fluid back to the AOP. So eventually the hand pump reservoir will empty…

if you are just doing the 2 circuits, cab and tire crane, you could do away with the AOP and manifold entirely and use the hand pump and a selector valve to shift between cab and tire functions(second pic). Then a 2 position 3 way air valve for cab suspension control and you are in buisness…


View attachment 933006


View attachment 933013
I think I have everything ordered from Surplus and the MetroSelect from Amazon. Your list in this thread post was quite helpful. I'll reply to that with what I actually end up using for sure as well as post it here.

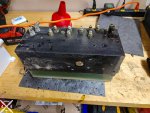
Looks like it might fit in a laser cut/CNC bent bracket replacing the manifold depending on if I can get a good seal on a 90* 4BSPP. There's 1/8"+ clearance between the bed and manifold with these slightly oversized ears. It would have been great to fit the deeper reservoir where the manifold was but unfortunately the handle would stick up too far.

I think I'd like to design a hood over the top of it to keep the weather off and mount the MetroSelect below it. Put a 90* before the vent, or maybe a short hose going beneath the bed + vent.

As always, thank you for your expertise !

20241006_173109 export.jpg


It does fit in the original location decently enough, since I'm not keeping that lift arm, but I'd rather put it where the manifold is.


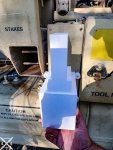
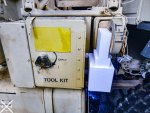
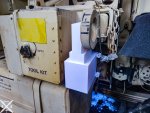
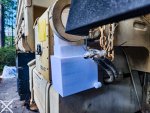
20241006_160815 export.jpg20241006_160818 export.jpg20241006_160828 export.jpg20241006_160836 export.jpg
 

Ronmar

Well-known member
3,881
7,547
113
Location
Port angeles wa
The 90 deg BSPP4-JIC4 adapters make it a pretty compact package. I think it is narrower than the mount tabs, even with the flow control mounted on one side…
found my BSPP leak:) ever miss the old oil filter seal stuck to the filter boss and put on a new filter and seal on top of it:) one of the old BSPP-NPT adapters left behind an aluminum washer and I didn’t catch it. It kept the lock nut on the new fitting from properly compressing the o-ring seal into the groove. Knocked it off and re-installed, No leaks now, just degreaser cleaning off the residue…

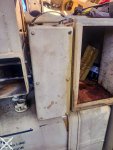
you can see the vented filler in the back and how vulnerable it is…


IMG_3993.jpeg
 

charlesrg

Member
56
43
18
Location
Nj
I've also followed @Ronmar video instructions on the pump upgrade. Alot less complicated than the older system and pretty fast to bring up/down. Thank you @Ronmar for sharing it.

@InvictusDecretum did you order your alternator brackets ? I've the same alternator in a box waiting for when other problems get resolved so I can upgrade mine. For now priority is to resolve oil leak issues. I've also ordered the external regulator for a future LIFEpo4 battery upgrade.
 

InvictusDecretum

Active member
108
210
43
Location
NC
I've also followed @Ronmar video instructions on the pump upgrade. Alot less complicated than the older system and pretty fast to bring up/down. Thank you @Ronmar for sharing it.

@InvictusDecretum did you order your alternator brackets ? I've the same alternator in a box waiting for when other problems get resolved so I can upgrade mine. For now priority is to resolve oil leak issues. I've also ordered the external regulator for a future LIFEpo4 battery upgrade.
I ordered the handpump and fittings/hoses yesterday, just got shipment notification today. Did you use the Metro selector valve Ronmar suggested/specified above ? If so, I'd love to see some pictures of how you did it !

I have not ordered the alternator bracket yet. I needed to take more/verify some caliper measurements of how the belt sits relative to the engine currently and my cab wouldn't lift. Hard to work on alternator when I can't get my cab up :LOL: :LOL: :LOL:

Once I get the measurements I can fine tweak the bracket (mostly need to set the distance from the mounting ear to the edge to line up the pulley), 3D print one to check bolt hole alignment, then I'll order one in metal to actually install. Once it is working and verified, then I will offer them up for sale.

If you're planning on putting in the same alternator, do you also plan on running 2/0AWG (Or bigger) cabling ?
 

GeneralDisorder

Well-known member
Steel Soldiers Supporter
2,076
5,305
113
Location
Portland, OR
Curious as to why you haven't considered a 24v quad-mount (pad mount) alternator like @MatthewWBailey used on his build?

Reportedly a toddler could bolt it up. No modifications required......


His post:


InvictusDecretum

Active member
108
210
43
Location
NC
Curious as to why you haven't considered a 24v quad-mount (pad mount) alternator like @MatthewWBailey used on his build?

Reportedly a toddler could bolt it up. No modifications required......


His post:

BLUF: I don't think a 100A alternator would meet my needs or I would in a heartbeat.

I did look in to pad mounting for cost/simplicity/replaceability starting around post #13/#15 but soon we digressed into discussions on acronyms, initialisms haha.

While I found larger pad mount alternators, I don't think they'd clear the doghouse. I then investigated swung alternators, but didn't find a lot of them. I did find a ton of J180 alternators though, so I went that route.

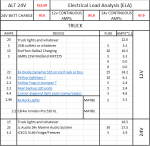
My ELA is still a work in progress, and I can't see myself running all of this all the time (or really at any point), but trying to plan for worst case scenario +20% safety margin. I was searching for a 200A alternator but the brushless version of the one @hike installed is 250A so... can't hurt ? Plus I'm trying to bias idle output vs 2000RPM engine/6000RPM alternator shaft speed output. The BLD4102M "Idle Pro X" series advertise 80% of output at idle speed. Never trust a vendor, but I'd be happy with even 50% at idle.

1728339899766.png

I'm planning on running an EcoFlow Delta2 in the cab now instead of a 600W SAMLEX PSW inverter, but by my back of the excel napkin math, I still need more than 100A.
 

InvictusDecretum

Active member
108
210
43
Location
NC
Manual setup Ronmar specified should be delivered tomorrow. Took about an hour but I got the hydraulic manifold removed and all the lines tagged/bagged.
20241008_155102 export.jpg

20241008_170209 export.jpg

20241008_172109 export.jpg

20241008_171656 export.jpg

Seems like the manual pump will fit well right where the manifold was in a 1/8-3/16" laser cut/CNC bent steel bracket with at least 1/8" clearance between the bed and the pump ears.
20241008_175247 export.jpg
 

charlesrg

Member
56
43
18
Location
Nj
I ordered the handpump and fittings/hoses yesterday, just got shipment notification today. Did you use the Metro selector valve Ronmar suggested/specified above ? If so, I'd love to see some pictures of how you did it !

I have not ordered the alternator bracket yet. I needed to take more/verify some caliper measurements of how the belt sits relative to the engine currently and my cab wouldn't lift. Hard to work on alternator when I can't get my cab up :LOL: :LOL: :LOL:

Once I get the measurements I can fine tweak the bracket (mostly need to set the distance from the mounting ear to the edge to line up the pulley), 3D print one to check bolt hole alignment, then I'll order one in metal to actually install. Once it is working and verified, then I will offer them up for sale.

If you're planning on putting in the same alternator, do you also plan on running 2/0AWG (Or bigger) cabling ?
My parts list: Same as on Ronmar suggested on his video
Code:
  Qty   Item No               Description                                       Amount   
******************************************************************************************
     1  9-3800-4-4            JIC 4M x 1/4 BSPPM CONNECTOR                            3.65
     1  9-3801-4-4            4 JIC M x 1/4 BSPP M 90 DEGREE ELBOW                    4.05
     1  9-8437-15             1.5 CU IN DA WOLVERINE WHP-15-DA HAND PUMP HEAD       160.00
     1  9-8438-60             60 CU IN ALUM TANK WOLVERINE HAND PUMPS WHP-T-60       41.20
     1  9-2404-4-6            JIC 4M x 3/8 NPTM CONNECTOR                             1.60
     1  9-5500-6-4            3/8 NPTM x 1/4 NPTM 90 ELBOW                            2.35
     1  9-7960-4              1/4 NPT 5 GPM PRINCE WFC-400 IN-LINE FLOW CONTRO       29.70
     1  9-5502-4-4            1/4 NPTM to 1/4 NPTF 90 ELBOW                           2.00
     1  9-2404-4-4            JIC 4M x 1/4 NPTM CONNECTOR                             1.00
Screenshot 2024-10-08 204143.png

On the alternator wiring I didn't check what's the current wiring there. But I will sure upgrade if needed. So far I have the BLD4102M alternator (mining version) and 24V converter waiting. I also ordered the external regulator for the alternator as in the future I plan to replace to lithium batteries.

There are others running the same J180 alternators, they are standard and readily available so that's the most reasonable path to go, Here is a picture from an A0
Screenshot 2024-10-08 205404.png from a thread on Facebook. And here an A1 j180.jpganother from another thread.
 

InvictusDecretum

Active member
108
210
43
Location
NC
My parts list: Same as on Ronmar suggested on his video
Code:
  Qty   Item No               Description                                       Amount 
******************************************************************************************
     1  9-3800-4-4            JIC 4M x 1/4 BSPPM CONNECTOR                            3.65
     1  9-3801-4-4            4 JIC M x 1/4 BSPP M 90 DEGREE ELBOW                    4.05
     1  9-8437-15             1.5 CU IN DA WOLVERINE WHP-15-DA HAND PUMP HEAD       160.00
     1  9-8438-60             60 CU IN ALUM TANK WOLVERINE HAND PUMPS WHP-T-60       41.20
     1  9-2404-4-6            JIC 4M x 3/8 NPTM CONNECTOR                             1.60
     1  9-5500-6-4            3/8 NPTM x 1/4 NPTM 90 ELBOW                            2.35
     1  9-7960-4              1/4 NPT 5 GPM PRINCE WFC-400 IN-LINE FLOW CONTRO       29.70
     1  9-5502-4-4            1/4 NPTM to 1/4 NPTF 90 ELBOW                           2.00
     1  9-2404-4-4            JIC 4M x 1/4 NPTM CONNECTOR                             1.00
View attachment 933136

On the alternator wiring I didn't check what's the current wiring there. But I will sure upgrade if needed. So far I have the BLD4102M alternator (mining version) and 24V converter waiting. I also ordered the external regulator for the alternator as in the future I plan to replace to lithium batteries.

There are others running the same J180 alternators, they are standard and readily available so that's the most reasonable path to go, Here is a picture from an A0
View attachment 933137 from a thread on Facebook. And here an A1 View attachment 933138another from another thread.
Mine were 1/0AWG cables with the 100A stock alternator. I feel more comfortable running that amperage with 2/0AWG, and should have less voltage drop as well. This is my go to chart, from Blue Sea, whenever I'm running current carrying wiring.

1728437105775.png

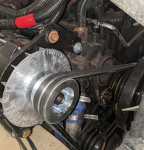
I deleted the PPD and ran ANCOR 2/0AWG Marine Grade Primary Wire all the way to my batt box and crimped on some Selterm 2/0AWG 3/8 Ring Terminals with some generic 10 Tons Yellow Handled Hydraulic Wire Crimpers. Looks a little short here since the alternator we have has connection points in the rear, but it clears the doghouse just fine. Oh the good days when my cab would lift up...

20240928_181815 export.jpg

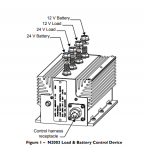
I have an A0.5 so I had a Polarity Protection Device (two high amp diodes potted in aluminum heatsink) like an A0, not a Load Battery Control Device like a true A1 (I have no cannon plug/control harness receptacle). I'm not sure what my CHARGING SYSTEM warning light is connected to, but I found this thread awhile back and intend on giving that a try.

1728436733720.png
 

ckouba

Well-known member
Steel Soldiers Supporter
614
1,750
93
Location
Oregon
If this saves you one trip to CAT to read codes you’ve likely paid for it.
Late to the party on this topic but I can attest, from the experience I had in the backcountry, being able to accurately diagnose what's ailing you and plan your strategy without needing a CAT tech is absolutely worth the investment. I roll with the kit and dedicated laptop in the rig. When I had my issue in Feb while ~1200 miles from home, I was able to have a coherent chat with the CAT tech which cost me $0. I can't imagine that I'd have gotten out of there for less than the buy in for the kit & laptop (~$700 I think) if they had to take the time to hook me up and diagnose. It also gave me the confidence to make an educated decision about heading home or having the work done in the field.
 

InvictusDecretum

Active member
108
210
43
Location
NC
Late to the party on this topic but I can attest, from the experience I had in the backcountry, being able to accurately diagnose what's ailing you and plan your strategy without needing a CAT tech is absolutely worth the investment. I roll with the kit and dedicated laptop in the rig. When I had my issue in Feb while ~1200 miles from home, I was able to have a coherent chat with the CAT tech which cost me $0. I can't imagine that I'd have gotten out of there for less than the buy in for the kit & laptop (~$700 I think) if they had to take the time to hook me up and diagnose. It also gave me the confidence to make an educated decision about heading home or having the work done in the field.
I have no rahgrets about the kit. Not one single letter. Even though fedex wants a direct signature and I'm going to be out of town for 2 weeks, hopefully my wife can sign for it !

Btw what oil cooler did you use for your trans cooler between the frame rails ? Do you remember if the ends are AN-12/JIC12 ?
 

ckouba

Well-known member
Steel Soldiers Supporter
614
1,750
93
Location
Oregon
Btw what oil cooler did you use for your trans cooler between the frame rails ? Do you remember if the ends are AN-12/JIC12 ?
It's the OE cooler for the M1088 and it's been too long to remember the connection... They are enormous though!


I re-oriented it from vertical to horizontal and had new lines made at a local shop. I just took the old ones with me after measuring what I needed for a new length. The cooler is held in place with simple angle iron brackets which are through-bolted at the original hole locations and I replaced the OE fan shroud with a pair of low profile fans and a blocking plate. Without a trailer and 45k+ pounds attached, I don't think there's even a need for a cooler.

There are other pics in my build thread. This was the first one I stumbled across.
 

InvictusDecretum

Active member
108
210
43
Location
NC
It's the OE cooler for the M1088 and it's been too long to remember the connection... They are enormous though!


I re-oriented it from vertical to horizontal and had new lines made at a local shop. I just took the old ones with me after measuring what I needed for a new length. The cooler is held in place with simple angle iron brackets which are through-bolted at the original hole locations and I replaced the OE fan shroud with a pair of low profile fans and a blocking plate. Without a trailer and 45k+ pounds attached, I don't think there's even a need for a cooler.

There are other pics in my build thread. This was the first one I stumbled across.
I'm jealous of quite a few things on your truck, those shocks being one of them ! I've definitely stalked your build thread previously and recognized your name. I'll take a look again. Maybe I'll see one of those M1088 coolers pop up for sale on here or elsewhere for a good price. If not, I'll keep using the stock system until I'm at the point of "nice to have" mods haha.

My straight LMTV doesn't have the worst cooling setup for the trans, I just prefer to run a thermostat into an oil cooler w/ electric fan vs through the engine coolant. Or rather, in addition to, to help it warm up in the cold. Something like:

Trans -> Stock liquid to liquid cooler -> IR-FSX-185 thermostat -> liquid to air plate cooler w/ fan -> trans.

Not sure how many GPM the trans pushes but pretty sure that -16AN thermostat can handle them
 
Last edited:

InvictusDecretum

Active member
108
210
43
Location
NC
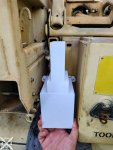
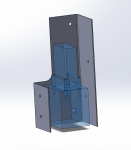
Currently have a prototype of my pump mount on the 3D printer. The Metro Six Port - Two-Position Double Selector Valve will mount on the left where the 2 holes are, which sits below the bed. I didn't model it because the dimensions available for it were... not great. Should be delivered today so I can fit check/model it if I wanted.

1728660331571.png

I'll end up drilling 2 new mounting holes in the toolbox reinforcement plate (that the manifold mounted to) for the prince pump, but it'll use 3 of 4 original mounting holes.

Still need to figure out hydraulic lines and which combination of 0*, 45*, and 90* fittings to use to get there. But all part of the fun
 

GeneralDisorder

Well-known member
Steel Soldiers Supporter
2,076
5,305
113
Location
Portland, OR
My straight LMTV doesn't have the worst cooling setup for the trans, I just prefer to run a thermostat into an oil cooler w/ electric fan vs through the engine coolant. Or rather, in addition to, to help it warm up in the cold. Something like:

Trans -> Stock liquid to liquid cooler -> IR-FSX-185 thermostat -> liquid to air plate cooler w/ fan -> trans.
Are you going to run ECO hubs? If so I wouldn't bother. The cooling system on our trucks is sized for twice as much engine at the "normal" RPM range that ECO hubs run the engine. For my clutch fan to engage on my 370 HP C7 M1079 (21,500 lbs) It has to be at least 75+ degrees outside and I have to be pulling a grade for a while or be really booking it down the freeway at 75+ mph and then it will only come on ONE time when I exit the freeway. The vast majority of the time I never even see the clutch fan engage. I daily drive my truck and I might have my clutch fan come on once a week unless it's 80F+ outside and then maybe it's once a day. The cooling system (including the transmission heat exchanger) is so ridiculously oversized once you put the engine in it's efficient RPM range that I doubt you will ever need an aux cooler. With ECO hubs the transmission is also spinning half speed.
 

Ronmar

Well-known member
3,881
7,547
113
Location
Port angeles wa
Yea the only need for the aux cooler is to dissipate the heat created by the load applied when towing an attached semi trailer In a very hot environment… IE: far more load than the 3 axles could ever bear by themselves… so unless you are towing VERY heavy across a desert, i don’t think you will be able to load the 3 axles heavy enough to need it…

that system has a thermostatic diverter valve that only sends fluid that way when it gets warm enough, the fans are wired to the same control circuit as the engine fan so they run when the engine fan engages…
 

InvictusDecretum

Active member
108
210
43
Location
NC
Are you going to run ECO hubs? If so I wouldn't bother. The cooling system on our trucks is sized for twice as much engine at the "normal" RPM range that ECO hubs run the engine. For my clutch fan to engage on my 370 HP C7 M1079 (21,500 lbs) It has to be at least 75+ degrees outside and I have to be pulling a grade for a while or be really booking it down the freeway at 75+ mph and then it will only come on ONE time when I exit the freeway. The vast majority of the time I never even see the clutch fan engage. I daily drive my truck and I might have my clutch fan come on once a week unless it's 80F+ outside and then maybe it's once a day. The cooling system (including the transmission heat exchanger) is so ridiculously oversized once you put the engine in it's efficient RPM range that I doubt you will ever need an aux cooler. With ECO hubs the transmission is also spinning half speed.
Good point, and over-cooling is a real thing. Has there been many/any reported instances of the fluid->fluid exchanger leaking one fluid into the other ? Coolant into the trans, or vice versa ?

Yessir, EcoHubs are on my shelf awaiting install. And then updating the RPM in the ECM + enable cruise control after that, so speedometer is correct and I can wire in some cruise control switches. Would love to do the 330HP uprate at that time as well.
 

GeneralDisorder

Well-known member
Steel Soldiers Supporter
2,076
5,305
113
Location
Portland, OR
Good point, and over-cooling is a real thing. Has there been many/any reported instances of the fluid->fluid exchanger leaking one fluid into the other ? Coolant into the trans, or vice versa ?
Never heard of or seen a single report of that type of failure. Every one of these trucks I have dealt with has had amazingly clean coolant with little to no corrosion despite probably never being changed - My guess on this is that the cooling system being double the normal size (they basically sized it for a C15 - 15 liter engine) the coolant just naturally has more volume and thus the dissolved zinc anode and corrosion inhibitors don't get "used up" nearly as quickly as they would in other OEM applications with cast iron blocks. Thus the transmission heat exchangers (which are themselves very heavy duty all-metal fabricated units, not the plastic shite found in consumer and commercial applications) don't fail internally due to corrosion. I haven't seen any develop cracks or other issues and have not seen one report of such a failure either. It's not on my radar at all.
 
Top
AdBlock Detected

We get it, advertisements are annoying!

Sure, ad-blocking software does a great job at blocking ads, but it also blocks useful features of our website like our supporting vendors. Their ads help keep Steel Soldiers going. Please consider disabling your ad blockers for the site. Thanks!

I've Disabled AdBlock
No Thanks