• Steel Soldiers now has a few new forums, read more about it at: New Munitions Forums!

  • Microsoft MSN, Live, Hotmail, Outlook email users may not be receiving emails. We are working to resolve this issue. Please add support@steelsoldiers.com to your trusted contacts.

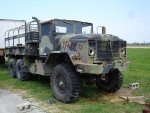
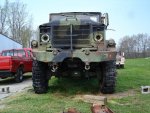
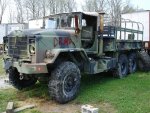
M923A2 came home with me today!

Jetnoise400

Member
238
0
16
Location
Sparks, NV
Hey Chris,

On the hinge, heat might be the answer. Just don't get things too hot! Heat and hammering. I'm not familiar with the configuration of the hinge, but perhaps it would be possible to drill out the pin.. at least enough to get it to move... just a thought. Otherwise, you're back to Kroil and the liberal application of the "linear torque amplifier". Make sure you support the hinge so that it doesn't warp the metal it's attached to while you're hammering on it.

Sorry I don't have any better ideas.
 

steelsoldiers

Administrator
Staff member
Administrator
5,251
3,961
113
Location
Charleston, WV
Thanks Sean. I'll try heat, kroil and BFH. It seems like I saw a hinge pin press in a tool catalogue once. I can't remember where...
 

Recovry4x4

LLM/Member 785
Super Moderator
Steel Soldiers Supporter
34,012
1,804
113
Location
GA Mountains
Chris, heat will be your answer. Those bolts are hardened and take some considerable effort to drill. Devilman did a tech article on the hinge mods he did. I have done a couple of my doors and they work wonderfully.
 

Elwenil

New member
2,190
40
0
Location
Covington, VA
Might try the heat control valve solvent available from GM and Mopar dealers. It's the best at getting loose rusted parts. Mopar part number 4318039.
 

Recovry4x4

LLM/Member 785
Super Moderator
Steel Soldiers Supporter
34,012
1,804
113
Location
GA Mountains
Lanty, I've gone through a half can of GMs Heat Valve Lube with negative results. I still have a few hinges to do myself.

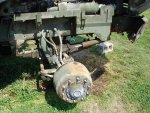
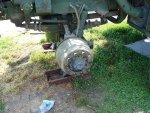
Hey Chris, thought of this earlier and forgot to post it. Why don't you strip the locknut off the RF spindle so that you can get the left side together. You can add the 2 nuts your getting later. At least at that point you can have the wheels on and only have to lock the nuts down and install the drive flanges. Can't drive it that way but you sure can get closer.
 

steelsoldiers

Administrator
Staff member
Administrator
5,251
3,961
113
Location
Charleston, WV
Good thunkin Kenny! I should have thought of that by now, but I guess I had a bunch of other stuff to do anyways ;) It was a busy saturday for me. The weather was beautiful and contributed to a nice sunburn on my back and neck. I'm like a Quizno's sub, toasty!

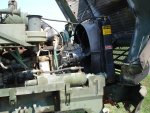
I did find out that the diffs and t-case were still full of hypoid gear oil. I figured they would be drained like the engine and tranny. Hmmph. The oil is real clean too! Looks fresh, maybe serviced before take out of service :) I'll run it for a little bit and then change it to be sure.

I got the stone shield mounted back over the ram hoses so the pass side is done. I found a busted air line when I took the spare tire off the back so I replaced that with one that I'd got from Winslow's. I got the driver's hub fully assembled except for the nuts and washer. I ran the truck for about 20 minutes while slowly adding Dexron to the top off the tranny. It took almost 5 gallons to fill that pig up. Sheesh. I uncaged the spring brakes and tested the parking brakes and service brakes. I held the brake pedal down and and shifted the tranny from N to R to N to 5-1 and it engaged just like it should have. I think all that is left is the hub nuts, putting on the front wheel/tire combos, hooking up the front wheel CTIS valves and putting on the driver's door. I should have it driving on Wednesday!!!

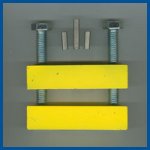
Sean, thanks for the links. That's not quite it. It looked like a stout C-clamp with a drift to press the pins out using a socket.
 

Recovry4x4

LLM/Member 785
Super Moderator
Steel Soldiers Supporter
34,012
1,804
113
Location
GA Mountains
Screamin right along there Boss! You're gonna be happier than a pig in slop come the end of the week. Thats a bad arse ride and by doin it up yourself, you should be way ahead of the cash curve. Can't wait to see it in person.
 

cranetruck

Moderator
Super Moderator
Steel Soldiers Supporter
10,350
75
48
Location
Meadows of Dan, Virginia
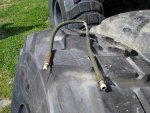
Chris, those fittings are reusable and you can probably use copper lines if you can't find the right plastic ones. The ferrules would have to be replaced that's all.
 

steelsoldiers

Administrator
Staff member
Administrator
5,251
3,961
113
Location
Charleston, WV
Thanks Kenny. It's definitely a cash saver and very satisfying to do it yourself, as you well know ;)

Bjorn, thanks for the tip. I save the fittings for later. I had a hose I pulled out of a junker. It was about twice as long, which was good since it got it out of harm's way. My local Napa sells a lot of big truck parts so they have a nice selection of air fittings, air brake parts, valves, etc...

Thanks Joel. That looks like it would work. I might try heat and beat first.
 

steelsoldiers

Administrator
Staff member
Administrator
5,251
3,961
113
Location
Charleston, WV
Major league excitement yesterday afternoon. I took Kenny's advice and installed the lock nut from the right side on the left spindle and mounted up the tires and wheels. I checked all fluids and fired it up. I let the air pressure build and then slipped it into 1-5. I felt the tranny engage so I gave it a little throttle. It lurched forward under its own power for the first time in a LONG time. I tried R and then back to 1-5. Everything seemed to be working right so I took off down the dirt farm road next to where I have been working on the truck. I just kinda loped around a little getting the feel of the big beast. Finally I found a nice straight stretch of dirt road and hammered down on it a little bit. It really felt quite sporty. It kinda lugs right off the line but as soon as the turbo starts to spool, hold on to your hats, because that sucker is quick. The trasmission shifts nice and smooth under full throttle. No bang shifts, just a smooth gear change. I only had enough room to get it up to 2nd gear and about 20 mph. Woo-hoo!!

Now for the bad news, when I was installing the CTIS valve on the left front wheel, the valve stem cracked right after the last thread. Dang! Now I've got to get that replaced. It should be fun getting that wheel apart to replace the stem :(

The CTIS is still unhappy because the hub seals in the left front are shot. Every time the computer checks the pressure, the knuckle boot inflates a little bit and air escapes from the knuckle vent. Sheesh, that should be fun. The hub has to come off again and the outer race has to be driven out. Then, there is a big snap ring that has to come out and then the seals can be tapped out. Yippee ;)

I'll try to post some pics of the assembled truck later today. Hopefully I'll get a video of it next week when I can get someone to hold the camera.
 

steelsoldiers

Administrator
Staff member
Administrator
5,251
3,961
113
Location
Charleston, WV
Just a small snafu this time Jed. The news could have been a lot worse, like a burned up Allison ;) I should have the valve stem fixed next week. The hub seals are fairly cheap, just a lot of work to put in :roll:

Good luck getting your deuce moving!

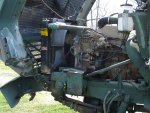
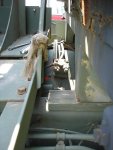
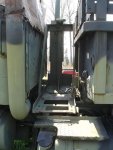
Here's a couple of the latest pics right before the test drive:
 

Attachments

maddawg308

Well-known member
Steel Soldiers Supporter
10,857
734
113
Location
Front Royal, VA
That beast is going to be too cool at Aberdeen! Leave that "DRMO" in red on the side, looks like a badge of honor to be wearing that, yet in driving condition!
 

steelsoldiers

Administrator
Staff member
Administrator
5,251
3,961
113
Location
Charleston, WV
Chris' M923A2, starring in the 2007 rendition of "The Scarlet Letters." :) The truck was painted with a red DRMO to show its shame, but yet it fought back and became a running and driving example for the rest of the near-residue trucks in the tall grass on the GL lot.
 
Top