• Steel Soldiers now has a few new forums, read more about it at: New Munitions Forums!

  • Microsoft MSN, Live, Hotmail, Outlook email users may not be receiving emails. We are working to resolve this issue. Please add support@steelsoldiers.com to your trusted contacts.

My m925a1 build "Brutus"

muthkw25

Well-known member
Steel Soldiers Supporter
498
617
93
Location
Sayre, PA
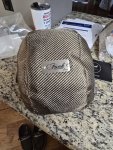
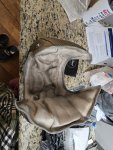
I also bought one if not the nicest turbo blanket on the market. It's made by Funk Motorsport. They make a blanket for a T6 flange turbo. Very high quality. Hoping this will help keep the heat out of the engine bay, and improve performance a tiny tiny bit. Plus it looks cool.

They also sell tons of stuff to reflect heat, or contain heat. Highly recommended company.

I'll be adding this on after firing the truck up for the first time.

Next step is to finish the air intake side with the after cooler, piping, boost gauge and injectors. Hopefully it will be together and running soon.
 

Attachments

muthkw25

Well-known member
Steel Soldiers Supporter
498
617
93
Location
Sayre, PA
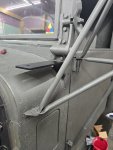
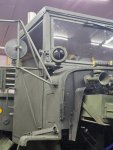
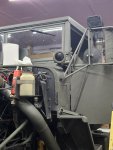
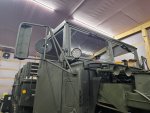
Installed some "ditch light mounts" that were made by lpcoatings. He can make these for anyone running a 900 series 5 ton. They are heavy duty and beefy. Lazer cut. Great man. Message him for some. They are very reasonably priced. Plan is to mount a 2nd set of armor lights. Im going to see about running some amber tint on them to help with visibility in fog or rain or snow. If it works I'll tint the front fogs as well. They are also long enough so the windshield can still open. Looks factory.
 

Attachments

Superthermal

Well-known member
Steel Soldiers Supporter
326
887
93
Location
Utah, Murray, United States
Installed some "ditch light mounts" that were made by lpcoatings. He can make these for anyone running a 900 series 5 ton. They are heavy duty and beefy. Lazer cut. Great man. Message him for some. They are very reasonably priced. Plan is to mount a 2nd set of armor lights. Im going to see about running some amber tint on them to help with visibility in fog or rain or snow. If it works I'll tint the front fogs as well. They are also long enough so the windshield can still open. Looks factory.
Nice addition! Back when I had my FJ40 I had mounted a pair of spot lights on the windshield frame so the center output on the light was just an inch or two above my eyes forward vision level. This made it so there were no shadows. I had a friend gift me two of those exact lights and mounts to me for my BOT. I haven't mounted them since I have no 12v circuit to power them with but I am definitely looking forward to having that vision again. You are going to love having the extra lights! Very worth the trouble to wire them carefully.
Your build is excellent! Very nice rig.
 

muthkw25

Well-known member
Steel Soldiers Supporter
498
617
93
Location
Sayre, PA
Nice addition! Back when I had my FJ40 I had mounted a pair of spot lights on the windshield frame so the center output on the light was just an inch or two above my eyes forward vision level. This made it so there were no shadows. I had a friend gift me two of those exact lights and mounts to me for my BOT. I haven't mounted them since I have no 12v circuit to power them with but I am definitely looking forward to having that vision again. You are going to love having the extra lights! Very worth the trouble to wire them carefully.
Your build is excellent! Very nice rig.
Thanks Superthermal! I'm running a LED PAR36 bulb. So I won't have issues wiring them up. I won't have a high/low feature but it will work with 12 or 24 volt. I have to make a slight modification to get the terminals to work with the new bulbs but the led bulbs I have are aircraft landing bulbs so they are a tad brighter than the stock setup haha. I'll have to figure out where I want to adjust the bulb after they are wired up. I usually try to aim them at 11 and 1 o'clock. Might try 10 and 2 depending on how it looks.
 

muthkw25

Well-known member
Steel Soldiers Supporter
498
617
93
Location
Sayre, PA
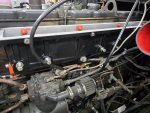
Got the coolant lines all finished up connecting to resevoir. New silicone line from filter to the block needed to fit around the turbo. Got the 2-90 degree elbows off the turbo done. Needed a 5" exhaust piece 6" long.

Decided to get the aftercooler installed. This has been a nightmare. The 925 does not have alot of room with the engine back in the doghouse. I decided to keep the bottom and top of the aftercooler separate to reduce weight when trying to line everything up. If I did it again, I'd make sure it's totally assembled before putting on the block. The extra weight isn't fun but trying to line a gasket up that's shifting when putting the top piece on isn't fun. Added some rtv to help gasket stick. Will get the top on tomorrow. If I can get this on I'll get a video of the trucks first start up before I do the Injectors. Been dying to hear it rip.

If I did this again for a 900 series truck, grab one of the intakes from big cam II or a ntc90 intake. It looks just like the 250 but has 2 ports on top that can be used. So you still have the "w" shaped intake, less weight, and easier to install. Here's a picture of the intake you should consider if doing a turbski build.

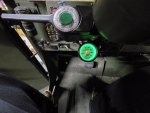
Also put the boost gauge cup on the steering column and got the green 24v bulb installed the autometer gauge. Going to work on the wiring once I get the rest of the piping figured out. I'm hoping to see about 8-10lbs boost.
 

Attachments

muthkw25

Well-known member
Steel Soldiers Supporter
498
617
93
Location
Sayre, PA
Got the truck fired up today! Got the aftercooler installed. Got all the plumbing done. Video link is first start up. Didn't put new injectors in yet because I wanted to drive the truck on Thanksgiving because my nephew and ran out of time today. Didnt finish boost gauge and or the catch can but those are simple things. Overall very pleased with sound.


Attachments

muthkw25

Well-known member
Steel Soldiers Supporter
498
617
93
Location
Sayre, PA
Welp. I have a minor setback. Truck was warming up to put heat in it and burp the coolant. Truck was running about 20 to 30 mins. It was dark and my girlfriend wanted me to take it out but I told her I want to wait and get the boost gauge and other stuff done before taking a first journey. I felt it wasn't ready yet. Next thing she says is you have a big leak. I run to the passenger side and there's coolant misting everywhere. I shut the truck down because I can't find where the leaks coming from.

Turns out either the water pump seal, the pump, or both failed. The photo shows the water stream. I have a video below of the leak. No worries. I'll order a new water pump and change all the belts while I'm in there and keep working on it.

I was very blessed this happened in a well lit garage and not on the road in pitch dark. Thank the Lord he was watching over me during this.

Trucks 40 years old. Not a bad thing to replace anyway.


Attachments

Mullaney

Well-known member
Steel Soldiers Supporter
Supporting Vendor
7,865
20,094
113
Location
Charlotte NC
Welp. I have a minor setback. Truck was warming up to put heat in it and burp the coolant. Truck was running about 20 to 30 mins. It was dark and my girlfriend wanted me to take it out but I told her I want to wait and get the boost gauge and other stuff done before taking a first journey. I felt it wasn't ready yet. Next thing she says is you have a big leak. I run to the passenger side and there's coolant misting everywhere. I shut the truck down because I can't find where the leaks coming from.

Turns out either the water pump seal, the pump, or both failed. The photo shows the water stream. I have a video below of the leak. No worries. I'll order a new water pump and change all the belts while I'm in there and keep working on it.

I was very blessed this happened in a well lit garage and not on the road in pitch dark. Thank the Lord he was watching over me during this.

Trucks 40 years old. Not a bad thing to replace anyway.

.
For sure! In a lighted garage is Soooooo much better than on the side of the road. In the dark. Without enough tools to work the problem...
 

muthkw25

Well-known member
Steel Soldiers Supporter
498
617
93
Location
Sayre, PA
While waiting for the water pump, I decided to get the boost gauge installed. Uses the same ultra comp series as the speedometer. As gauges fail I'm switching to this series. Love the nice bright colors but it's not blinding while driving.

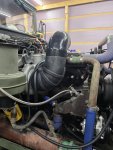
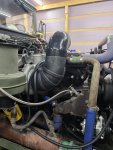
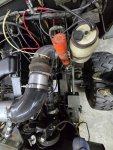
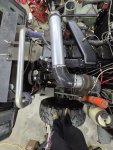
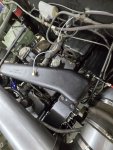
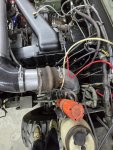
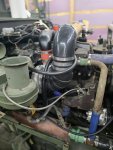
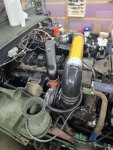
The next few photos show the 90 degree elbow and the intake pipe going over the aftercooler. I didnt want to weld or cut anything so everything is bolt on. Decided to use the flex rubber connecter that was originally used to connect to the 250 intake manifold. Put a 6" adapter in place and then a 90 degree silicone boot to go over the engine. The piece over the engine is 2ft long, then connected to a 90 silicone elbow and an adapter to a 90 degree 5" to 5.5" for inlet of turbo.

Got the methanol kit installed. Running a 4gph jet with 1 solenoid. Will see if this makes a difference now running a turbo. A 3gph nozzle did nothing when naturally aspirated. I doubt 4 will do alot but one way to find out.

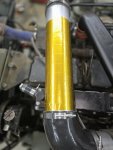
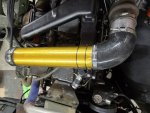
I added the gold reflector wrap from Funk Motorsport. I ordered the turbo blanket from them and this wrap is suppose to reflect heat away. I thought I'd add some bling and try to keep some of the heat from getting into the crossover tube. I ran out of the roll as I neared the end but I had all ready ordered a second roll so I'll have some extra if needed.

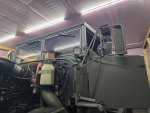
Other photos show the passenger side view with everything attached.

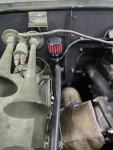
I decided to mount a catch can for the crankcase. I originally thought about having a welded bung put in the exhaust and burning it but I wanted to keep an eye on it. Decided to just run one and it will dump down below the front axle. I can keep an eye on it, monitor it and drain the catch can after a few runs.

Next is looking at the armor lights. I just sat the armor lights in position to see what they'd look like at a distance. New bulbs aren't in yet. Plan is to tint them yellow and see how it looks. If it works well I'll tint the fog lights to help with visibility.
 

Attachments

muthkw25

Well-known member
Steel Soldiers Supporter
498
617
93
Location
Sayre, PA
Got the wires run today for the ditch lights. Bulbs came in but the amber tint didn't. Waiting to assemble them until the tint is here otherwise I'm taking the bulbs out again.
Waiting on water pump. Next is to start taking the water pump out so I can prep it for the new one. Picked up belts at napa. Figured I'd better swap some out while I'm in there. Can't hurt or if the belts look good I'll just have some as spare parts.
 

muthkw25

Well-known member
Steel Soldiers Supporter
498
617
93
Location
Sayre, PA
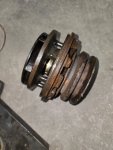
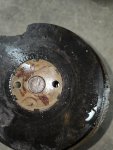
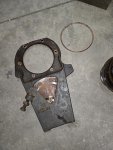
Got the water pump off. Not terrible. Doing the mrap radiator and a different cross over pipe gives you more room to work on stuff. Took the fan off and the bracket, etc. Not bad for first time. Got more coolant out. The water pump is definetly shot. New one should be here hopefully tomorrow and I can get it back together and take it for a test drive.
 

Attachments

muthkw25

Well-known member
Steel Soldiers Supporter
498
617
93
Location
Sayre, PA
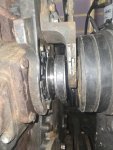
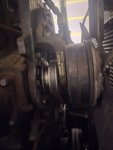
I got the water pump in. The video shows the eccentric design in case someone here wants to see what it looks like and how you use the design to tension the belts.


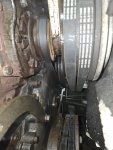
Put some antiseize on the lip where the copper gasket goes and on inside bracket that holds the pump in place. Helps with trying to put tension on the belts. Decided to also replace all the belts while in there. Glad I did. There was some wear on the air fan clutch. Bought 6 new grade 8 hardware bolts- 3/8-24 thread. Torqued the bolts to 30ftlbs.

The fan clutch is not light and awkward. Girlfriend held the bottom while I got the bolts started. Got it buttoned up.
 

Attachments

muthkw25

Well-known member
Steel Soldiers Supporter
498
617
93
Location
Sayre, PA
Got the truck fired up and started trying to burp the air out of it. Used the petcock on the heater core for some of it. Didn't realize how much air this thing traps. Here's a video of some baby revs of the engine up to 1500 or 1700rpms. Nothing crazy but I wanted to hear her whistle.


muthkw25

Well-known member
Steel Soldiers Supporter
498
617
93
Location
Sayre, PA
I decided to remove the ether water sensor on the water manifold to try and burp more air out of the system. I got a ton of air out. Since I disconnected the ether, I decided to remove it entirely and put a 3/8" npt pipe plug in. Was able to add some coolant directly into the water manifold. After getting the air out I added another 4 gallons of coolant. Ran the truck in the garage at different rpm ranges to get the water temp up to 170 or so.


Last edited:

muthkw25

Well-known member
Steel Soldiers Supporter
498
617
93
Location
Sayre, PA
First test drive! Long time coming. Couldn't wait to get it out and see what Brutus can do. Took it nice and easy for a few miles to see how it all worked. So far I'm super impressed. I did notice a small power gain. I didnt do the injectors yet but there is a tiny bit of gain.

It's quieter in the cab over the aftermarket muffler. I think raising the stack 15" above the cab made a big difference. I could have added an extra ft or so and would still clear the shop door but overall I'm happy with the sound in the cab. With windows down the whistle is lovely but not ear piercing, has a real nice sound. I notice it's easier to get up to speed and maintain speed.

The extra power is nice but the biggest gain was the drop in egts. I noticed a 300 degree egt temp drop on average. And this is with the probe on number 6 cylinder verses just in the manifold at the junction between the front and rear heads. Truck use to cruise at 1000 alot of the time, now it never breaks 800 on hills with foot in it. The truck at 50mph on the flats is sitting at 600 when maintaining speed at 1450 rpms. Truck just cruises. In fact the truck runs cooler now then it did with the 14r20s that came with the truck.
Not working as hard, cooler temps and a nice whistle is exactly what I wanted.

I am running a #27 button and pump rebuilt by premco. Once I add the 10% over injectors I'm hoping I'll gain a little bit more power and still keep the temps at bay.

Here's the first video drive.


muthkw25

Well-known member
Steel Soldiers Supporter
498
617
93
Location
Sayre, PA
After some consideration I decided to change up the ditch lights. The bulbs are great but not being able to aim the lights is not helping with ditch lights. I thought there would be more residual light shining down on the ground but turns out there's not as much as I hoped for.

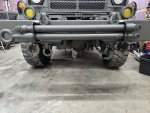
I've decided to mount the other armor lights on bottom of bumper. I'll have them on a switch so I can run with low beams or high beams. I'm getting a set of different led lights for the ditch lights that I can aim. Gives me more options.

I did decide to tint the fogs on the truck and I'm happy with the look and color. The color is a nice yellow. Ill be adding yellow to the bottom armor lights as well for help in fog, rain and snowy conditions. When the tint comes in I'll mount them up.


I just want to thank The Lord for blessing me and allowing me to financially be able to be in this hobby and work on Brutus. He's blessed me countless times over and the Glory is owed to Him.

I also want to thank one of my best friends Jim for helping me with this turbo project. Without his experience and help on this project Brutus would not be where he is today.


More to come with the injectors soon.
 

Attachments

muthkw25

Well-known member
Steel Soldiers Supporter
498
617
93
Location
Sayre, PA
Finished wrapping the intake cross over tube with the gold wrap. I also got the ditch lights mounted. Will angle them after getting the truck outside to see where the lights are best utilized.

Got the tint for the other armor lights. Will mount and wire up tomorrow.
 

Attachments

muthkw25

Well-known member
Steel Soldiers Supporter
498
617
93
Location
Sayre, PA
Got the last set of armor lights installed and wired up. Bottom set comes on a switch. The top ones come on with the high beams. With just the fogs I have 8000+lumens, not including high beams or ditch lights. Each fog is an aircraft landing bulb. Not too shabby. I used lamin-x yellow tint sheets. Thick material. Not terrible to apply. Will see how long it lasts. If it peels back or doesn't last I'll update everyone.
 

Attachments

Top
AdBlock Detected

We get it, advertisements are annoying!

Sure, ad-blocking software does a great job at blocking ads, but it also blocks useful features of our website like our supporting vendors. Their ads help keep Steel Soldiers going. Please consider disabling your ad blockers for the site. Thanks!

I've Disabled AdBlock
No Thanks