• Steel Soldiers now has a few new forums, read more about it at: New Munitions Forums!

  • Microsoft MSN, Live, Hotmail, Outlook email users may not be receiving emails. We are working to resolve this issue. Please add support@steelsoldiers.com to your trusted contacts.

My new 1992 M998 Avenger

TOBASH

Father, Surgeon, Cantankerous Grouch
Steel Soldiers Supporter
Supporting Vendor
3,582
3,490
113
Location
Brooklyn, NY
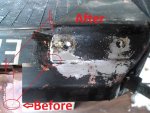
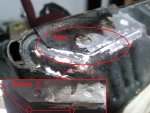
I hope you're correct. I though my radiator was good, but I decided to swap it out. That is when I found the two tiny punctures.

I will send the old one out for a re-core, but I'm glad I changed it out.

I really hope you have better luck, but these are old used military vehicles that were rode hard and put to bed wet.

Best,

T
 

Milcommoguy

Well-known member
Supporting Vendor
1,710
2,265
113
Location
Rosamond, CA
This is a dying art. Coupled with federal, state and local regulations of chemicals and processes used... I am surprised one could find a shop willing to mess with it. Uses to have a radiator row, shops side by side years ago in town. Two day turnaround. Came out like brand NEW, tested, painted. The roar of the hot tanks, smells, and the old guys that worked with fire like a paint brush. All gone now.

Brass and copper BIG bucks at the scarp yard.

Living in a plastic world, with a heavy metal truck, CAMO
 
Last edited:

springer1981

Well-known member
844
1,150
93
Location
Maine
It wasn't easily repairable for the radiator repair guy !
He didn't put any effort into it. I'm afraid it was just a quick buck and he over charged for the little work he did. Obviously, had I known that was going to happen I would have just done it myself to begin with. I am not afraid to do it and do it right. I just didn't want to do since I had enough other stuff going on. But as they say, you want something done right, do it yourself.
 

springer1981

Well-known member
844
1,150
93
Location
Maine
This is a dying art. Coupled with federal, state and local regulations of chemicals and processes used... I am surprised one could find a shop willing to mess with it. Uses to have a radiator row, shops side by side year ago in town. Two day turnaround. Came out like brand NEW, tested, painted. The roar of the hot tanks, smells, and the old guys that worked with fire like a paint brush. All gone now.
Yep, I remember those days and is one of the reasons I looked for a radiator shop, it was even old school. I'd take it back but I can already see the type of work he does so no reason to expect it would be any better than the first time.

I posted the pictures to document what I do on this HMMWV. I'll either wreck it or it will be amazing LOL, either way I'll post the pictures and keep on going.
 

osteo16

Well-known member
Steel Soldiers Supporter
585
585
93
Location
Evansville, IN
This is a dying art. Coupled with federal, state and local regulations of chemicals and processes used... I am surprised one could find a shop willing to mess with it. Uses to have a radiator row, shops side by side year ago in town. Two day turnaround. Came out like brand NEW, tested, painted. The roar of the hot tanks, smells, and the old guys that worked with fire like a paint brush. All gone now.

Brass and copper BIG bucks at the scarp yard.

Living in a plastic world, with a heavy metal truck, CAMO
Dying art may be one thing, but doing a competent job is another.. I think its bull$hit to have paid for a service and not get a satisfactory result. Don't accept a challenge unless your gonna fulfill it. This kinda crap irks me ..😒
 

springer1981

Well-known member
844
1,150
93
Location
Maine
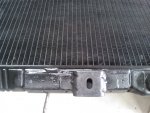
Radiator DONE. These pictures focus on the areas shown in the pictures I previously posted. I fixed every corner and mount on the radiator. It's all painted and ready to be installed. If I can find a pressure test kit (I think I have one somewhere) I will test it before I put it in.

Here's the bracket that was about 1/4" offset.
rad9.jpg


Here's the one that wasn't soldered.
rad10.jpg


And here's the bottom mounting bracket. All straightened and soldered back on. Here it is after paint.
rad11.jpg
 

springer1981

Well-known member
844
1,150
93
Location
Maine
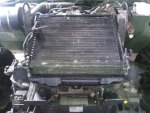
Got the radiator stack back together. Replaced all the cooling hoses and replaced the lower metal cooling line with a stainless steal replacement. I deceided to replace the two side radiator supports, the rubber bushings are shot and the supports have a fair amount of rust.

rad12.jpg
 

springer1981

Well-known member
844
1,150
93
Location
Maine
With the radiator all mounted and new supports I still have to fill it and pressure test it. I also have to fill the power steering and bleed it now that the lines are hooked up to the winch. Then the nose goes back together.

In the mean time I have been working on a rear view camera. The previous owner put in a really cheap backup camera and 7" monitor screen. I pulled that out and trashed it. I picked up a much nicer camera that has a review mirror type display. I set it up to test it and see how it works. I played with different mounting locations for the camera and the display. I haven't figured out where the display is going but I did pick a location for the camera.

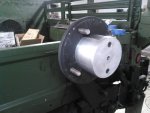
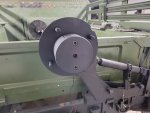
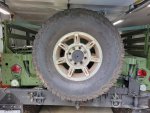
The best rear camera view I found was from the center of the spare tire carrier. I couldn't simply stick the camera in there, it has to look like it belongs there. I decided to make an insert to fill the center of the tire mount to house the camera. The finished mount will be painted black to match the spare tire carrier.

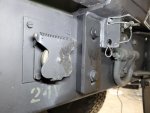
Even though I plan on owning this Humvee for a long time I wanted any modification I made to be reversible. In the center of the spare tire mount is a stamped in NSN number. I made sure that in the event I wanted to reverse this I could weld up the holes and not damage the NSN number.

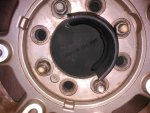
Here is the spare tire mount and you can see the NSN number.
camera.jpg


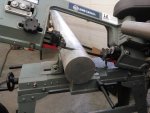
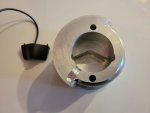
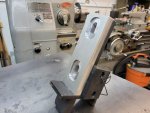
The camera housing starts with a 5" diameter 3.5" long chunk of aluminum
camera1.jpg
 

springer1981

Well-known member
844
1,150
93
Location
Maine
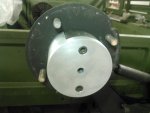
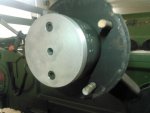
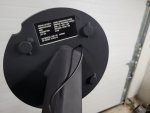
After some machining the housing fit in the center of the mount nicely. The bolts are at 12 and 6 oclock which is above and below the NSN. The center hole will eventually be the camera lens.

camera2.jpg

camera3.jpg

camera4.jpg
 

springer1981

Well-known member
844
1,150
93
Location
Maine
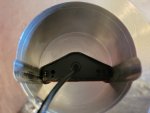
Got a chance to work on the camera mount again. I had to open up the back and fit the camera.

cam5.jpg

cam6.jpg

The lens lined up perfect. Once the paint sets up i'll finish assemble it and mount.
cam7.jpg
 

TOBASH

Father, Surgeon, Cantankerous Grouch
Steel Soldiers Supporter
Supporting Vendor
3,582
3,490
113
Location
Brooklyn, NY
Nice work(!), but why not just make it out of hard rubber or plastic or fiberglass or bondo. Easier to shape and form and machine and still will last a lifetime.

IMHO
 

springer1981

Well-known member
844
1,150
93
Location
Maine
Nice work(!), but why not just make it out of hard rubber or plastic or fiberglass or bondo. Easier to shape and form and machine and still will last a lifetime.

IMHO
Thanks, I have the Aluminum and the machines to work it. Also the spare tire/rim slides over it, plastic, fiberglass or bondo (??) would be easier to damage, crack, break, chip etc. Find a piece of rubber that size to work with and it isn't easier to work than the Aluminum. The Aluminum should protect the camera better and be more durable. Plus it matches the rest of the truck.
 

springer1981

Well-known member
844
1,150
93
Location
Maine
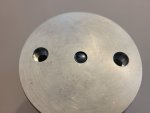
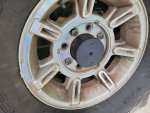
Here's the finished camera mount. The camera is sealed around the lens with silicone and held in place with silicone and some double sided tape. It's also sealed to the tire mount. Once it is hooked up and all working I'll use a little silicone to seal around the wire.

cam8.jpg

20210528_103143.jpg
 

springer1981

Well-known member
844
1,150
93
Location
Maine
While putting the radiator back in I also changed the start box to a smart start. Today I filled the antifreeze/coolant and topped off the power steering fluid then hooked up the batteries. And went to start it. Put the key in the on position and the wait light flashed for a second and went off. I waited for a few seconds and turned it over. Just spun with no start. I turned the key off and back on a few times and after a few minutes it finally kept the wait light on. When it went out the engine just turned over and again no start. I gave it a few more minutes to charge the batteries. I turned it back on and the wait light was on for a couple seconds and went out. I turned it over and it started finally. I let it run for a while and warmed up the engine looking for any leaks. I turned it off and let it sit for a few minutes and then went to start it again. Turned it on and the wait light didn't come on but it started right up.

I'm not sure if all of that is expected behavior with the new smart start box. I'm guessing it wouldn't start the first few times for low battery voltage even though the engine turned over easily.

I did warm it up and no leaks. I also checked the fan clutch operation and it was working properly. Probably the first time in many years it worked. The new gauges all worked properly. Overall it was a success so now I can put the rest of the front end back together.
 

springer1981

Well-known member
844
1,150
93
Location
Maine
The spare tire mount isn't parallel with the bumper so the camera points at an angle to toward the driver side. To fix that I made a spacer for the bumper bracket that holds the tire carrier at rest. Now the tire and the camera are parallel to the bumper.

cam12.jpg

cam13.jpg
 

springer1981

Well-known member
844
1,150
93
Location
Maine
Your work is outstanding.

Are you running H2 rims? How do you like them?
Thanks, yes I am running the H2 rims. I have mixed feeling on them and kind of wish I hadn't sold the stock rims. I have no complaints because the H2 rims do exactly what I wanted, better street tires in a more common size and less weight. 37x12.5x17 But I prefer the look of the original rims and the function of run flat with bead locks for off road. Since I wont likely be doing any hard core off road the BFG All Terrain tires will likely do everything I need and more. I do plan to paint the rims black at some point so the aluminum look goes away.

I went with the H2 rims because the offset was pretty close, the tires are moved outward less than an inch. And I found a good deal on a set of 5 with new BFG's. Someone before me was running them on a GM or Ford and opened up the centers so they fit right on. The stock lug nuts don't work well with the tapper in the aluminum wheel. I found some Dodge Truck lug nuts that work much better but use a different size socket. The originals are 13/16" and the Dodge are 3/4". I still need to replace the 4 lug nuts on the spare tire.
 

Awol

Well-known member
535
527
93
Location
MA
Awesome thread!

I remember back when this truck was for sale. I was super tempted, but just couldn't swing it at the time. I'm glad someone on here ended up with it, and it's getting the attention it deserves.
 
Top