One of the most laughable design aspects of the M1079 is the silly intake fan in the hab.
This is the 4"x4" hole the Army made for air to come in:

This is the 9"x9" fan in the 12"x12" box that the Army made to push air in the 4"x4" hole:

This is the 10,000 cu/in box the Army made to hold the 12"x12" box that holds the 9"x9" fan that blows air in the 4"x4" hole:

The problem is, the whole thing doesn't work. The fan is mounted in such a way that it's so close to the 4" hole that only the center hub (that doesn't turn and blocks air) is exposed. Thus less than 25% of the fan's potential air flow is available. And it's such a waste of space.
The Hunter heater (opposite side of the truck) fits tight in it's nook with no wasted space. Very efficient. I get that.
The center section is pretty much wide open so as to allow a number of large A/C systems. I get that.
But what in the name of FJB were they thinking when they designed the intake fan system? So much wasted space and a critical item that basically doesn't work.
Anyway, it's all in my scrap pile now...
I'm not sure what all I will do with the space. I've seen the two cubbies made into stowage in various floorplans. But in my case it's over the bed, so not exactly easy-access stowage. I'd move the a/c to where the heater was but the TV pretty much blocks that space so I'm not certain that's the best idea (no worse than having the heater blowing on the TV, though).
The BIG box that the tiny fan came out of would make for a good external storage spot. Lots of room. too. But that my become my drone hangar.
I'll re-task the 8" 120v fan to push air into the generator enclosure when it's running.


 101.8 KB Views: 2
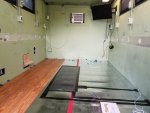 122 KB Views: 2

")


