• Steel Soldiers now has a few new forums, read more about it at: New Munitions Forums!

  • Microsoft MSN, Live, Hotmail, Outlook email users may not be receiving emails. We are working to resolve this issue. Please add support@steelsoldiers.com to your trusted contacts.

Was looking for a shop in or near Milwaukee to work on M1008; then did it all myself!

retro_life

Well-known member
243
629
93
Location
Los Angeles, California
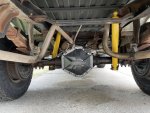
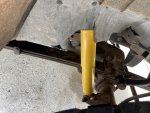
Just got back from a quick drive and WOW night and day difference. The truck not only rides way better but also feels more stable. Now when I hit bumps it’s a firm but smooth feeling instead of a jolt. My dash isn’t shaking and making noise whenever the road is uneven. Also I did some hard braking and the shaking in my steering wheel is gone. That’s probably a combination of the new shocks and the new steering stabilizer. I’m super happy!
C790031B-2FB8-4343-8177-173F19A58C31.jpeg3CBF49AA-D141-40FA-BD44-44B4CCAF569F.jpeg
 

ezgn

Well-known member
650
1,039
93
Location
Lake Elsinore Ca.
Just got back from a quick drive and WOW night and day difference. The truck not only rides way better but also feels more stable. Now when I hit bumps it’s a firm but smooth feeling instead of a jolt. My dash isn’t shaking and making noise whenever the road is uneven. Also I did some hard braking and the shaking in my steering wheel is gone. That’s probably a combination of the new shocks and the new steering stabilizer. I’m super happy!
View attachment 840839View attachment 840840
Awesome!!
 

ezgn

Well-known member
650
1,039
93
Location
Lake Elsinore Ca.
I was just looking at the pics and I realized that the top of the shock has a bit longer sleeve on one side and I installed it outwards… is that incorrect? does it even matter? It would only be a few mm difference if I flipped it around.
View attachment 840849
I think your fine, I think that the metal bushing will seat in the same from either direction
 

retro_life

Well-known member
243
629
93
Location
Los Angeles, California
I think your fine, I think that the metal bushing will seat in the same from either direction
Ok great because I wasn’t really wanting to mess with them again lol. The first one I was installing extended out much faster than I thought it was going to when I cut the strap and it was quite a workout to compress it back in. Also I think that sleeve being outward is probably better for the lock washer to sit on.
 
Last edited:

retro_life

Well-known member
243
629
93
Location
Los Angeles, California
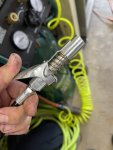
I got the Lock N Lube fitting for the grease gun today. I was able to finish lubing the front end and it made the job so much easier and faster. Every grease gun should probably have one of these things on it. You don’t wanna break a zerk like I did! Instead of the zerk popping into the grease gun like a ball joint, there are these spring loaded jaws that come out of this thing and hook onto the zerk. When you’re done greasing you just press it down again and the jaws release from the zerk and it comes right off.

4F775350-317B-4BA5-9F6F-3C2D2478BDBA.jpeg
 

chevymike

Well-known member
597
463
63
Location
San Diego, CA
I got the Lock N Lube fitting for the grease gun today. I was able to finish lubing the front end and it made the job so much easier and faster. Every grease gun should probably have one of these things on it. You don’t wanna break a zerk like I did! Instead of the zerk popping into the grease gun like a ball joint, there are these spring loaded jaws that come out of this thing and hook onto the zerk. When you’re done greasing you just press it down again and the jaws release from the zerk and it comes right off.

View attachment 840869
Yep, got mine years ago and it works very well. About the only issue is for some fitting (on other vehicles) I have had issues where it wouldn't fit the space.
 

ezgn

Well-known member
650
1,039
93
Location
Lake Elsinore Ca.
It rode nice on the smooth country roads, but was very bouncy on the city streets where there’s a lot of potholes and cracks. I’m finishing up the front shocks right now and I will take it out for a drive and will report back!
Yeah it probably rode like a cadillac until it hit a bump.
 

M1009_SPAIN

Active member
73
161
33
Location
Spain
I got the Lock N Lube fitting for the grease gun today. I was able to finish lubing the front end and it made the job so much easier and faster. Every grease gun should probably have one of these things on it. You don’t wanna break a zerk like I did! Instead of the zerk popping into the grease gun like a ball joint, there are these spring loaded jaws that come out of this thing and hook onto the zerk. When you’re done greasing you just press it down again and the jaws release from the zerk and it comes right off.

View attachment 840869


First of all, forgive me for my ignorance that I am a zerk, that I have not finished locating it and that it is exactly what you are lubricating, that there are terms that I do not understand in English and when I translate it into my language they are nonsense;

Great job, I'm learning a lot with all of you and thanks to cucvrus for his tireless help
 

retro_life

Well-known member
243
629
93
Location
Los Angeles, California
First of all, forgive me for my ignorance that I am a zerk, that I have not finished locating it and that it is exactly what you are lubricating, that there are terms that I do not understand in English and when I translate it into my language they are nonsense;

Great job, I'm learning a lot with all of you and thanks to cucvrus for his tireless help
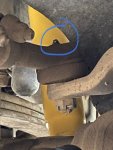
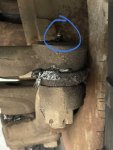
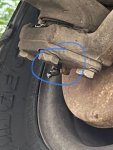
No problem man. Zerks are the name for the little grease fittings. There are several on the front end of our trucks. Here are some pics of a few of them.
D34510D4-652E-4801-A28F-CDAAC3EAC2A8.jpeg23DBB1DF-A3CF-41AF-9004-F111F1572E50.jpeg789D3636-E351-4B03-9729-6FCCB3504028.jpeg

You connect the grease gun to them and pump the grease into the area. All my steering stuff ultimately needs to be replaced, but I added some fresh grease until I am able to replace it. But even when you have nice new stuff it’s part of the maintenance.
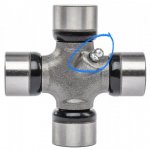
Same with U-joints on your drive shaft if you get the greaseable kind. When I got my drive shafts fixed the shop replaced them with greaseable type. They say that if you add fresh grease every 5,000 miles or so, they will outlast sealed U-joints.

D28A1B4A-2566-454E-8743-967E95F83A97.jpeg
 
Last edited:

retro_life

Well-known member
243
629
93
Location
Los Angeles, California
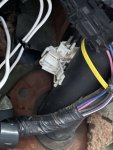
I got my reverse lights working! Cucvrus shared a lot of good info on how to do it in an earlier post but I just got around to messing with it. The switch is located all the way at the end of the steering column near the firewall.
BFFBAF58-AE96-4FD6-AA42-215BB139360D.jpeg
There are some clips at the top side of the switch and once you pop them loose you can rotate it left and right until you get it to make contact when you’re shifted into reverse. I had to move mine slightly to the right and then it started working again!
To test it while you’re working on it you can just click the key up to unlock the steering wheel and shift into reverse with the truck off (not on run so your glow plugs aren’t heating).
E9411361-1817-415D-A88C-5E22985C005F.jpeg
 
Last edited:

M1009_SPAIN

Active member
73
161
33
Location
Spain
No problem man. Zerks are the name for the little grease fittings. There are several on the front end of our trucks. Here are some pics of a few of them.
View attachment 840894View attachment 840895View attachment 840896

You connect the grease gun to them and pump the grease into the area. All my steering stuff ultimately needs to be replaced, but I added some fresh grease until I am able to replace it. But even when you have nice new stuff it’s part of the maintenance.
Same with U-joints on your drive shaft if you get the greaseable kind. When I got my drive shafts fixed the shop replaced them with greaseable type. They say that if you add fresh grease every 5,000 miles or so, they will outlast sealed U-joints.

View attachment 840897
thanks for explaining and teaching me
 

Mullaney

Well-known member
Steel Soldiers Supporter
Supporting Vendor
7,716
19,766
113
Location
Charlotte NC
thanks for explaining and teaching me
Way to go retro_life !

Thanks for the kind words M1009_SPAIN . I feel sure "retro" knows that but I just had to say it. Go man Go!
I think an organization like this - where all of us have something to share or something to learn - is what MVing is all about!
 

retro_life

Well-known member
243
629
93
Location
Los Angeles, California
I had to make a small modification to my wiring to get my front marker lights to work properly. I suspect this is because I converted the truck to LEDs and installed E-flashers like this one here.
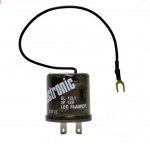
5A1D2375-75B6-4753-B0F2-2D8F1126E14E.jpeg
For whatever reason my front marker lights would light up very dimly when applying the turn signals/hazards and would stop working completely once the parking lights or headlights were turned on. According to the wiring diagram, the front marker lights each have a blue wire and a brown wire. All the brown wires splice together with the other brown wires coming from the parking lights.
31256830-098A-4E48-972A-6464E9D9065B.jpeg
I used a multimeter in continuity mode (beeps when two electrically connected points are touched by the leads) and verified that all the brown wires were connected and there were no broken wires. I then tried swapping in a standard incandescent 194 bulb and it also blinked very dimly, but even more strange when the parking lights or headlights were turned on it would stop blinking but also my left signal light would stay on in the instrument panel, as if I had a burned out bulb.

I don’t recall if this was an issue with my truck before I swapped to LEDs and E-flashers but the wiring in my truck seems to be pretty much untouched which is why I think this behavior started once I installed them.

So to fix the problem I disconnected the brown wires on the marker light sockets from the rest of the lighting harness and connected them straight to ground instead. I left the blue wires alone.
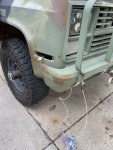
143465C9-B44A-41FC-9847-9B6227821D30.jpeg
Now the marker lights work as they should. I don’t like having to do stuff like this but I left enough length of wire at the bulb sockets and the wiring harness that it could easily be reverted if need be.
 
Last edited:

retro_life

Well-known member
243
629
93
Location
Los Angeles, California
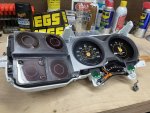
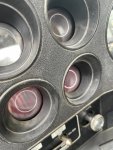
I just put the dash back in the truck. I want to report that the full clear plastic cover fits perfectly fine without any modifications! Since I was rebuilding my cluster I decided to go with the full covered plastic lens to protect my dummy light filters. I got the new replacement plastic from LMC. There’s two versions, one for a clock and one without. If you decide to go this route make sure to get the one for trucks without a clock so there’s no hole in it for the time setter. 4CB1AEE7-5478-42F2-8E0C-084C01FF9EE9.jpeg82B5CD19-CDB5-4C72-B6A2-D12B2873DB4D.jpeg6BD87A52-C009-46D2-9EC7-649906F60F84.jpeg
 

ezgn

Well-known member
650
1,039
93
Location
Lake Elsinore Ca.
I just put the dash back in the truck. I want to report that the full clear plastic cover fits perfectly fine without any modifications! Since I was rebuilding my cluster I decided to go with the full covered plastic lens to protect my dummy light filters. I got the new replacement plastic from LMC. There’s two versions, one for a clock and one without. If you decide to go this route make sure to get the one for trucks without a clock so there’s no hole in it for the time setter. View attachment 841042View attachment 841047View attachment 841049
Where did you get the new dash? Are you happy with it? Looks good! Thanks for all the good Info.
 

retro_life

Well-known member
243
629
93
Location
Los Angeles, California
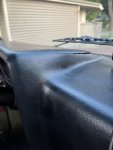
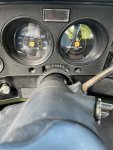
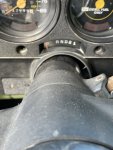
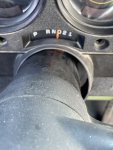
Now that I got my dash back together I kinda realized that my steering column has always been over a bit to the left and I was wondering is this is normal or is there some adjustment to make it more centered?
E289D81D-25DD-41E1-A167-F8A4DAC87E75.jpegDBC414C4-777D-4FE2-991D-10A57A60A836.jpegE6C69F82-8363-414C-B360-6F03BB534B5F.jpeg
everything feels fine with it, just cocked over to the left some.
 
Top