• Steel Soldiers now has a few new forums, read more about it at: New Munitions Forums!

  • Microsoft MSN, Live, Hotmail, Outlook email users may not be receiving emails. We are working to resolve this issue. Please add support@steelsoldiers.com to your trusted contacts.

What did you do to your deuce this week?

BGR

Active member
80
213
33
Location
MS
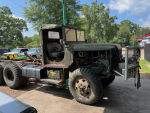
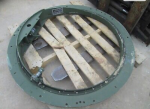
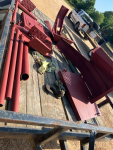
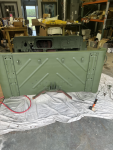
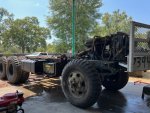
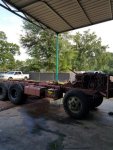
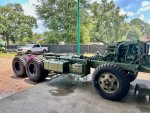
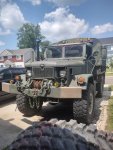
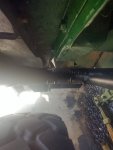
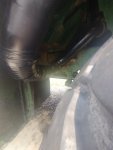
This has actually taken place over the last two days. This thing was a lot worse off than I thought when I got it. We are working towards swapping out the cab and putting in a new front wiring harness. My harness is completely falling apart and causing multiple issues. Hopefully the harness I purchased last year is the correct one as advertised. I ordered the ring mount and it shipped today. Also today I dropped off five installation mount legs and most of the removed items to be blasted and primed.
 

Attachments

pitpawten

Active member
259
199
43
Location
Centreville, Maryland
@pitpawten

Those are some good looking tires

Btw, when you do your brake job try just putting a spray nozzle on a hose and using water to do your cleaning before you use the brake clean, you might be surprised how well it works .
Good call that stuff is not cheap and doesn't last forever. I actually got one of those Sureshot canisters a couple years back to use a brake clean thinking it would save me some money but there's no replacement for the force that the aerosol cans have.

Today I retorqued the heads reinstalled the rocker arms and covers and am now at the point when I get more than 20 minutes where it's not raining AND I'm free, I will pull the injectors and spin the engine to clear the coolant out of the cylinder.

Received in the mail today a crate of rapco green brown and black rattle cans and got the call that the tires are ready for pickup...inching ever closer

20230622_095121.jpg
 

pitpawten

Active member
259
199
43
Location
Centreville, Maryland
On Saturday reconnected everything started up and it ran just fine drove it to my cousin's shop where we started breaking down tires and hubs.

Up front found a blown u joint on the right side and on the left rear inside dual the bud nut was friction welded off and had to be ground off at the wheel.

Some blown seals and brakes covered in gear oil which explains the weak breaking.

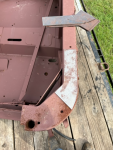
Also hit the windshield frames in Corroeal so that I can get them but back together.

Going to keep hammering away

20230624_192009.jpg20230624_191122.jpg20230624_190447.jpg20230624_145721.jpg20230623_220421.jpg20230623_220345.jpg20230623_165248.jpg
 

ToddJK

Well-known member
1,321
4,518
113
Location
Sparta, MI
On Saturday reconnected everything started up and it ran just fine drove it to my cousin's shop where we started breaking down tires and hubs.

Up front found a blown u joint on the right side and on the left rear inside dual the bud nut was friction welded off and had to be ground off at the wheel.

Some blown seals and brakes covered in gear oil which explains the weak breaking.

Also hit the windshield frames in Corroeal so that I can get them but back together.

Going to keep hammering away

View attachment 900350View attachment 900351View attachment 900352View attachment 900353View attachment 900354View attachment 900355View attachment 900356
She's going be practically a new truck by the time you're done!
 

pitpawten

Active member
259
199
43
Location
Centreville, Maryland
Continue to work on getting it back together, usually too greasy to take pics

Pulled all 6 "corners" down to the spindles to reassemble with new seals, re-packed bearings (all were fine). All but one of the rear corners had blown the seals so bad that they drums, pads, and everything were completely coated with thick layers of grease/gear oil - cleaning all of that was not a small task and took the better part of 3 days. GASOLINE is the only way - Brake Cleaner, high pressure hose, Purple Power etc, nothing cuts like gas in a tub with a brush. Wound up swapping the pads out for spares on 2 of the corners due to them being so caked that they would have sweat for decades : /

Hubs are now flipped and reassembled/torqued after replacing several studs (one we had to cut, the others which were nearly stripped).

Tonight is reassembly, which includes mounting the 12.00 R20 XML's, bleeding/flushing the brakes, adjusting the drums (had to back off the adjusters to swap pads) and then onto finishing up the windshield frames.

I noticed that I had mistakenly included some 12 hole 5Ton rims when I dropped them off at the tire place so 2 of my tires were mounted on the wrong rims *DOH*, fortunately 6 of the 8 were good to go.

Also installed a new ujoint in front right steering knuckle which was Meritor CP750N (the 90 degree greaseable version).

Shout-outs: Big Mikes for shipping quickly an including extra parts that I didnt pay for (1 extra of each stud just because). My 2 brothers who have put in 2 late nights with me though they have families and jobs of their own. This community who has stepped in with answers, and specifically @patracy who quickly pulled a part of his spare motor and shipped it to me.

Getting ever closer.
 

Shooter308

Active member
39
122
33
Location
Northern MI
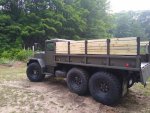
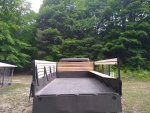
After getting the call about a week ago to be the truck for the local VFW in a 4th of July parade I had to scramble with a couple late nights to early mornings to get some benches done for the vets to sit on. I know it's not historically accurate but had to rush to get them done with some help. Happy July 4th
 

Attachments

Mullaney

Well-known member
Steel Soldiers Supporter
Supporting Vendor
7,696
19,722
113
Location
Charlotte NC
After getting the call about a week ago to be the truck for the local VFW in a 4th of July parade I had to scramble with a couple late nights to early mornings to get some benches done for the vets to sit on. I know it's not historically accurate but had to rush to get them done with some help. Happy July 4th
.
Thanks for having a Deuce and cool old guys that you can haul around

Happy-4th Mount Suribachi.gif
 
Last edited:

pitpawten

Active member
259
199
43
Location
Centreville, Maryland
After getting the call about a week ago to be the truck for the local VFW in a 4th of July parade I had to scramble with a couple late nights to early mornings to get some benches done for the vets to sit on. I know it's not historically accurate but had to rush to get them done with some help. Happy July 4th
Yeah good call 👍

I always drive by the VFW but have never stopped in to interact with them now that I have a huge pile of NDTs I might see if any of them fit the artillery piece they have in front of the building
 

pitpawten

Active member
259
199
43
Location
Centreville, Maryland
Finally got everything buttoned up boots seals bearings brakes tires oil coolant crawling around realized my transmission fill plug was nearly backed out tightened it up but need to check the fluent level was already planning on refilling both it in the transfer case with 40 weight on detergent but just one more thing

First test drive the brakes actually stopped the truck who knew also noticed that tracking was horrible up front got back and checked the air pressure 90 PSI from the tire guys while there's your problem lowered it to 70 still feel like it needs to be a little less

Windshield seals I got from Big Mike's must be for a different truck maybe a 5-ton cuz they're a full six to eight inches wider than my windshield frames but I've got nothing but good things to say about Mike as he has shipped quickly and included a little extra item here and there that he knew I might need for the project

Made a power bleeder for the brakes that I had seen here on the site which worked great but I'm still not confident I got all of the fluid out of the master cylinder as when I took the bleeder off and a little bit extra float over it looked like two different types of liquid not mixing that's after I pushed a gallon and a half through the system

Overall very happy with the outcome of the project though I realized pretty much every other seal from input and output shaft on every other movable item needs to be replaced as are signs of fluid leakage at every conceivable location : /

Topped off with water for now as I wasn't quite sure on what I wanted to do for coolant and still needs to be flushed any suggestions on best way to get the right pH and coolant mix specific for a deuce so that I won't wind up with corrosion?
 

Attachments

Last edited:

cattlerepairman

Well-known member
Steel Soldiers Supporter
3,247
3,325
113
Location
NORTH (Canada)
@pitpawten If you have not done so, yet, having the cooling system filled with water would be the time to remove the thermostat, pop a couple of Cascade capsules into the radiator and drive the truck up to operating temp for a good 20-30 minutes. Let cool down, then pop the lower rad hose off, let everything drain and see how much gunk comes out. Put the garden hose into the rad fill until clear water comes out at the bottom. Button everything up, fill with water, drive up to operating temp and repeat the drain procedure. If the water drains out more or less clean, then you are ready to refill with that expensive diesel rated coolant.

Yours is not overheating, so there is likely no big blocking issue, but it is amazing how much gunk comes out of the block and rad when you do that.
 

ToddJK

Well-known member
1,321
4,518
113
Location
Sparta, MI
I agree with Cattlerepairman, that's a good way to clean the system. I've always used 50/50 prediluted coolant (green) and no issues. Fortunately, the deuces don't seem to be finicky with the coolant concentration like some modern cars can be. From what I understand, it's a good idea to do a flush every once in a while and replace with new coolant depending on how much you drive it. Another thing that helps, wash the front end of the radiator good, mud, dirt, and bugs can cause it to be less efficient in heat transfer.
 

ToddJK

Well-known member
1,321
4,518
113
Location
Sparta, MI
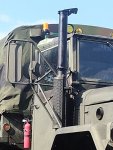
I had to fix my J pipe due to rotting in the trap and I cut off the top of the stack and installed a rain cap or flapper as I like to call it. About a 6 hr job but it's all newly painted, new hardware, and looks good imo. The only troubles I had was removing the J pipe, normally it just slides down when you remove all the clamps, but that's with stock tires, not 395's! I had to cut the hole in the fender larger to maneuver the pipe enough to get it to drop down, but I made sure it was still small enough so the bracket that strengthens the fender still covered the hole.

For the J pipe,using some redneck ingenuity, I used two soup cans,50 ft of self sealing silicone tape, and 6 hose clamps. I figured it should hold until I get a new J pipe.
 

Attachments

BGR

Active member
80
213
33
Location
MS
I had to fix my J pipe due to rotting in the trap and I cut off the top of the stack and installed a rain cap or flapper as I like to call it. About a 6 hr job but it's all newly painted, new hardware, and looks good imo. The only troubles I had was removing the J pipe, normally it just slides down when you remove all the clamps, but that's with stock tires, not 395's! I had to cut the hole in the fender larger to maneuver the pipe enough to get it to drop down, but I made sure it was still small enough so the bracket that strengthens the fender still covered the hole.

For the J pipe,using some redneck ingenuity, I used two soup cans,50 ft of self sealing silicone tape, and 6 hose clamps. I figured it should hold until I get a new J pipe.
Dig the flapper. I just got a new J-pipe in for mine, they aren't cheap at all with shipping.
 

ToddJK

Well-known member
1,321
4,518
113
Location
Sparta, MI
Dig the flapper. I just got a new J-pipe in for mine, they aren't cheap at all with shipping.
Agreed, most I saw were far from cheap unlike ten twelve years ago, could buy those for half the price all day. The flapper is fricken awesome too, I really like it. When idling, I just tap the throttle and I can make it go tap tap tap tap for a few moments before it levels back off, lol.
 
Top