• Steel Soldiers now has a few new forums, read more about it at: New Munitions Forums!

  • Microsoft MSN, Live, Hotmail, Outlook email users may not be receiving emails. We are working to resolve this issue. Please add support@steelsoldiers.com to your trusted contacts.

What did you do to your deuce this week?

77 AMG

Active member
403
62
28
Location
Owingsville, KY
Another *fun* project that I get to do... Anybody know if the "twist the knob to adjust" parking brake handle is a direct swap for the older *whale tail* style? I like the thought of being able to simply adjust the cable without having to crawl under the truck.
 

Mrmag1

Head of Stuff N' Things
Steel Soldiers Supporter
602
14
18
Location
Hereford Arizona
Another *fun* project that I get to do... Anybody know if the "twist the knob to adjust" parking brake handle is a direct swap for the older *whale tail* style? I like the thought of being able to simply adjust the cable without having to crawl under the truck.
I do know there are two different cables for the two different handles, whether or not one works with the other I don't know.
 

tobyS

Well-known member
4,832
833
113
Location
IN
This thread is huge and although it probably won't come up when doing research later, will a video survive into the future? Links become inactive, pictures are gone, etc, making it hard to research a subject.

Do video's also disappear ? Lots of threads come up in a search, few are complete and useful.
 

gimpyrobb

dumpsterlandingfromorbit!
27,786
758
113
Location
Cincy Ohio
Another *fun* project that I get to do... Anybody know if the "twist the knob to adjust" parking brake handle is a direct swap for the older *whale tail* style? I like the thought of being able to simply adjust the cable without having to crawl under the truck.
No, you will need to swap out the cable under the truck too.
 

77 AMG

Active member
403
62
28
Location
Owingsville, KY
Yeah, I know about the cable issue. It is a LARGE part of the "why" I want to switch- better adjustability, easier and cheaper to find, as well.
 

Kaiser67M715

Member
699
26
18
Location
NH
Another *fun* project that I get to do... Anybody know if the "twist the knob to adjust" parking brake handle is a direct swap for the older *whale tail* style? I like the thought of being able to simply adjust the cable without having to crawl under the truck.
Once the cable is properly adjusted at the parking brake, you can adjust handle travel of the "whale tail" in the cab.

I'm pretty sure major adjustments of either system still require you to go under the truck.

Sent from my SM-S920L using Tapatalk
 

fpchief

Well-known member
1,041
220
63
Location
South Alabama
Got the sheetmetal repair panels on the M109 room Installed and fixed some other rust holes. Put on first cost of paint on the roof also. I now consider the roof to be dried in. Major accomplishment for me. I do have the luxury to have it under shelter, but the problem is that it has to be on hands and knees.

Also put bolts through the window assemblies to tighten them up. Found some 1/4"x1/2" neoprene weatherstripping to add to the existing stuff to hopefully give windows that keep out most of the rain. The middle window on each side have been deleted and sealed.


Sent from my SM-G955U using Tapatalk
 

emeralcove

Member
Steel Soldiers Supporter
134
15
18
Location
Battle Ground/WA
For what is worth, I swapped out the whale tail P-brake lever for the twist to adjust knob handle P-brake lever. I am happy with it, but routing the cable was a real chore, made worse due to the fact I added second 50 gallon fuel tank on the drivers side and removed the spare tire carrier and pioneer tool rack. But it does work nicely.
 

fpchief

Well-known member
1,041
220
63
Location
South Alabama
For what is worth, I swapped out the whale tail P-brake lever for the twist to adjust knob handle P-brake lever. I am happy with it, but routing the cable was a real chore, made worse due to the fact I added second 50 gallon fuel tank on the drivers side and removed the spare tire carrier and pioneer tool rack. But it does work nicely.
Could you post some pics of that additional tank and the mount?

Sent from my SM-G955U using Tapatalk
 

emeralcove

Member
Steel Soldiers Supporter
134
15
18
Location
Battle Ground/WA
second fuel tank 1.jpgSecond fuel tank 2.jpg The tank is mounted but not connected yet, I got a really good deal on the tank and brake lever and quickly mounted/installed them to not have loose pieces laying around but moved out of California before I got everything done. The mounting is just like the original one except the filler is at the rear of the tank because it is a stock tank and mounting brackets. I just drilled holes in the frame and bolted it on like the one on the passenger side if that helps.
 

fpchief

Well-known member
1,041
220
63
Location
South Alabama
View attachment 757241View attachment 757243 The tank is mounted but not connected yet, I got a really good deal on the tank and brake lever and quickly mounted/installed them to not have loose pieces laying around but moved out of California before I got everything done. The mounting is just like the original one except the filler is at the rear of the tank because it is a stock tank and mounting brackets. I just drilled holes in the frame and bolted it on like the one on the passenger side if that helps.
Gotcha, thank you. I have a tank that is a little larger than a stock tank that I have to figure out how I want to mount. You going to do a transfer pump type setup to feed other tank?

Sent from my SM-G955U using Tapatalk
 

emeralcove

Member
Steel Soldiers Supporter
134
15
18
Location
Battle Ground/WA
I am leaning toward the way Rustystud did his, but would like to be able to have a redundant ability to pump to the engine or the other tank, just playing with ideas until I have the truck back where I can work on it. California fuel prices are crazy, like a dollar a gallon more than Oregon or Washington. That can be an extra $100 to fill up, kind a makes one really brain storm how to avoid that extra cost if you know what I mean. Even a couple 55 gallon drums strapped in the bed and a hand pump starts sounding worth the hassle.
 

whatadeuce

Active member
Steel Soldiers Supporter
959
38
28
Location
Loxahatchee, Florida
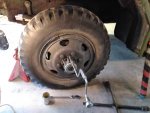
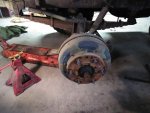
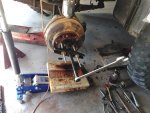
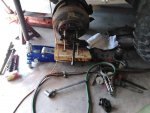
WEll since I had to rerplace the front wheel bearings on the passenger side, why not check them on the drivers side....Thank God I did! I leaned that in removing a frozen bearing , a heat assisted puller is my best friens!
 

Attachments

Tracer

Well-known member
Steel Soldiers Supporter
6,643
14,165
113
Location
Hawthorne, NV.
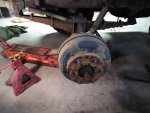
C.jpg The bearings look dry as a bone. I trust your going to do complete brakes, bearings, seals, and flex lines on both front wheels. Then do all the rear wheels, along with your Master Cylinder, Air Pak, and all your flex lines. Use quality bearing grease and Dot 5 (silicone) brake fluid. From my experience, stay away from all New Star brake parts, the quality just isn't there (china). NAPA makes a good wheel cylinder repair kit, (45 wheel cylinder kit) still made in the USA. I don't know about the condition of the rest of your truck, but your wheels and brakes look like they need some serious TLC.
 
Last edited:

Mrmag1

Head of Stuff N' Things
Steel Soldiers Supporter
602
14
18
Location
Hereford Arizona
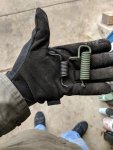
IMG_20190302_150243.jpg
As I redo my parking brake I got new springs just because, but I think the jam nut spring I got is a tad too big. Will this still work? I don't know, but I still have all the old springs just in case.

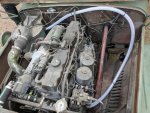
Also, I hooked my air compressor to my air filter housing with braided clear PVC pipe. This is the start of my DIY fording kit.
IMG_20190302_152545.jpg
 

Mrmag1

Head of Stuff N' Things
Steel Soldiers Supporter
602
14
18
Location
Hereford Arizona
What size hose are you using? 1" maybe? I keep forgetting to measure the intake on the air compressor.
1" ID x 1.375". I copied what I saw on hanks deuce, I'm not gonna duplicate his whole fording set up but this was a no brainier.
 

1brassjunkie

Member
Steel Soldiers Supporter
46
20
8
Location
Missouri
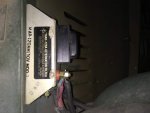
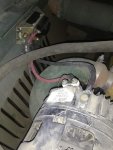
Installed an MAR 120A Alternator Noise Filter on my M35A3 w/ Vic1 & RT-246. Found on ebay for $65. Easy install, works great, no more whining!!

MAR 120A Alternator Filter1.jpgMAR 120A Alternator Filter3.jpg
 
Top
AdBlock Detected

We get it, advertisements are annoying!

Sure, ad-blocking software does a great job at blocking ads, but it also blocks useful features of our website like our supporting vendors. Their ads help keep Steel Soldiers going. Please consider disabling your ad blockers for the site. Thanks!

I've Disabled AdBlock
No Thanks