• Steel Soldiers now has a few new forums, read more about it at: New Munitions Forums!

  • Microsoft MSN, Live, Hotmail, Outlook email users may not be receiving emails. We are working to resolve this issue. Please add support@steelsoldiers.com to your trusted contacts.

What have you done to your 5 ton this week?

jarhead1086

Member
112
2
16
Location
Farr West, UT
Ummmm.......watched all the coolant run out of my now leaking radiator side tank gasket/seal.
-1991 M925A2.
I had coolant leaks and problems the whole 900 miles home. While I had the system drained to replace all my belts and check my water pump I decided to install the block heater and clean/check all my hoses and pipes. I have a low mile truck but was shocked with all the crap I found in the cooling system including a shop rag in my oil cooler intake and rusted out wire in my lower elbows. I am amazed it ran cool with all that garbage and little to no flow, testament to the design. I pulled my radiator today and will get it overhauled as a precaution. I will run flush through the system to check for leaks before I fill it with new SCA coolant. All the stop leak needs removed if you have a block heater. My 923 lives in a garage, but I plan on bringing my Honda generator when I camp in the cold weather to warm her up.
 

Scar59

Active member
Steel Soldiers Supporter
2,811
41
38
Location
Mt. Eden, KY
Put a spin on oil filter adapter on my M925/ NHC250. Clean up the engine compartment. Stated it up and no leaks.
Then when back to the shop and readied the transmission in the M35A3 to come out. Got the roof off, all that left is hoist it down.
JC
 

MtnSnow

New member
1,466
14
0
Location
NSL, UT
Installed a 24volt 7" color monitor & two CCD color cameras (one in the front and one in the back). Also wired in a digital 5-40v voltage meter (still have to mount it and tidy up the wiring as it got dark on me) and also moved the solar panel of the PulseTech charger/desulfator to the middle of the cowl. On the agenda for tomorrow if not raining is tracking down air leaks so I also setup an air hose with another gladhand I had that will hook up to my air compressor in the garage to be able to back-fill the air system of the truck so I don't have to fight with the noise of the engine running.

Also got some pics of the bed mounted hoist that I did earlier. By trimming back the outer most seat slat I could keep the troop seats & not have the hoist in the way when the troop seats are in the stowed position.
 

Attachments

TacticalDoc

Member
602
26
18
Location
Otisville MI
Snow. How did you mount the bed crane to your bed? Did you put a plate under it?
Also where did you put the camera in the back? over the pintle hitch?

I got the other type of bed crane because the base was wider with 8 bolt holes and not as tall. I also picked up 2 more base plates so I can mount it to the front of the bed. Then move the crane to front of the bed. Mine is on the driver side. I use a smaller lever and put it in on the other side of the pump.
back.jpgIMG_0452.jpgIMG_0563.jpg
 

Attachments

Last edited:

MtnSnow

New member
1,466
14
0
Location
NSL, UT
TD,

Yes it has a 10" x 12" plate up top and two 2" x 18" angle iron braces underneath. Going to be plenty stout to load 55 gallon drums of fuel &/or water or a wheel/tire assembly as needed.

I have one camera mounted up front to the plate that holds the ABS limiter/release valve and the rear one is above the pintle hitch.
 

MtnSnow

New member
1,466
14
0
Location
NSL, UT
TD, They are basically generics as the boxes they came in where "white boxes" but are much better than what my F-250 has. I'll see if I can find a part number or something on them and will edit this post if I find one but I don't recall seeing one on them.

Edit - No numbers or name on the cameras but in looking at the listing for them they use "sharp" ccd imagers.
 
Last edited:

Steve1031

New member
79
3
0
Location
Dundee, OR
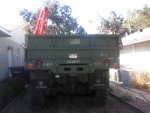
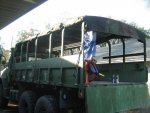
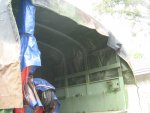
IMG_20140303_160318_462.jpgPut on my brand new all-green cargo cover, installed my radio mount (without reversing the sliding window), and installed DOT led lighting across the back.IMG_20140303_132044_413.jpgIMG_20140303_160513_808.jpg
 

Bulldogg

New member
46
0
0
Location
Albany MN
Well I picked up my M923A1 last Tuesday I'm new to this and this is my first 5ton and from the help of SS I'm learning a lot well replaced the ppv valve and things to do - change all filters air,rule,oil ...replace governor... rebuild air cleaner.... change all oil and I mean all.. grease it... and now the fun putting decals on it and ask my local body guy to paint the jaws paint job on the front good thing is my gf wants to help with all this lol gotta like a girl who likes to get greasy I'll keep you all updated with pics of progress oh and get it titled yet
 

machinist75

Member
777
7
18
Location
Murphy, TEXAS
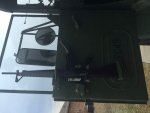
Started installing the three position gun mounts I got from CC Surplus today. Had a little trouble with the supplied hardware and had to improvise. Still have to mount the two on the dash and the butt mounts on the floor.
 

Attachments

MtnSnow

New member
1,466
14
0
Location
NSL, UT
Nice Machinist75! I have a couple of those same door mounts due to arrive this coming week. I didn't see the dash one's or are they they same kits just positioned differently?

I did a couple of stencils and mounted my personalized license plate. (I only drilled the lower holes as the upper's were already there?..Do/did the Texas Army reserve run plates or some other placard that was plate sized?) Anyways, I was happy to still be able to get this as all of the others I tried were gone (101AB, AB101, 101ST, A101B, etc)

Edit...Oh I also trimmed about 2 inches of foam out of my driver's seat back cushion and straightened out the seat back's metal pan (it was bent forward when I got it). I like it so much better now! I didn't realize how much 2 inches out of the back of the seat would effect my leg room :driver:
 

Attachments

Last edited:

MyothersanM1

19K M1 Armor Crewman
Steel Soldiers Supporter
1,957
418
68
Location
Culver City, CA
Last week I mounted my towbar in the bed using a HMMWV pintle and an extra bumper tie-down mount.

Today, I repaired the t-bolt on the left/front fuel tank strap. The fine threaded original somehow galled up when I was replacing the standard nut with a lock-nut.
 

machinist75

Member
777
7
18
Location
Murphy, TEXAS
Nice Machinist75! I have a couple of those same door mounts due to arrive this coming week. I didn't see the dash one's or are they they same kits just positioned differently?

I did a couple of stencils and mounted my personalized license plate. (I only drilled the lower holes as the upper's were already there?..Do/did the Texas Army reserve run plates or some other placard that was plate sized?) Anyways, I was happy to still be able to get this as all of the others I tried were gone (101AB, AB101, 101ST, A101B, etc)

Edit...Oh I also trimmed about 2 inches of foam out of my driver's seat back cushion and straightened out the seat back's metal pan (it was bent forward when I got it). I like it so much better now! I didn't realize how much 2 inches out of the back of the seat would effect my leg room :driver:
If it's the kit for the m939's then it will have the one door mount for the drivers side and then the two dash mounts. I have another door mount kit that is from a mk-48 that I'm debating on weather to mount it to the drivers side, it's black as supposed to green.
 

Gunzy

Well-known member
1,769
66
48
Location
Roy, Utah
Hey Mike. I didn't know you were special. LOL Last Saturday I got most of the winch Hydraulics installed. Still have to do PTO, tank and controls. All in due time.
 

MtnSnow

New member
1,466
14
0
Location
NSL, UT
Gregg, Yep I was SPCial but now I really am ;-) Holler if you need help with the PTO!

Machinist75, Nice I like it!
 
Last edited:

joesco

Member
442
1
18
Location
Hampstead, NH
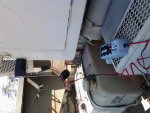
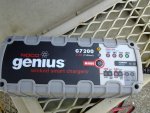
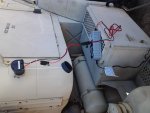
See my pics below, installed today. The Humvee Nato (new $47.50) Slave Receptacle J-6362/U 24V came with a fused-in electrical power cord which would have plugged into a 24v charger. In about 5 minutes, I removed the screws on the back of the Receptacle, removed the power cord, and installed the my charger's cable (red to red, black to ground). I then plugged the new Receptacle into the side of the truck and using a multi-meter I tested the new charger's pigtail cable pins and it showed 24.8 volts coming off the batteries in the truck. So I knew my truck's Receptacle was wired and working correctly.

I plugged in my charger and set it to 24v Normal and it began conditioning and charging! Really neat, thanks for all the help on this guys!!!
 

Attachments

Top
AdBlock Detected

We get it, advertisements are annoying!

Sure, ad-blocking software does a great job at blocking ads, but it also blocks useful features of our website like our supporting vendors. Their ads help keep Steel Soldiers going. Please consider disabling your ad blockers for the site. Thanks!

I've Disabled AdBlock
No Thanks