• Steel Soldiers now has a few new forums, read more about it at: New Munitions Forums!

  • Microsoft MSN, Live, Hotmail, Outlook email users may not be receiving emails. We are working to resolve this issue. Please add support@steelsoldiers.com to your trusted contacts.

What have you done to your CUCV today/lately? - Part 1

Status
Not open for further replies.

CycleJay

New member
1,433
7
0
Location
Marietta, Ga
re; What have you done to your CUCV today/lately?

Hi guys...

Here is a suggestion regarding CUCV keys.

It would be cheaper, to just go to any local retail store that cuts keys.
No reason to go to ebay.

When I needed another key for mine, I just went to my neighborhood Walmart,
and about $2.00 bucks later, I had another key. No worries, that can cut as many as you want.

And it works fine... I use the walmart key, and the original I use as a backup.. In case I lose the new one.

Just my $0.02 cents...
 

Vhyle

New member
181
1
0
Location
Clarksville, TN
Hi guys...

Here is a suggestion regarding CUCV keys.

It would be cheaper, to just go to any local retail store that cuts keys.
No reason to go to ebay.

When I needed another key for mine, I just went to my neighborhood Walmart,
and about $2.00 bucks later, I had another key. No worries, that can cut as many as you want.

And it works fine... I use the walmart key, and the original I use as a backup.. In case I lose the new one.

Just my $0.02 cents...
Of course. I'm getting copies made of my ignition key, and the other guy is going to bring me a couple of copies of the door key, so I'll be good to go. I don't do any of that online; no sense in that.
 
481
10
18
Location
Charlotte, MI
Interesting. The key that came with my truck unlocks the doors and starts the truck like its supposed to. The new key that I put on my key ring works fine in the ignition but won't unlock the door.
 

antennaclimber

Moderator
Moderator
Steel Soldiers Supporter
1,353
895
113
Location
State College, PA
Recently bought another M1009 from an individual. Having no service records or other info on the truck, I decided to change glow plugs, fuel filter, oil and and clean up a few dirty electrical contacts that these vehicles are prone to have.

I changed 7 of the glow plugs (one is swollen), changed the GP voltage feed to 12 volts, cleaned all the fuse contacts, battery cable connections, changed and bled the fuel filter. All good till I went to start it, just cranks and cranks. It started (with difficulty) before I did the maintenance.

I noticed that the GP wait light now stayed on for a long time and smelled unburnt fuel from the exhaust. Some quick voltmeter tests and I found that the GP relay had 13.5 volts on the top and .245 volts on the GP side when closed. I found a big isolated relay in our stock room and installed it, truck starts fine now. I will deal with the bad glow plug when I have more time.

Apparently the increased current demand for the new GP's being fed from the 12 volt side caused the relay to fail.
The joy of owning a 26 year old truck.
 

Dirty1

New member
47
0
0
Location
MA
I finally have my plow setup and running! I was also able to fix my electrical problems I was having the other day. Now it is time to get a new headlight harness and adjusters.
 

richingalveston

Well-known member
1,715
120
63
Location
galveston/Texas
1985 M1009. Work done today: Harmonic balancer, new front main seal, new belts.

Work in progress: gauge cluster rebuild. all gauges in dash with Tachometer. Overhead shelf ordered not delivered. 205 transfercase with ORD Magnum box being built. All parts ordered. Magnum box not being delivered till mid to late january. Triple shifter.

Work done in last 4 months but not posted in this thread:
doghead relay, 12v glowpug conversion resister removed, AC 60G glowplugs, 2 new fuse panels (one always hot, one hot on ignition). new used oem dash (colorbond black), colorbond door panels black, installed new seats with arm rest (currently blue cloth going to get recoverd black leather). new sun visors. ORD 4 inch lift -shackle flip rear-new springs front. zero rates front rear. Dana 60 front with e-locker 14bolt rear gov lock. 4:56 gears. 5100 bilsteen shocks, front shock mount extensions. front and rear brake rebuilds with extended brake lines. 2 wheel drive steering box ORD cross over-high steer. tilt steering column intermitant wipers Power windows and locks (front not tailgate). Dakota Digital alternator tach interface. 4l80E transmision with TCI trans controler (received defective trans unit new unit should be here in next couple of days). HD headlight harness.

Work done within last year: strip vehicle, repaint interior and exterior (gilespie Marine green, base green for woodland camo). Insulate interior with LMC kits, Rubber LMC floor liner. put vehicle back togather and had it on the road for about 3 months before garaging it again for all of the above mods.

Still have stock 1008 tires from doner truck. going to have to save for a few months before buying recentered hummer 12 bolts with 37 inch tires.
going to build roof rack and rock sliders.

truck should be back on the road at end of January. have 208 transfercase and reworked driveshaft in truck now but driveshaft uper U joint binds. So until the 205 is complete it will be in the garage. not going to put any money into the 208 and current driveshaft.

I have lots of pictures and have posted some of the work already. I plan to put togather an entire build thread once it is complete.

Merry Christmas to all.
 

Speddmon

Blind squirrel rehabiltator
Super Moderator
Steel Soldiers Supporter
4,640
28
38
Location
Cambridge, Ohio
I finally have my plow setup and running! I was also able to fix my electrical problems I was having the other day. Now it is time to get a new headlight harness and adjusters.
A word of advice...

I replaced the adjusters on mine after I got it. Even though they came from NAPA the main part of it was still cheap plastic and stripped out as soon as some tension started getting put on it by the springs of the bucket. What I did was bought a few 1/4-28 nuts and put never seize on the adjuster bolt and then backed up the plastic piece with the nut. It's more of a PITA to do the adjustment since you now need a 7/16" wrench to hold the nut while you turn the adjuster bolt, but the lights won't come out of adjustment anymore because the plastic is stripped out.
 

scottladdy

Member
538
8
18
Location
CT
Rebuilt Injection Pump and Injectors

So, I was driving my M1008A1 to my sons robotics tournament about two weeks ago when, as I was climbing a good hill on the interstate she started to lose power, sputter a little, and dump some bluish smoke. I knew I needed a new IP as there had been a pronounced miss at idle that was getting progressively worse. Compression tests on the engine showed all 8 cylinders were pumping well.

In anticipation of doing the replacement before the weather got bad up here, and based on reviews on this forum I decided to order from Badger Diesel in mid November. Fred is a great guy to talk to, and really knows his stuff. The shipping on the rebuilt pump and injectors was delayed a bit as Fred is really backed up and he ended up getting a pretty nasty bug that knocked him back a few days (he sounded awful when he got back to the shop). Well, when the pieces arrived they were really well done. A nicely refinished case on the IP that I am not certain isn't a new piece. It even has a new Stanadyne data plate on it. Definitely not a "rattle can" rebuild.

I took the time to clean up the valve covers and intake manifold. I used Rustoleum pro paint for the manifold. Came out really nice and should stay a lot cleaner over the long run. I used the Fel-Pro MS-91586 Intake Manifold gasket set for the HD 6.2 engine. Got everything buttoned back up. Used Badgers made in Germany return line tubing to replace the originals. Very easy to work with, and no silly little clamps to deal with. Put a new FRAM fuel filter on, replaced the flexible fuel lines to the filter and IP with new clamps. Bled the system.

FYI, I had performed the GP resistor bypass, replaced the GP relay with the overpriced NAPA part (I couldn't wait for the shipping from CUCV Electric when the old one died) and had installed the AC 60G's all the way around in September.

Well, I haven't had a chance to road test her yet due to Christmas. But, it is almost like I have only to look at the key after the wait light goes out to get her to start. That is dead cold in 28 degree weather. She idles like new. I'll provide a road test report when I have a chance later this week.

A very Merry Christmas to all!
 

Attachments

K9Vic

Active member
1,261
7
38
Location
Fort Worth, TX
My M1009 has been parked for about a month now and just moved around the driveway a few times as I have been driving my Suburban. I had it sitting in the same spot not moved for about 2 weeks and when I got in to move it the brake pedal went all the way to the floor. Look and no fluid in the rear chamber and I noticed a small dried up oily puddle near the right front wheel, but no oil seen on the wheel or caliper. I also have a small trans leak and may have been from that before I moved it before. So we are expecting snow on Christmas, so I scrambled to get the brakes fixed but did not see any problems. So I just ended up bleeding the brakes and will keep a close eye on them.

If I have to I will use the M1031, but that is registered as a antique/collector vehicle and should not technically be driven personally. But of course I am on my way to a Christmas even meet other club members ;-)
 

Dirty1

New member
47
0
0
Location
MA
A word of advice...

I replaced the adjusters on mine after I got it. Even though they came from NAPA the main part of it was still cheap plastic and stripped out as soon as some tension started getting put on it by the springs of the bucket. What I did was bought a few 1/4-28 nuts and put never seize on the adjuster bolt and then backed up the plastic piece with the nut. It's more of a PITA to do the adjustment since you now need a 7/16" wrench to hold the nut while you turn the adjuster bolt, but the lights won't come out of adjustment anymore because the plastic is stripped out.
Sweet! Thanks for the info. I will definitely look into that.
 
367
0
18
Location
Castalian Springs, TN
Finally got around to changing out Cracked/welded rear pinion... noticed rear driveshaft is bent... Installed my spare... The bent one will be going to be repaired.. Also noticed my charging system is on the blink again... Ugh, just had both alt rebuilt a bout a year ago... They must have either short changed me or used inferior parts... going order repair kit from cucvelectric and do it myself....
 

ororke1

New member
28
0
0
Location
Oregon Il
Removed my thin aluminum heater core and replaced with a much thicker heavier duty copper heater core from NAPA. Took about 2 hrs.
Checked all duct work for obstructions etc.
It now produces enough heat to stay warm on a 20 degree day in Il.
 

jets1959

Member
594
9
18
Location
Lakewood, WA
Removed my thin aluminum heater core and replaced with a much thicker heavier duty copper heater core from NAPA. Took about 2 hrs.
Checked all duct work for obstructions etc.
It now produces enough heat to stay warm on a 20 degree day in Il.
What part number and how much was the heater core? Thanks!
 

hodgeb

New member
48
1
0
Location
Rapid City, SD
I've just done a couple little things since there's "not a lot to do" (heh heh) to her since she's got it all going on. :p

These are all relatively hasty things I've done in the past month and a half to get her 'every day ready':
* removed about 300lb of surplus radio equipment from the inside so the back seat would be useable by the little people
* removed the side antenna mounts (all but 1 of them) and 'emergency service' light that were side mounted on the body (drew too much unwanted attention)
* removed all the decal stickers from the body (urg going to have some paint touch-up to do come Spring)
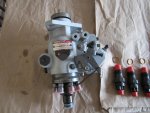
* replaced the (oversided nice brass, but unfortunately failed) ratcheting battery clamps with some temporary and very crappy "tin can metal" terminals (anyone know where I can get some decent ratcheting/quick release terminals? these were lever operated; the levers broke on me in the low <10F temps)
* replaced the heater core (on a 15F day, urg) with a proper copper one from a '87 Chevy camper (iirc) which was 1/4" larger in one dimension, had to make a custom mounting bracket.
* dealt with my dad discharging the battery trying to start her improperly on a 20F day.
* got an oilpan heater to help the cold weather starting I'm having to contend with this winter (didn't get to the block and/or coolant line heater; why couldn't it be warm like last winter?)
* finally got the front license plate put on the bumper, rear license is staying in the window for the time being until I can figure out what to do about the pintle hitch (really want to have a post hitch so I can use some of the after market post hitch carriers for bikes/gear/etc.)
* used the wood pallet the shingles for my roof came on to build a 'back bed' cargo separator; it sits level in the back, about 1" lower than the side body rails, and has carpet on top. Tools, the tire (until I can get a rear carrier built/bought), and misc. other things go underneath. (It cuts down on road noise a bit, too).
* started tracing some of the wiring bundle in the cab and for the lights to try to figure out what's what, and what's powered
 
Status
Not open for further replies.
Top
AdBlock Detected

We get it, advertisements are annoying!

Sure, ad-blocking software does a great job at blocking ads, but it also blocks useful features of our website like our supporting vendors. Their ads help keep Steel Soldiers going. Please consider disabling your ad blockers for the site. Thanks!

I've Disabled AdBlock
No Thanks