• Steel Soldiers now has a few new forums, read more about it at: New Munitions Forums!

  • Microsoft MSN, Live, Hotmail, Outlook email users may not be receiving emails. We are working to resolve this issue. Please add support@steelsoldiers.com to your trusted contacts.


What have you done to your FMTV or LMTV today

aw113sgte

Well-known member
Steel Soldiers Supporter
462
673
93
Location
La Crosse, WI
Have been chasing down why ctis wasn't working. Replaced a leaky hub seal, rebuilt a few wheel valves, but still wasn't working right. Today I found the front fill line to the hub is super porus and a spray of soapy water resulted in a foam party. Time to find a hose builder
 

ramdough

Well-known member
1,554
1,727
113
Location
Austin, Texas
Have been chasing down why ctis wasn't working. Replaced a leaky hub seal, rebuilt a few wheel valves, but still wasn't working right. Today I found the front fill line to the hub is super porus and a spray of soapy water resulted in a foam party. Time to find a hose builder
Try

Hoseandfittings.com

They were way cheaper than local for me…. Even after shipping.


Sent from my iPhone using Tapatalk
 

aw113sgte

Well-known member
Steel Soldiers Supporter
462
673
93
Location
La Crosse, WI
Try

Hoseandfittings.com

They were way cheaper than local for me…. Even after shipping.


Sent from my iPhone using Tapatalk
I'm having a hell of a time spec'ing the correct hose. When selecting 100R5 (air brake hose) they have no compression SAE fittings available. Using removable fittings, they are still limited and cost is $132 for the hose. It's not a brake line so other hose could be used but not seeing a good option on there that uses SAE 45.

Edit: I think I will just have to call. They don't show the fittings in their "build your own hose assembly" but they do list the crimp fittings separately.

1695294826895.png
 
Last edited:

hike

—realizing each day
Steel Soldiers Supporter
345
499
63
Location
Texas Hill Country
I'm having a hell of a time spec'ing the correct hose. When selecting 100R5 (air brake hose) they have no compression SAE fittings available. Using removable fittings, they are still limited and cost is $132 for the hose. It's not a brake line so other hose could be used but not seeing a good option on there that uses SAE 45.

Edit: I think I will just have to call. They don't show the fittings in their "build your own hose assembly" but they do list the crimp fittings separately.

View attachment 906420
I have ordered hoses from CAT for years, though I use that little tag they put on there. I looked at this site this morning and said a similar thing: How am I going to know how to order the right hose–
 

Third From Texas

Well-known member
2,704
6,327
113
Location
Corpus Christi Texas
I have ordered hoses from CAT for years, though I use that little tag they put on there. I looked at this site this morning and said a similar thing: How am I going to know how to order the right hose–
When in doubt, I just take my old hose to the local hose shop and let them make one up.

Should be several hose shops in San Antonio and along the corridor who could hook you up.
 

B-Dog

Well-known member
164
288
63
Location
Denver, CO
I'm having a hell of a time spec'ing the correct hose. When selecting 100R5 (air brake hose) they have no compression SAE fittings available. Using removable fittings, they are still limited and cost is $132 for the hose. It's not a brake line so other hose could be used but not seeing a good option on there that uses SAE 45.

Edit: I think I will just have to call. They don't show the fittings in their "build your own hose assembly" but they do list the crimp fittings separately.
Those reusable fittings are going to negate any savings you could possibly find, anywhere. They are $$$

You sure the stock hose is 5/8"? I can't remember but I didn't think they were that big. The hoses on the wheel valves are much smaller.

discounthydraulichose.com has more options for fittings

Lastly, you could consider changing those fittings and hoses to JIC which is more common. You would have to change the fittings on the frame and hubs. It's been awhile but I think changing everything to JIC was cheaper than replacing the existing SAE hose. SAE is going to be even harder to find outside the US, if you're travelling.
 
Last edited:

aw113sgte

Well-known member
Steel Soldiers Supporter
462
673
93
Location
La Crosse, WI
Those reusable fittings are going to negate any savings you could possibly find, anywhere. They are $$$

You sure the stock hose is 5/8"? I can't remember but I didn't think they were that big. The hoses on the wheel valves are much smaller.

discounthydraulichose.com has more options for fittings

Lastly, you could consider changing those fittings and hoses to JIC which is more common. You would have to change the fittings on the frame and hubs. It's been awhile but I think changing everything to JIC was cheaper than replacing the existing SAE hose. SAE is going to be even harder to find outside the US, if you're travelling.
This is for the frame to hub, but there are 3 sizes, 13/32 for brake, 1/2 for ctis fill, 5/8 for vent. Those are the hose sizes, the fittings are more complex.
 

Wingnut13

Well-known member
Steel Soldiers Supporter
232
556
93
Location
Strafford, NH
Is there a write-up somewhere that covers replacement and updating to JIC? Sizes, fittings etc? I don’t have problems yet, but would like to start collecting the parts to have on hand for when it does.
 

serpico760

Well-known member
Steel Soldiers Supporter
608
1,563
93
Location
San Diego, CA
I attached an airline quick connect and shut off valve to my wet tank for using air tools. Picked up a 20-ton pneumatic Jack and 22 ton jack stands!
My only complaint with the jack stands is the holes are too far apart. They put divots in the base at 90° from each other but holes only on one part of the extension. it would have been best to put holes on the opposite side of the extension in between the ones on the main section. I'll have to run an FEA in SolidWorks to see if that would weaken it IMG_20231018_101538.jpgIMG_20231018_113118.jpgIMG_20231015_120818.jpgIMG_20231015_122612_01.jpgIMG_20231018_122606.jpgIMG_20231018_122703.jpg
 

ramdough

Well-known member
1,554
1,727
113
Location
Austin, Texas
I attached an airline quick connect and shut off valve to my wet tank for using air tools. Picked up a 20-ton pneumatic Jack and 22 ton jack stands!
My only complaint with the jack stands is the holes are too far apart. They put divots in the base at 90° from each other but holes only on one part of the extension. it would have been best to put holes on the opposite side of the extension in between the ones on the main section. I'll have to run an FEA in SolidWorks to see if that would weaken it View attachment 908522View attachment 908523View attachment 908524View attachment 908525View attachment 908526View attachment 908527
Do you have any links to what you bought (including plumbing and stands)?


Sent from my iPhone using Tapatalk
 

serpico760

Well-known member
Steel Soldiers Supporter
608
1,563
93
Location
San Diego, CA
Do you have any links to what you bought (including plumbing and stands)?


Sent from my iPhone using Tapatalk
The plumbing is just a quarter npt T-fitting with one male in the middle and a female on each end together with a quarter in PT ball valve and a universal airline quick connect. The original pressure relief valve went on the other end. If I had to do it differently I might put a variable angle quick release on there or a 45° fitting or something just to angle it out a little bit to make it easier to attach the hose. Those were all from home Depot. Sealed everything with permatex liquid thread sealant.
Jack is on sale for $100 right now it was $170 and lifts the truck in under a minute!
The jack stands weren't on sale unfortunately but might be soon who knows
 
Last edited:

serpico760

Well-known member
Steel Soldiers Supporter
608
1,563
93
Location
San Diego, CA
I attached an airline quick connect and shut off valve to my wet tank for using air tools. Picked up a 20-ton pneumatic Jack and 22 ton jack stands!
My only complaint with the jack stands is the holes are too far apart. They put divots in the base at 90° from each other but holes only on one part of the extension. it would have been best to put holes on the opposite side of the extension in between the ones on the main section. I'll have to run an FEA in SolidWorks to see if that would weaken it View attachment 908522View attachment 908523View attachment 908524View attachment 908525View attachment 908526View attachment 908527
IMG_20231018_163847.jpgIMG_20231018_164547.jpg
 
Last edited:

littlesfmtv

Member
Steel Soldiers Supporter
42
93
18
Location
Memphis Tennessee
Swapped out the front engine mounts today. Used a tree and a tow chain for support to hookup the chain hoist. Pucker factor never hit 5k, but it was a solid 2.5k. blocked the engine off the top of the front axle in case the tree decided to untree.

Some things to note if you ever swap yours:

Removing the upper part of the fan shroud is a good idea to give yourself a little more lift room.
Be prepared to possibly have a coolant line on the top of the motor come off and take a shower. I did.

The manual sucks for the procedure. If basically just shows a chain hooked to the engine and says swap them out. You have to jigsaw the bolts out and the spacers separately, and, like most things under this truck, it's an ab workout. Took me about three hours. I was being extra cautious with the engine in the air. My old mounts were hosed.

My vibrations at idle have decreased in their magnitude so my head lights don't vibrate with the same force, but they still shake around pretty good at idle. Is this common?
 

Attachments

Last edited:

coachgeo

Well-known member
4,969
3,340
113
Location
North of Cincy OH
Swapped out the front engine mounts today. Used a tree and a tow chain for support to hookup the chain hoist. Pucker factor never hit 5k, but it was a solid 2.5k. blocked the engine off the top of the front axle in case the tree decided to untree.

Some things to note if you ever swap yours:

Removing the upper part of the fan shroud is a good idea to give yourself a little more lift room.
Be prepared to possibly have a coolant line on the top of the motor come off and take a shower. I did.

The manual sucks for the procedure. If basically just shows a chain hooked to the engine and says swap them out. You have to jigsaw the bolts out and the spacers separately, and, like most things under this truck, it's an ab workout. Took me about three hours. I was being extra cautious with the engine in the air. My old mounts were hosed.

My vibrations at idle have decreased in their magnitude so my head lights don't vibrate with the same force, but they still shake around pretty good at idle. Is this common?
yikes.... living life dangerous... thats a lot of force that far out the branch.. you were wise to be very cautious, and/or stupid and lucky lol
 

littlesfmtv

Member
Steel Soldiers Supporter
42
93
18
Location
Memphis Tennessee
yikes.... living life dangerous... thats a lot of force that far out the branch.. you were wise to be very cautious, and/or stupid and lucky lol
It's hard to see in that pic, but there is an 18k pound tow chain running from the lift point on the branch that goes up and around the trunk. The trunk is ~20" at that height. There is no way I would trust that branch by itself. The branch is around 9" in diameter that far out and is used almost solely in compression with the majority of the load being transmitted to the trunk. Using that branch by itself, it would flex like a fishing rod of death with you being the bait under it.

There are some pretty good references online about shear loading on trees with some pretty simple equations to figure it out. 1500# on this tree static at that height and trunk diameter barely moves the needle. In full foliage in high winds it sees many multiples of that dynamically.

Even with that, the axle is stacked in 2x4 pieces I cut up so if it let go I'd lose and oil pan and not my life/hands.
 

Third From Texas

Well-known member
2,704
6,327
113
Location
Corpus Christi Texas
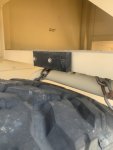
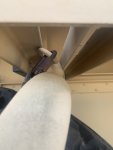
My amazing feat of the week was installing 6-fuse blocks behind both the driver and passenger kickpanel.

One thing I hate about the A1R is the way BAE buried the power lugs used to tap into additional power. While there are +/- lugs right on the left face of the PDP on the A0 trucks, on the A1R they are located basically UNDER the PDP and the only way to reach them is to disassemble half the electrical panel. LOL

So this will make the addition of non-OEM devices a lot easier gong forward.

I also picked up a 12-fuse block for the overhead panel mockup (which will support my backup display, Bluefire display, cooling fans, stereo, 3 radios, lights, accessory outlet, USB chargers, etc.

--------------------------

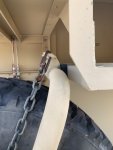
I also added a split "Y" cable to the J1939 diagnostic port. It splits off the OEM connector, leaving one end mounted to the OEM space intact with it's OEM 24v B-pin And a second leg hidden behind the kickpanel for the Bluefire and repowered that leg (which seemingly required 12v...and thus the new fuse panel there).

I'll be doing a little review of the Bluefire in the Diagnostic Reader thread and get some pics.
 

serpico760

Well-known member
Steel Soldiers Supporter
608
1,563
93
Location
San Diego, CA
My neighbor is a garage door repairman on the side and gave me a garage door that was bent so I could use it for parts for my garage door that had broken. And then realized the panels would work good in the bed of the truck as additional panels. For example when I go camping in the back of the truck I had a 2x12 going across the back so when I had the tailgate down and the ladder in place it blocked most of the view into the back of the truck but it was very heavy. I measured the distance between the folding sides on each side and it was 91", so I trimmed the ends off of the lower garage door piece, drill the rivets out on the end caps and reattach them with rivets to the piece I trimmed. Now it goes a little higher than the tailgate and completely blocks The view when the flap is down. The bonus is that if you don't have the seat kit which I have only the rails and posts for the seat kit but not the seats, the lower riding lug in the garage door fits perfectly in the slots on the sides which means if I didn't have the seat kit in place I could simply slot it right into there! Next I will paint it to match the rest of the camo. Additionally I can trim some other pieces from the other three garage door panels and attach them to where the seats would attach to be fold down bed panels. They are a little wide for use as seats because they are 24 in wide
IMG_20231028_140445.jpgIMG_20231028_141159.jpgIMG_20231028_141226.jpgIMG_20231028_141220.jpg
 

Mullaney

Well-known member
Steel Soldiers Supporter
Supporting Vendor
7,357
19,060
113
Location
Charlotte NC
My neighbor is a garage door repairman on the side and gave me a garage door that was bent so I could use it for parts for my garage door that had broken. And then realized the panels would work good in the bed of the truck as additional panels. For example when I go camping in the back of the truck I had a 2x12 going across the back so when I had the tailgate down and the ladder in place it blocked most of the view into the back of the truck but it was very heavy. I measured the distance between the folding sides on each side and it was 91", so I trimmed the ends off of the lower garage door piece, drill the rivets out on the end caps and reattach them with rivets to the piece I trimmed. Now it goes a little higher than the tailgate and completely blocks The view when the flap is down. The bonus is that if you don't have the seat kit which I have only the rails and posts for the seat kit but not the seats, the lower riding lug in the garage door fits perfectly in the slots on the sides which means if I didn't have the seat kit in place I could simply slot it right into there! Next I will paint it to match the rest of the camo. Additionally I can trim some other pieces from the other three garage door panels and attach them to where the seats would attach to be fold down bed panels. They are a little wide for use as seats because they are 24 in wide
View attachment 909256View attachment 909257View attachment 909258View attachment 909259
.
Neat Idea!
And the price is definitely right too...

.
 

Bryteayes

Member
50
87
18
Location
San Angelo, TX
I wondered why the spare tire lift on my 1998 M1079 would not lower the tire. It appears that the lift was too high when the new box was put on in 2013. I had to lift the box about 2" to be able to get the lift in proper position. It worked perfectly after repositioning.

Also replaced Oil Line of Death and installed engine block heater.

Now to find out where the oil leak coming from the front of the engine is coming from.

Have you noticed that there is nothing light about a Light Medium Tactical Vehicle?
 

Attachments

Top
AdBlock Detected

We get it, advertisements are annoying!

Sure, ad-blocking software does a great job at blocking ads, but it also blocks useful features of our website like our supporting vendors. Their ads help keep Steel Soldiers going. Please consider disabling your ad blockers for the site. Thanks!

I've Disabled AdBlock
No Thanks