• Steel Soldiers now has a few new forums, read more about it at: New Munitions Forums!

  • Microsoft MSN, Live, Hotmail, Outlook email users may not be receiving emails. We are working to resolve this issue. Please add support@steelsoldiers.com to your trusted contacts.

What have you done to your HMMWV today/lately

Mullaney

Well-known member
Steel Soldiers Supporter
Supporting Vendor
7,716
19,766
113
Location
Charlotte NC

Mogman

Moderator
Staff member
Moderator
Steel Soldiers Supporter
6,932
9,594
113
Location
Papalote, TX

Milcommoguy

Well-known member
Supporting Vendor
1,710
2,265
113
Location
Rosamond, CA
What brand and model tent?
Tent is a CVT Rainier. https://cascadiatents.com/ Not a sales endorsement or affiliation.

Those M- series trailers are being built into DIY overland rigs... which might be why the crazy high prices. I bought three years ago NEW out of Barstow $470 +/- each. See utube for all the builds and ideas. Some factory rigs $26,000 just nuts OH.

Next project is to enclose one into a "Tactical Teardrop" Getting ready for that day ???? LOL

Bring big money, CAMO
 

Bulldogger

Well-known member
Steel Soldiers Supporter
1,330
586
113
Location
Quantico VA
Spent a hot sweaty hour and a half in the 95F 90% humidity learning how to align the shifting mechanism. As part of my "why does the engine race when hot and hate to be manually shifted to neutral when slowing" adventure, I decided to inspect the shift linkage. According to the TM, which has a grand total of about 5 sentences on shift linkage alignment, the shift arm on the left front of the trans must be parallel to the relay arm (it relays the movement from the PRND21 shift lever down to the trans) if the linkage is correct. Mine was waaaaaay off. (That's pages 603-604 of the 954 pages, in TM 9-2320-280-20-2 by the way.)
It's hard to check for parallelism when you can't actually get your head on the same level, what with the propellor shaft and exhaust pipe in the way.
With some thinking, it occurred to me that parallel means equally spaced along its length, so I removed the linkage rod from its mounts between the two arms and compared its length to the two mounting bolts centers at the bottom of each arm. It was much longer than that distance.
This led me to the rod between the shifter and the relay arm; it was bent on the threaded end at the relay arm. Culprit identified! Probably the scrappers I got my salvage powertrain from bent that rod (along with breaking a nice long list of components) and the installer just made it work, without trying to repair the rod and align completely.
So I spent a bit of time whanging on the rod in the vise with some aluminum jaws until the threaded portion was as straight as I could get it. Then some tickling down the rod threads with a thread restoration die and I could screw the trunion down all the way (hard to turn, but it turned).
Then it came down to fiddling about until the length of the trans shift arm to relay arm rod was right and the shift lever rod matched. It took a long time because the trunions wouldn't screw by hand. I could have removed them by force and chased all the threads, but I never plan to do this again, so didn't bother.
After all was back together, it seemed to shift assertively when putting the lever through the gears at rest, and I had no issues during a quick test drive.
The real test will be the next hot day when I drive it 50-70 miles, towing, and see if the trans hiccups again or just rolls along.
BDGR

P.S. I highly recommend investing in a thread restoration tool set. Chasing threads with a standard tap or die will cut away too much material and make the threads sloppy. The restoration tool is much gentler, and just nudges the threads back into shape. I use mine maybe twice a year, but each time I smile at the satisfaction of how well it works and enjoy having the right tool for the job.
 

Glider

Active member
278
229
43
Location
South Pittsburg, TN
Nice. I just removed 4 run-flats. Wish I did the inserts but didn't. Also, have factory high back seats and driver suspension frame coming. How do the seats work as compared to pads? Is there less room for the driver?
 

osteo16

Well-known member
Steel Soldiers Supporter
585
585
93
Location
Evansville, IN
Nice. I just removed 4 run-flats. Wish I did the inserts but didn't. Also, have factory high back seats and driver suspension frame coming. How do the seats work as compared to pads? Is there less room for the driver?
I’m 6’2 and going from frame seat to smitybilt on new driver pedestal I found I lost maybe just a tad of length. Still plenty of room for myself. All 240lbs.. High backs should give you even more room than what I have. Thinner padding on backside.
 

DHumvee

Member
42
50
18
Location
Northwest Florida

Mullaney

Well-known member
Steel Soldiers Supporter
Supporting Vendor
7,716
19,766
113
Location
Charlotte NC
You are ahead of me... I have violent shaking at 20! Not sure if it's the run flats or flat spots from sitting 10 years.
.
Go down the the road again and see if the shaking is in the steering wheel or in the seat. Maybe moving a tire from the front to the back will make a difference - or at least help you discover where the problem is.

You might also lift the front of the truck and block it up. Then use a 3# hammer or something that you can stand up beside the tire. Slowly turn the tire and see if you have a left right wobble. Or get a piece of wood about the thickness of the open space under the tire. Spin the tire and see if you can see up and down movement.

Yeah, it is a pain in the butt but that might get you sighted in on the problem rim or tire or both. On the bright side, discovery is a cheap piece of work. I know this is a HMMWV, but this Dayton Rim video will help you see what I am trying to explain. A bent rim will be obvious using this technique.


DHumvee

Member
42
50
18
Location
Northwest Florida
.
Go down the the road again and see if the shaking is in the steering wheel or in the seat. Maybe moving a tire from the front to the back will make a difference - or at least help you discover where the problem is.

You might also lift the front of the truck and block it up. Then use a 3# hammer or something that you can stand up beside the tire. Slowly turn the tire and see if you have a left right wobble. Or get a piece of wood about the thickness of the open space under the tire. Spin the tire and see if you can see up and down movement.

Yeah, it is a pain in the butt but that might get you sighted in on the problem rim or tire or both. On the bright side, discovery is a cheap piece of work. I know this is a HMMWV, but this Dayton Rim video will help you see what I am trying to explain. A bent rim will be obvious using this technique.

Thanks for the info! I just got the truck and haven't had time to track it down yet. I took it back out after I messaged you and I'm pretty sure it's the pass rear, definitely in the seat. It calls for 50psi which is crazy high from what I have seen. I'm running 25psi, could low air pressure be affecting the run flats causing it? I wondered if a squatting low tire could be bouncing the run flat inside like an over inflated basket ball.
 

Mullaney

Well-known member
Steel Soldiers Supporter
Supporting Vendor
7,716
19,766
113
Location
Charlotte NC
Thanks for the info! I just got the truck and haven't had time to track it down yet. I took it back out after I messaged you and I'm pretty sure it's the pass rear, definitely in the seat. It calls for 50psi which is crazy high from what I have seen. I'm running 25psi, could low air pressure be affecting the run flats causing it? I wondered if a squatting low tire could be bouncing the run flat inside like an over inflated basket ball.
.
Nice! You cut down your problem area by 75% so now you have something to focus on. I'm not sure if the run-flat could bunch up of not. I would think that the truck would see the shake come and go according to your speed if that was the problem.

Airing up to 50psi is a cheap fix too. Just remember to air it up by a few (maybe 5) pounds, then walk away and come back again for another 5. These rims aren't like the old split rims from the days gone by - but with it being a new-to you truck - it might be smart to keep as much of your body out from in front of the tire as you add pressure.

It may have sat there flat for a while like you mentioned...
 
Last edited:

Coug

Well-known member
Steel Soldiers Supporter
2,975
4,356
113
Location
Olympia/WA
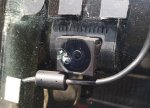
So of all the places I could get a rock chip, it was directly in front of the dash camera.
So I spent 45 minutes changing out the windshield today. Still need to redo the name stickers on top and the dash camera mounting pad, but other than that it's nice to have new glass.
Would have taken a lot less time if I hadn't used Lexel to seal the gasket in (and possibly could have saved the old windshield and repaired the chip, then used as a spare for the other side). Soapy water made installing the new one easy.

d4292e418d3e204a2db397250e7228944607a065-1.jpg
 
Top
AdBlock Detected

We get it, advertisements are annoying!

Sure, ad-blocking software does a great job at blocking ads, but it also blocks useful features of our website like our supporting vendors. Their ads help keep Steel Soldiers going. Please consider disabling your ad blockers for the site. Thanks!

I've Disabled AdBlock
No Thanks