• Steel Soldiers now has a few new forums, read more about it at: New Munitions Forums!

  • Microsoft MSN, Live, Hotmail, Outlook email users may not be receiving emails. We are working to resolve this issue. Please add support@steelsoldiers.com to your trusted contacts.

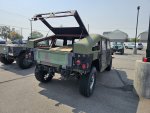
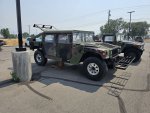
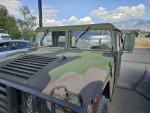
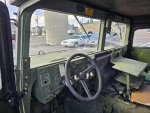
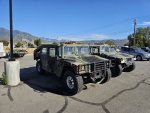
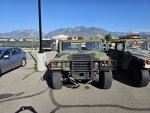
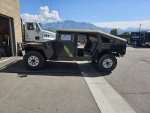
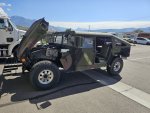
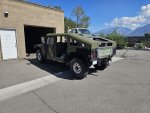
2000 HMMWV M1123 Project

mow***com

Active member
72
205
33
Location
Salt Lake, Utah
Another quick update....

So, I have finally done the transmission gasket again and also the dipstick seal.
It is full of ATF and ready to start testing. The transfer case fluids have also been changed, along with both diffs.
The hubs still need to be done and the brakes bled.

Tomorrow, I will finish the fuel system(for now) and move along to check offs for first start up.
The other day, I did the filler hose and added a new filler surround.
So, no more leaks when filling it up. Today, I drained the fuel tank again and may do it one more time.
The fuel filter is back in, with new fuel hoses.

I am feeling good about the first start up. I just wonder how the first drive will eventually go.
For now, I plan to just run the engine up to temperature and see how it holds fluids.

I did hurry and paint the hatch green. But, it isn't a match and will need to be painted again. There are already previous sanding imperfections and chipping paint that I didn't really care to address until next season.
I decided to order the fixed windshield interior brackets, instead of making my own. Time is of the essence, maybe.
Same with the windshield surrounds. I ordered those, instead of drilling.
I plan to roll around without rear windows for a short period. At least until it starts getting colder.

That is about it, at the moment. Still need to re check my grounds and wire up some batteries. I did wire up a keyed switch. I had zero problems with mine in the last truck.
Hopefully, Saturday or Sunday, it will run... But, I'll get there, when I get there. Haha.
 

Attachments

mow***com

Active member
72
205
33
Location
Salt Lake, Utah
Another small update.... Today, I decided to finish what was needed and give the truck a start. Only one small hiccup.
I couldn't seem to get fuel to the injectors. Now, it was late in the day and I wanted to get home.
So, I decided that I would troubleshoot tomorrow. I just can't figure it out yet and will spend some more time this weekend.

I am using a new KDS smart start box (with matching temp sensor) and still have the original ignition switch wired up.
New glow plugs and the light cycles on/off, as it should(But, it is 90+° outside and shouldnt even need the aid of glowplugs, unless something else does)... Fuel is at the filter, at the petcock drain.
Tomorrow, I will try to establish if fuel is getting up to the IP.
The fuel system was completely dry. But, I just can't imagine that it wasn't getting to the injectors, after 3-4+ rounds of cranking. No fuel at the injectors in sight, sigh.

I brought the batteries home, to give them a full charge and test again tomorrow.
Is there anything electrical that I might be missing, that could keep the fuel from getting to the pump, or injectors?
I will go over everything again in the morning and report back.
4 of the injectors are new numbers matching and all copper seals are new.
The injector pump was sold to me as new and still looks really clean. For now, I've unplugged the harness to the glowplugs, since I didn't want continuous cycles of the plugs, just trying to get it to run.

On another note.... The transmission light stays on. So, fun digging through transmission files.
All fluids look good, except a leak at the thermostat area. An area that I touched and will redo properly.
Still not a bad day. I had just hoped for a little more sweet success.
Let me know if any of you have any ideas about the fuel? Thanks again, everyone. Have a good afternoon.
 
Last edited:

mow***com

Active member
72
205
33
Location
Salt Lake, Utah
This last weekend has been a little frustrating, to say the least.
I do believe some progress is being made. It will just take a little time to get to it.
I am picking up a new intake manifold gasket set up, since I have a bit of diesel fuel in the block valley and leaking injector hard lines to the IP.

I am starting to get little spurts of diesel out of the hard lines and on Saturday, it ran for a short bit, albeit pretty rough.
So, I am just trying to work injector cleaner into the system, so I don't have to pull the IP.
But, if it has to be done, it has to be done.

That is about all there is to report. Later this weekend I will try and get a few things done.
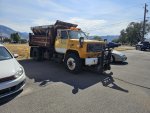
Lastly, I picked up a project truck. It is an old plow/dump truck and is pretty beat up. But, it does run and drive. It is a 1990 GMC 7000 truck, with a 8.2 Detroit Fuel Pincher and a 5 speed/2 speed rear axle.
It is a back burner project for the distant future.
 

Attachments

mow***com

Active member
72
205
33
Location
Salt Lake, Utah
Based on recent threads and threads that I've recently read, here is another quick update.
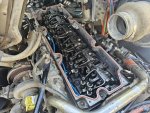
Yesterday, I decided to pop off the intake manifold and lock down the injector hard lines to the IP.
Cleaned up the valley and there are no more leaks to the hard lines.
Then, I decided to bleed the injectors and see if anything happened.
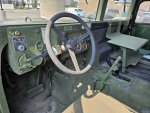
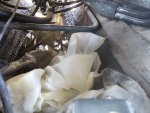
Before bleeding the injectors, I wanted to see how much pressure might be on the IP side of the fuel filter.... Well, I think enough is the answer, as the hose popped off and sprayed the inside of the truck(as is evident in the pictures). Sigh.
Well, after trying to clean up diesel fuel, the truck started again. It wasn't pretty, but I just let it ran for a minute or two, to monitor voltage, engine oil pressure, engine temps. All looked good, until it shut itself down.

All signs point to the IP. I blew out the hard lines enough to know, that isn't the problem.
5 out of 8 injectors are brand new. So, while it might not be helping fully, it doesn't seem like that is my problem yet.
I've got plenty of fuel at the drain and to the feed at the IP.
Everything is telling me it is the IP that is gummed up.

That being said, on order is a 5 way security penta-key for the top of the IP pump.
After trouble shooting this area, I will figure a solution.
I had suspected terrible fuel initially and it is why I decided to drain the system/tank a few times.
Just didn't realize how quickly it worked itself into everywhere.

Seeing oil pressure, good voltage, proper temps just makes me want to put it on the road as quick as I can.
Lastly, new windshield retainers and the interior windshield fixed brackets came in.
So, the truck is looking pretty complete. Ordered some mirrors and I am starting to get a bit antsy.
That's about all, for now. I will keep reading and troubleshooting.
 

Attachments

mow***com

Active member
72
205
33
Location
Salt Lake, Utah
Interesting small update. So, the other day, the truck was running long enough for me to shut it down with the switch.
Only, I had noticed that the engine stayed running. So, I started to read another thread where someone had the cold advance wire switched with the IP solenoid wire, resulting in the exact symptoms that the M1123 was experiencing.
Could that really be it? Could it have been me? Or even the seller?
Well, the next morning, I went to the truck. I open the M998, to verify the wires and went over to the M1123. Sure enough, those wires had been crossed over.

So, as of now.... It does run and shut off with the switch. I also fixed the leak at the thermostat and it was just a new gasket. I must have not tightened the bolts all the way. Since, I used a little sealant to hold it in place, it formed a little gap for a leak.
Although, it still doesn't completely fix my fueling issue.
But, I did catch another booboo that I made in the spring and am going to do today.
I had forgotten to fully tighten the valve cover gasket, after I mounted the new one. So, oil started leaking down the side.
So, new valve cover gaskets and I am going to change the oil again after I run it once.

I did bleed the brakes and now actually have a pedal. I was actually able to drive the truck around the parking lot.
Plus, no more transmission light. I was having trouble with the emergency circuit switch button behind the battery box. It was acting like it was seized and tripping.
For now, I am going with the cheap 24F batteries. Another day, I will possibly consider something else. Gotta keep costs down somewhere.
One thing that I did, that made me half proud was route a new fuel vapor line to the top of the tank.
I made the line red, because it was the cheapest they had in stock. Haha

Lastly, I finished the mounting bolts for the windshield frame. The hardtop bolts would not index with my windshield frame bolts, not matter how I adjusted things.
The problem was my windshield wiper holes. I was maxed out all the way on the sides of the hole.
I put towels under the frame, to give me a center over the hole. But, it only marginally helped.
Either, I was to bore out the windshield wiper nut hole (an absolute ton of work to get the frame out again), or drill the mounting holes a bit larger, to align with frame holes.
So, that is what I did and used a slightly oversized washer to cover up any gaps.
It wasn't exactly what I wanted, but life goes on.
Now, to get me through the winter, I had a crazy idea to cut some clear plexiglass and just mount it.
Since I want to strip the stantback next season, something has to get me through the winter. I still stay updated on the decision.
Made a license plate mount put of some angle aluminum. I used the existing hole, so it is ultra simple.

That's all for now. I will update after I finish the valve covers. Plus, I do have a leaking injector at the seal. Thought it might have been the return, nope.
So, another seal and I will see what happens. Luckily, I got an extra set of injector washers, thinking they might be needed.
 

Attachments

Mogman

Moderator
Staff member
Moderator
Steel Soldiers Supporter
7,015
9,693
113
Location
Papalote, TX
I have not read every word but wonder if you have installed the missing CDR valve, if not you have a direct opening into the intake, one little piece of trash in that hole and the engine is toast.
 

mow***com

Active member
72
205
33
Location
Salt Lake, Utah
Another update...

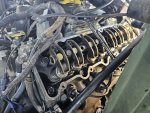
On Friday, I decided to pull the valve covers and throw new ones on. Much cleaner, but I still have a couple tiny leaks.
After I finish everything else, I will consider my options. The valve covers are pretty beat up and new valve covers wouldn't be the worst future investment.
Also ordered two more injectors. I've been trying to source matching Delphi injectors to what came out of the truck(especially since I have been mixing). But, most vendors only have the Bosch injectors (which I've read both are possibly made by Bosch anyway).
So, that will be 7 new injectors and I will probably get one cleaned locally, while I seek the last one.

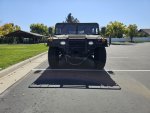
After adding new oil, I decided to fire up the truck and finally see the gauges move. I've been wanting to blow out the oil cooler/radiator fins for a while. The M998 had so much dust in between the fins.
Since, I still haven't done the hubs... I just decided to putt it over to the garage and use the compressed air. It is wild to see the truck in another location.
Surely, there was dust for miles. But, it already feels cleaner.
Let it run for 15-20 minutes, just monitoring various things, adding a little ATF to the transmission.

Then, I decided to just give it a little spin down the road, just to see what the transmission might do.
Well, it didn't do too much. Just 2nd gear, telling me that the transmission has no idea what the truck is doing.
But, at least the speedometer gauge works.
So, I dove the truck back to the garage and poked my head around, to see what I might find.
Well, I do believe that I have found the issue.
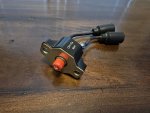
It is still the manual 15A circuit breaker, that interrupts the transmission circuit and also the powered transmission light.
It just is so corroded, that I can't get it to properly set, or reset.
Problem is.... Almost any vendor wants over $215 for the part, for a 15 amp manual circuit breaker. I almost can't believe it and came up with my solution.
I found an NOS Texas Instruments, 12v/24v manual push button 15 amp circuit breaker, that doesn't have insulated connectors for ~$28.
So, for now... I will make a connector adapter set up, just to test whether or not my transmission light cycles properly and I can access to the gears.

Early next week, I will do the hubs and get to the testing. I still have some things to button up under the engine bay, but it shouldn't take too long.
My exhaust system rattles like nothing else I've ever heard. So, I've got some wrenching underneath again.
On another note, I am happy to have soft doors. I take them off so frequently, that I prefer to just store them in the back, if needed.
At some point, it would be awesome to have fiberglass winter doors.
That is pretty much all for now. I will let you all know how things go later this upcoming week.
 

Attachments

Last edited:

TOBASH

Father, Surgeon, Cantankerous Grouch
Steel Soldiers Supporter
Supporting Vendor
3,596
3,518
113
Location
Brooklyn, NY
Leaks on valve covers are typically because they are either bent or you did not apply the sealant properly. Specifically, you need to wipe the heads clean and then apply the sealant to the valve head and not to the valve cover.
 

Mogman

Moderator
Staff member
Moderator
Steel Soldiers Supporter
7,015
9,693
113
Location
Papalote, TX
Leaks on valve covers are typically because they are either bent or you did not apply the sealant properly. Specifically, you need to wipe the heads clean and then apply the sealant to the valve head and not to the valve cover.
Holy Moly, both the factory and I have been doing it wrong all these years :)
You need to strip any oils off of the head and valve cover mating surface, wiping them is not enough.
 

TOBASH

Father, Surgeon, Cantankerous Grouch
Steel Soldiers Supporter
Supporting Vendor
3,596
3,518
113
Location
Brooklyn, NY
Holy Moly, both the factory and I have been doing it wrong all these years :)
You need to strip any oils off of the head and valve cover mating surface, wiping them is not enough.
Yeah, a well respected member on this forum once gave these instructions and lo and behold he was and is correct. I’m just quoting.
 

mow***com

Active member
72
205
33
Location
Salt Lake, Utah
Funny enough... I stripped oil off the head and valve covers, plus cleaned them for sealing. I sadly did what I did with my Detroit Series 60. Of course, forgetting that I was working on a V8 6.5 this time.
Since, I am the one that drives my trucks, my process takes a bit longer.
Working outside on big trucks can be a pain. You do everything you can to keep your work piece clean. But, it is never like having a shop, or garage.
Anyway, I like to clean the entire head and re oil what I can, before cleaning the surface again for sealing.
But, on the Detroit Series 60 14L, since it is an inline 6. I just sealed the front and back of the head, due to the design.
On the Detroit/GM 6.5, I did the exact same thing and should have sealed the entire head, all the way around.
Lesson learned and it will cost me time, yet again.
 

Attachments

mow***com

Active member
72
205
33
Location
Salt Lake, Utah
Quickish update....

The TI 15 amp circuit breaker arrived. So, I made my little adapter and tossed it in the truck.
Surprise.... It even fits. I suppose I could dunk it in sealant or something. But, I plan to keep it, as it does what it needs to do, at nearly 10% cost of the replacement part.
So, I will keep this updated as I continue to do my testing.
But, so far....The transmission light cycles. It drives around and shifts into gears.

On another note. I ordered a couple more injectors that are hopefully on their way. The fuel system is getting better, with every run.
But, it still isn't there yet. I don't quite trust taking the truck too far from the parking lot.
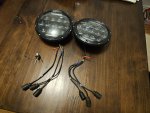
All lights function, as they should. I just need to finish wiring the LED headlights, which I will do today.

Lastly... Man. Clear polycarbonate sheets are pretty pricey. Still trying to decide what to do there.
In the next weeks, I'll try to work out any remaining kinks.
The powersteering still feels whiney. The brake system feels louder than the M998 also.
 

Attachments

mow***com

Active member
72
205
33
Location
Salt Lake, Utah
It has been a few days since I have updated the thread.
In the last couple weeks, I've just been doing some light on road testing, working out the kinks.
The truck seems to be running a little better every day and I have finally received all the new injectors.

The other day, I took the truck out for some fuel and to get some lunch.
Of course, after getting my food, I noticed fluid under the rear of the truck. So, I limped it back to work and got a better visual inspection.
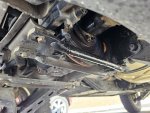
The right rear brake line, to the caliper had hit the spinning brake rotor and cut into the line(the placement tab wasn't secure, allowing the line to move more freely).
Just another joy of putting old trucks on the road.

So, I ordered the new line and it should be here today, or tomorrow.
I also ordered a few small things, like small J hooks for the battery(made my last J hooks) , hold down tabs for the harnesses, etc.
Hubs are all done and all fluids in the truck have now been changed.
LED headlights are finally wired up and all lights now function.

The next week or so, will be seeing if I can get to overdrive. While driving around 45-55mph, I didn't seem to be getting the final gear.
Gonna have to check my brake switch and transmission fluid levels again.
Another thing that has me puzzled, is that my glowplug light is activating every time I go to start the truck, regardless if the engine is already warm.
I imagine his has to be related to a temp sensor issue, with the box not knowing the truck is already warm.

So, that is my update. I still haven't gotten to the windows and it will probably be my last care.
The aluminum top is loud. So, I need to lift it up and place some dampening material on the top of the A/B pillars at some some point.
Made a plate that covers the radio cable retainer hole. Of course, I am happy with it, since I cut it with a grinder, drill, some paint and a cork gasket:).
Lastly, decided to reloate the transmission circuit breaker and other related stuff, to give more back seat leg room. I will probably relocate them into the right section of the battery box.
Thanks again, everyone. I feel like the journey is still just beginning with this truck.
 

Attachments

Last edited:

mow***com

Active member
72
205
33
Location
Salt Lake, Utah
Smallish update...

Brake line arrived and installed(it is such a tight fit in that area, it was nearly impossible without removing the brake caliper, but I finally got it, with plenty of negative words). Feels nice to continue testing again.
First thing I decided to do, was pay attention to shifts. Surely, 1st gear, 2nd gear, followed by 3rd, then 4th.
Well, that makes me feel pretty proud. So, I decided to take it on the freeway. Mind you, it still needs an alignment, but it still goes relatively straight down the road.
Got it up to maybe 65-70mph and it felt like a new experience that I hardly knew how to gauge.

Brought it back to check things out and everything looks good. Also, when I unplugged my TSU and plugged it back in, my glow plug light cycle problems with warm engine temps seems to have gone away. We will see.
Hard to tell if I can hear the fan kick on. I have seen engine temps get to about 220ish and backing off.
Although, it doesn't feel like the old M998, where it would bring the temps quickly down to 200ish, then start the cycle over again.
So, I will unplug the TDS and drive it around the block.

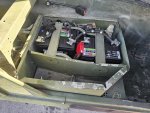
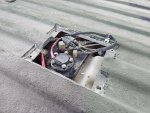
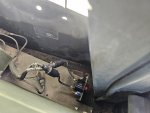
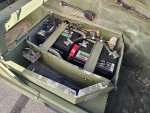
I relocated the transmission circuit breaker and related components. It was easy enough to cut down the original panel and reuse it in the jack kit compartment. I ride with a 1.5 ton aluminum hydraulic pump jack under the passenger rear compartment anyway, it was unused space.
Plus, the battery area still looks pretty clean.

That is about all for now. I am hoping to start taking it home in the next week, or two.
Still a lot of testing and buttoning up certain areas, before I trust the old girl to haul me around.
Lastly, the M998 has found its new owner and I am down to the M1123 now.
I'd like to just keep this truck forever and customize it as I go. It has taught me quite a bit and continues to teach me everyday.
 

Attachments

Milcommoguy

Well-known member
Supporting Vendor
1,713
2,279
113
Location
Rosamond, CA
Smallish update...

Brake line arrived and installed(it is such a tight fit in that area, it was nearly impossible without removing the brake caliper, but I finally got it, with plenty of negative words). Feels nice to continue testing again.
First thing I decided to do, was pay attention to shifts. Surely, 1st gear, 2nd gear, followed by 3rd, then 4th.
Well, that makes me feel pretty proud. So, I decided to take it on the freeway. Mind you, it still needs an alignment, but it still goes relatively straight down the road.
Got it up to maybe 65-70mph and it felt like a new experience that I hardly knew how to gauge.

Brought it back to check things out and everything looks good. Also, when I unplugged my TSU and plugged it back in, my glow plug light cycle problems with warm engine temps seems to have gone away. We will see.
Hard to tell if I can hear the fan kick on. I have seen engine temps get to about 220ish and backing off.
Although, it doesn't feel like the old M998, where it would bring the temps quickly down to 200ish, then start the cycle over again.
So, I will unplug the TDS and drive it around the block.

I relocated the transmission circuit breaker and related components. It was easy enough to cut down the original panel and reuse it in the jack kit compartment. I ride with a 1.5 ton aluminum hydraulic pump jack under the passenger rear compartment anyway, it was unused space.
Plus, the battery area still looks pretty clean.

That is about all for now. I am hoping to start taking it home in the next week, or two.
Still a lot of testing and buttoning up certain areas, before I trust the old girl to haul me around.
Lastly, the M998 has found its new owner and I am down to the M1123 now.
I'd like to just keep this truck forever and customize it as I go. It has taught me quite a bit and continues to teach me everyday.
Nice and clean battery box area(y) and the relocation (y)(y) Not a fan (n)of all the RTV on the bus bar, But that's another story📖

Something to think about :unsure: That front battery?? What I am seeing:3dAngus:from the easy internet chair💺......

If one make a HARD stop, it MIGHT slip forward ? driving the positive post connector overhang, the way it is oriented into the front battery box panel and POOF aua My 2 cents2cents Maybe over thinking it here 🤔

On my rig I cut out a 6x6 inch fiberglass square (insulator), pop rivet-ed in place and reposition the terminal clamp to be sure🤝 Little things like this...sometimes overlooked, end up like the gouged out brake line. No finger pointing... CUZ I have seen it a few times.

Customized to minimize the fireworks 🎇 ⚡ 💥Sunday morning cartoons with, CAMO

brake 22 (2).jpg
 

mow***com

Active member
72
205
33
Location
Salt Lake, Utah
Nice and clean battery box area(y) and the relocation (y)(y) Not a fan (n)of all the RTV on the bus bar, But that's another story📖

Something to think about :unsure: That front battery?? What I am seeing:3dAngus:from the easy internet chair💺......

If one make a HARD stop, it MIGHT slip forward ? driving the positive post connector overhang, the way it is oriented into the front battery box panel and POOF aua My 2 cents2cents Maybe over thinking it here 🤔

On my rig I cut out a 6x6 inch fiberglass square (insulator), pop rivet-ed in place and reposition the terminal clamp to be sure🤝 Little things like this...sometimes overlooked, end up like the gouged out brake line. No finger pointing... CUZ I have seen it a few times.

Customized to minimize the fireworks 🎇 ⚡ 💥Sunday morning cartoons with, CAMO

View attachment 933820
Funny... I knew there might be a couple members that might take note. I've already taken the battery area into consideration. It definitely will spark if it touches the wall.... Ask me how I know.
Even the rear battery negative is too close for comfort. I was thinking of lining the wall. But, I am always open to ideas and I do have a rivet gun.

So, that is the first thing to address. Then, I will probably remove the RTV from the terminals, since I like to clean them up and make sure they are snug.
This week, I plan to go over all grounds and major battery connections too.
I found a split, all the way through the wire in the body ground, from the harness. It is always something I guess.
 

mow***com

Active member
72
205
33
Location
Salt Lake, Utah
So, small update...

I started working on grounds and discovered something. The body ground to the truck, from the harness was broken. So, I trimmed it back, to make a repair and it kept breaking back into the harness. Long story short, even after trimming the entire harness back, the entire ground wire is toast and just falls apart all the way back.
That being said. Does anyone know the number on this wire and where it traces back to?
Somehow, I misplaced where I put it and forgot to document it the number.

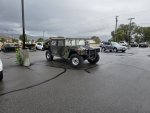
Other than that, most things feel pretty good. I've probably put about 120 miles on the M1123 and it still looks like a truck.
So, I will continue just driving it and working out the kinks as I go.
On the plus side, after making my own grounding harness and going through my alternator wires, it is now charging as it should.

Lastly, I took the truck to a couple alignment shops and I don't think they are really seeing what I am seeing.
I mean, the rear passenger side looks slightly off. They have all offered to put it up and see what they can do.
But, I think I may just try to adjust the tie rod on my own. We'll see.

It is now time to start getting windows in and making this truck somewhat ready for some weather. I predict snow again this year. Haha.
 

Mogman

Moderator
Staff member
Moderator
Steel Soldiers Supporter
7,015
9,693
113
Location
Papalote, TX
So, small update...

I started working on grounds and discovered something. The body ground to the truck, from the harness was broken. So, I trimmed it back, to make a repair and it kept breaking back into the harness. Long story short, even after trimming the entire harness back, the entire ground wire is toast and just falls apart all the way back.
That being said. Does anyone know the number on this wire and where it traces back to?
Somehow, I misplaced where I put it and forgot to document it the number.

Other than that, most things feel pretty good. I've probably put about 120 miles on the M1123 and it still looks like a truck.
So, I will continue just driving it and working out the kinks as I go.
On the plus side, after making my own grounding harness and going through my alternator wires, it is now charging as it should.

Lastly, I took the truck to a couple alignment shops and I don't think they are really seeing what I am seeing.
I mean, the rear passenger side looks slightly off. They have all offered to put it up and see what they can do.
But, I think I may just try to adjust the tie rod on my own. We'll see.

It is now time to start getting windows in and making this truck somewhat ready for some weather. I predict snow again this year. Haha.
Are you talking about the body ground that goes from the engine compartment through the firewall behind the inst. panel using a bolt? if so which side are you talking about.
 

Mogman

Moderator
Staff member
Moderator
Steel Soldiers Supporter
7,015
9,693
113
Location
Papalote, TX
If soon the engine side it is # 3C
To replace it all you would need to do is run a wire from the ground lug on the alt or any other major ground to the firewall.
Most likely something heavy shorted +24V to the body and that fried the wire, the problem now is how many other wires in the harness were affected by the red hot wire :eek:
 
Top
AdBlock Detected

We get it, advertisements are annoying!

Sure, ad-blocking software does a great job at blocking ads, but it also blocks useful features of our website like our supporting vendors. Their ads help keep Steel Soldiers going. Please consider disabling your ad blockers for the site. Thanks!

I've Disabled AdBlock
No Thanks