• Steel Soldiers now has a few new forums, read more about it at: New Munitions Forums!

  • Microsoft MSN, Live, Hotmail, Outlook email users may not be receiving emails. We are working to resolve this issue. Please add support@steelsoldiers.com to your trusted contacts.


Bringing back to life a 2009 HMMWV M1165A1 from GovPlanet - total newbie, please help...

T9000

Well-known member
Steel Soldiers Supporter
473
360
63
Location
California
Hi, I am back in the trenches, hope everyone had a good Thanksgiving!
I believe that I found the check valves, in front of the fuel tank, under rear passenger, like you said:
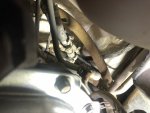
CheckValves.JPG

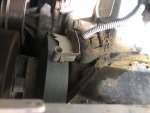
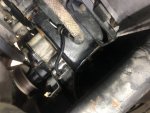
I also replaced the fuel filter and water separator and replaced the short 3/8" hose connected to the fuel pump, it had a crack and it was leaking. There is another 1/4" fuel hose that is leaking at the connector, but some it may come from higher up in the engine. Is this a return line? It's hard to tell where it goes and how to get to it in order to replace it, please see attached picture:
Fuel hoses leaks.jpg

(picture before cleaning and replacing - shows the leaking)
Leak 2.JPG


In the process I broke the 1/8" plastic line, which presume it is not critical like the diesel hose (found Gates Barricade rated R14 at 225PSI at O'Reilly - 27339 = 1/4" I.D. and 27341 = 3/8" I.D. - the fuel hose I took out was R7.
 
Last edited:

Action

Well-known member
3,581
1,551
113
Location
East Tennessee
The return line at the top of injection pump connects to a metal tube. That tube runs down to both sides to take return from injectors. The passenger side connects to your leaky 1/4” hose. Then that connects to the metal line in your pic. Then that runs down the frame rail to one of those valves you removed.
Fix the hard plastic line. It is the vent tube. It is air brake line. Napa carries a big assortment of sizes and colors.
if you can’t reach the top of leaky hose, you could move the a/c compressor. Don’tvdisconnect the hoses, just unplug wires and swing it out of the way. The bracket can be removed too.
 

T9000

Well-known member
Steel Soldiers Supporter
473
360
63
Location
California
The return line at the top of injection pump connects to a metal tube. That tube runs down to both sides to take return from injectors. The passenger side connects to your leaky 1/4” hose. Then that connects to the metal line in your pic. Then that runs down the frame rail to one of those valves you removed.
Fix the hard plastic line. It is the vent tube. It is air brake line. Napa carries a big assortment of sizes and colors.
if you can’t reach the top of leaky hose, you could move the a/c compressor. Don’tvdisconnect the hoses, just unplug wires and swing it out of the way. The bracket can be removed too.
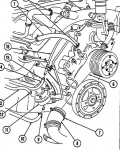
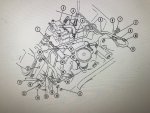
Thank you for the explanation, that helps a lot in understanding what to look for and I think I found the two return lines you describe marked #9 in the diagram below:

Return.jpg

I want to absorb every detail about the truck as I usually get obsessed with getting things done right so I spend a lot of time getting my mind around it, as I was up again until 2:30AM last night working on it.

When I changed the fuel pump hose, I noticed something like an oil mud right above the oil pan, in front of the engine, that stays semi-wet even if the engine didn't run. It feels like something is leaking but at the same time nothing drips on floor (being above the oil pan, my instinct says the leak/ drip should come from somewhere above, not from the oil pan itself). See attached picture, is something else going on here, maybe related to the leaky return line or is it normal, maybe from something that was fixed before? I was thinking to clean it up and see if it comes back?

Leak3.JPG
 

jkcondrey

Active member
Steel Soldiers Supporter
317
140
43
Location
Rutherfordton, NC
For the "oil mud", just clean it off real good and then follow up to see what fluid it actually is. But oil loves dirt. And dirt loves oil. It will attract it and then more attaches and it piles up. I'd say its just a slight leak on the oil pan gasket. But you wont know until clean. Also on the vent line breakage, you can also get a short piece of silicone tube on amazon slightly larger than that line and slip over the break to mend it. That is the vent lines for your hubs, case etc.
 

T9000

Well-known member
Steel Soldiers Supporter
473
360
63
Location
California
For the "oil mud", just clean it off real good and then follow up to see what fluid it actually is. But oil loves dirt. And dirt loves oil. It will attract it and then more attaches and it piles up. I'd say its just a slight leak on the oil pan gasket. But you wont know until clean. Also on the vent line breakage, you can also get a short piece of silicone tube on amazon slightly larger than that line and slip over the break to mend it. That is the vent lines for your hubs, case etc.
I call it oil, but I realize that I think is fuel, but will clean it and check to know exactly, like you said.
My engine is covered in a lot of fine dust and some gunk even as I washed with just water a few times. Every time I move a hose or cable the fine dust is still there popping up. Would it be OK to wash the engine with something like "Foaming Crystal Simple Green® Industrial Cleaner and Degreaser"- is non-corosive, non-abrasive


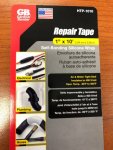
Great idea about the sleeving, I have Self-Bonding Silicone Wrap, which would wrap tightly around it and seal it in place, good from -60 to 500F.
I would like to replace it with new tubing but trying to remove it may break other pieces as it seems almost like glued on the tees when I tried to pull off the broken one.

IMG_0344.JPG
 
Last edited:

jkcondrey

Active member
Steel Soldiers Supporter
317
140
43
Location
Rutherfordton, NC
Yeah I have used Simple green many times. It will help to scrape off as much thick buildup as you can before using the cleaners. Its not a fun job in my opinion lol. I haven't used the heat tape in this manner, but the silicone works well, is heat resistant and chemical resistant. Those vents typically dont have alot of fluid or pressure in them.
 

Action

Well-known member
3,581
1,551
113
Location
East Tennessee
If you replace a vent line, use a razor blade to slice the end. It will slide right off. Use a heat gun to warm the ends of new tube, and they will slide on easier.
don’t mess with the #9 s in that diagram. Your leaking hose hooks up below the #9 on the right side.
 

T9000

Well-known member
Steel Soldiers Supporter
473
360
63
Location
California
If you replace a vent line, use a razor blade to slice the end. It will slide right off. Use a heat gun to warm the ends of new tube, and they will slide on easier.
don’t mess with the #9 s in that diagram. Your leaking hose hooks up below the #9 on the right side.
Noted, that's a great procedure on the vent line!
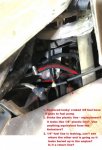
I thought the leaky hose I am looking at is #9? Is a 1/4" and it looks like it comes up from the top, high enough that I cannot see or feel it's end (like in the diagram, close to the IP return?).
Is there another connector in between the #9 and the 1/4" hose? I would love to get to it without having to remove the AC compressor, which I think it would also require the removal of the serpentine belt?
 

Action

Well-known member
3,581
1,551
113
Location
East Tennessee
In your diagram, see the circled #9 on the top right? Follow to where it connect to the hard line (#1). Go down towards #10. You see there is another barb on the hard line. That is where your leaky hose connects.
the #9 hoses connect to the forward injectors, not the fuel pump.
.
.
 

T9000

Well-known member
Steel Soldiers Supporter
473
360
63
Location
California
In your diagram, see the circled #9 on the top right? Follow to where it connect to the hard line (#1). Go down towards #10. You see there is another barb on the hard line. That is where your leaky hose connects.
the #9 hoses connect to the forward injectors, not the fuel pump.
.
.
Yes, I understand that #9 doesn't go to the fuel pump (that's the 3/8' hose I replaced) and I thought that #9 is the other leaky 1/4" hose in the picture? Sorry, I don't mean to even sound like I disagree with you in any way, but just to understand how everything is connected and learning from the experts :)

Fuel hoses leaks2.jpg
Or, is what I call hose #9 in the picture not depicted in the IP hoses diagram?
 
Last edited:

Action

Well-known member
3,581
1,551
113
Location
East Tennessee
Yes, I understand that #9 doesn't go to the fuel pump (that's the 3/8' hose I replaced) and I thought that #9 is the other leaky 1/4" hose in the picture? Sorry, I don't mean to even sound like I disagree with you in any way, but just to understand how everything is connected and learning from the experts :)

View attachment 852226
Or, is what I call hose #9 in the picture not depicted in the IP hoses diagram?
The hose you are calling #9 is not in that diagram.
The 2 hoses in the diagram that are listed as #9 connect to a fuel injector and to a metal tube that runs up to the injection pump and then over to the injector on the other side
That metal tube on the front of the engine has 4 connections
Injection pump via #3
Fuel injector via #9
Fuel injector via other #9
Hard return line on frame rail vis your leaky hose that is not in the diagram.
The maintenance TMs will have better drawings of how it all fits together.
 

T9000

Well-known member
Steel Soldiers Supporter
473
360
63
Location
California
The hose you are calling #9 is not in that diagram.
The 2 hoses in the diagram that are listed as #9 connect to a fuel injector and to a metal tube that runs up to the injection pump and then over to the injector on the other side
That metal tube on the front of the engine has 4 connections
Injection pump via #3
Fuel injector via #9
Fuel injector via other #9
Hard return line on frame rail vis your leaky hose that is not in the diagram.
The maintenance TMs will have better drawings of how it all fits together.
Thanks for the details! I am still learning my way around the manuals and couldn’t find that diagram, but will get to it.
 

Mullaney

Well-known member
Steel Soldiers Supporter
Supporting Vendor
7,375
19,084
113
Location
Charlotte NC
If you don't want to drag out an extension cord, really HOT water in a cup or similar will do the same thing to soften the plastic line...
 

T9000

Well-known member
Steel Soldiers Supporter
473
360
63
Location
California
Your leaky hose is #21 in this drawing...
TM 9-2320-387-24-1
.
.View attachment 852236
Thank you! For both, the diagram and for the manual number!
I have some very good news, it seems that the difficult start, unstable idle and stalling are fixed...indeed it seems that air it was getting into the fuel line at a key location, at the intake of the fuel pump.

I am sharing this for anyone that will experience something similar.
Long story short, my MO is to make only one modification/ repair at a time and then test for any changes in order to minimize or detect multiple problems/ symptoms that could mask eachother or make things appear as what they are not.
In this case, I ran the engine after replacing the fuel filter, water separator plus the fuel filter drain valve (petcock) cracked/ leaky hose and there were no visible improvements - still hard to start, even after it has ran for a while and the idle was still up and down, and the engine was stalling when left at idle, unless I kept is at higher RPMs (around 900) using the Throttle Lock.

I usually change/ repair the thing that could make the biggest difference and/ or the easiest ones.
Next I changed the short leaky 3/8" hose that was at the intake of the fuel pump, and after that all the problems listed above went away and now the engine starts within a second (after the Wait light goes away) and is running/ sounds very smoothly, thanks to you guys!!!

I did find the check valves and that was the next thing on the list to replace, for which I bought the extra hose to bypass them, but so far I didn't get around to remove them and still have the leaky hose that has one end buried up in the middle of the engine. I stayed under the caR with the engine running and saw how the fuel leak comes from the top, from the end that seems harder to get to.

I did find some other things that will require your expertise and will post them tomorrow, after I finally get some sleep.

Again, I want to thank you guys for pointing me in the right direction and for your patience, you guys are the BEST!
 
Last edited:

T9000

Well-known member
Steel Soldiers Supporter
473
360
63
Location
California
Happy Friday!
I started the engine several times just to make sure everything still works OK and it does, the engine sounds very good.
Only the first minute after starting there is some pulsing due to something drawing a lot of current (the voltmeter dips close to the Yellow range, but it is still in the Green) and during that short pulse there is a very brief slight change in the RPM sound, which I think is normal.

I cleaned up the "oil mud" and watching for any leaks, there is nothing so far:

Cleaned Oil Mud2.JPG

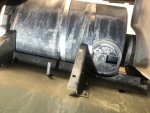
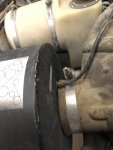
The Air Cleaner in the manual it shows having a rubber boot installed under the housing and mine has only an opening with no rim to attach a hose clamp, see picture below, is something missing? Is it OK to be opened like that without any cover? (it doesn't feel right being uncovered)

Air Cleaner Underview.JPG

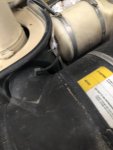
There are two small plastic tubes coming from the air cleaning unit that go nowhere, the open ends just hang on the other side of the engine bay, by the windshield washing reservoir. Where should these two lines be connected?

Line 1

Air Link 1.jpg

Line 2
Air Link 2.jpg

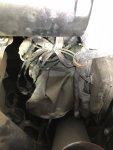
Behind the oil filter, looking from the engine towards the rear, there is something looking like a bag and has a rip/ hole on its side, is it broken or it is normal?
What is the bag for?

Bag.JPG
 
Last edited:

Action

Well-known member
3,581
1,551
113
Location
East Tennessee
I would get another air filter can.

The rubber hose goes through a grommet on driver side firewall and hooks to air restriction gauge.

The plastic hose is where almost everything vents to the atmosphere.

There is a silver “cloth” boot that covers the rubber boot on the bottom of shifter. Blocks some heat. If that is what you see, it is fine.
 

T9000

Well-known member
Steel Soldiers Supporter
473
360
63
Location
California
Got it! Yes, that bag is the silver cloth boot.

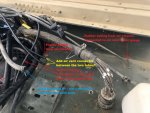
I found the grommet and attached the rubber tubing to the air restriction gauge, included in the picture below.

Should I connect the plastic air vent tubes together?

And there are a few tubes unaccounted fir, like the rubber hoses #1 & #2, but which I think were related to the water fording system that was removed and not really needed?

Tubing3.jpg

Hose2b.jpg

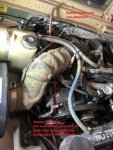
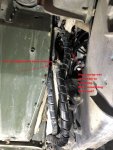
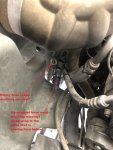
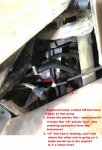
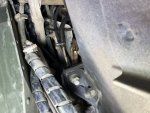
The hose in the picture below it looks like it is hanging too low, like something was removed, there are two un-tighten hose clamps on the hose itself and the wrap is half removed like it was attached to another hose that's missing? Also there is another empty hose clamp attached to the chassis?
Unnatached1.jpg

Missing1.jpg

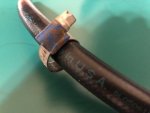
And I am embarrassed to say that I have a leftover hose clamp that I found under the truck after replacing fuel pump hose and I don't know where it is from.
The hose in the picture is 1/2' O.D. and the clamp is larger, therefore I don't believe it is from the fuel system, but I will keep looking - I don't remember taking it out from anywhere, but at the same time it couldn't just materialize itself :)

LeftOver Collar.JPG
 

Action

Well-known member
3,581
1,551
113
Location
East Tennessee
The hose by the front brakes was connected to the water fording pressure cup. The other end was on the cdr valve.
The plastic wrap, just slide it back down on hose.
The hose clamps with the blue body are used on fuel lines.
are you missing the cdr valve?
Bust open the books and figure out thise vent lines, or you will eventually get water and dirt into your parts....
 
Top
AdBlock Detected

We get it, advertisements are annoying!

Sure, ad-blocking software does a great job at blocking ads, but it also blocks useful features of our website like our supporting vendors. Their ads help keep Steel Soldiers going. Please consider disabling your ad blockers for the site. Thanks!

I've Disabled AdBlock
No Thanks