• Steel Soldiers now has a few new forums, read more about it at: New Munitions Forums!

  • Microsoft MSN, Live, Hotmail, Outlook email users may not be receiving emails. We are working to resolve this issue. Please add support@steelsoldiers.com to your trusted contacts.

CUCVRUS Repair Projects

ezgn

Well-known member
650
1,039
93
Location
Lake Elsinore Ca.
Yesterday I took time for R & R. Today after work I am going to open up the brake drums on the trailer chassis and see what I am dealing with. Without seeing what is in there I am not happy to say it is good. And good enough don't cut it for me. The only thing I have no control over is the outside temperatures. I will brave the cold and get the job done. Complete with pictures. Till then, Be Safe.
I'm betting they look brand new, hope so!
 

cucvrus

Well-known member
11,474
10,441
113
Location
Jonestown Pennsylvania
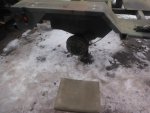
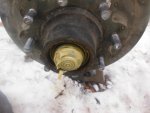
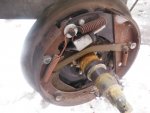
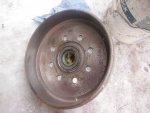
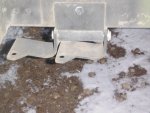
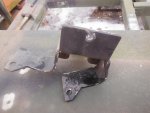
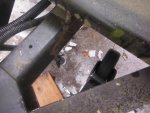
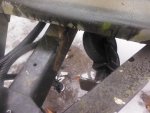
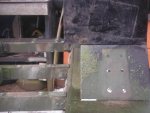
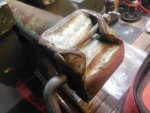
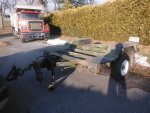
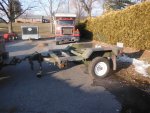
As I stated I would remove the brake drum after work today and get a bird's eye view of the inside of the drum and brake shoes. That way I have been there and seen what was in there. I was delighted. First the 5-gallon bucket and the HMMWV seat cushion. DSCF8291.JPG Last week I busted my folding chair. It was plastic and very cold about 12*. I guess the plastic did not like the load or the temperature. The cap was an easy removal. As soon as I had it removed, I knew the results were going to be favorable. DSCF8292.JPG I pulled the cotter pin and removed the nut. DSCF8293.JPG That is what I wanted to see. Like I mentioned I don't think this trailer chassis was ever towed down the road. DSCF8294.JPG The drum is brand new inside and out. My surge brakes are working, and all is well. That was the goal for the day. 28*is not great weather and it was flurrying. But an extra task needs to be done. Make up for the R & R time yesterday. This bent rear support bracket was bothering me since I first seen it. DSCF8245.JPG Time to come off. DSCF8295.JPG 2 batteries on the Milwaukee M12 mini grinder and I was able to remove the bracket and save it for repairs. I will make a set up with sockets and steel and press that back in place like new. DSCF8296.JPG It looks better with the bent bracket removed. I also measured up the rear fenders so I can make a set of mudflaps and a protector for the rear light wiring. I am building for the long haul. I need 2 pieces of extruded aluminum angle to do this job correctly. As a bonus I transported the wheels to the sand blaster and dropped them off. DSCF8297.JPG I am going to have them blasted and painted white. I have a set of the original Chevrolet center caps and trim rings for 16" 1 ton truck. They will look great. I only have 3 of the trim rings but I only need 3. 1 for the spare also. Take Care and Be Safe. Tires and wheels are my next thing to get completed. Next week. I don't think the trailer wheels and tires need balanced. But I may just do it. It has shock absorbers so it may as well have balanced tires. The HMMWV tires and wheels that were on the trailer were balanced.
 

ezgn

Well-known member
650
1,039
93
Location
Lake Elsinore Ca.
As I stated I would remove the brake drum after work today and get a bird's eye view of the inside of the drum and brake shoes. That way I have been there and seen what was in there. I was delighted. First the 5-gallon bucket and the HMMWV seat cushion. View attachment 857029 Last week I busted my folding chair. It was plastic and very cold about 12*. I guess the plastic did not like the load or the temperature. The cap was an easy removal. As soon as I had it removed, I knew the results were going to be favorable. View attachment 857030 I pulled the cotter pin and removed the nut. View attachment 857031 That is what I wanted to see. Like I mentioned I don't think this trailer chassis was ever towed down the road. View attachment 857032 The drum is brand new inside and out. My surge brakes are working, and all is well. That was the goal for the day. 28*is not great weather and it was flurrying. But an extra task needs to be done. Make up for the R & R time yesterday. This bent rear support bracket was bothering me since I first seen it. View attachment 857037 Time to come off. View attachment 857033 2 batteries on the Milwaukee M12 mini grinder and I was able to remove the bracket and save it for repairs. I will make a set up with sockets and steel and press that back in place like new. View attachment 857034 It looks better with the bent bracket removed. I also measured up the rear fenders so I can make a set of mudflaps and a protector for the rear light wiring. I am building for the long haul. I need 2 pieces of extruded aluminum angle to do this job correctly. As a bonus I transported the wheels to the sand blaster and dropped them off. View attachment 857035 I am going to have them blasted and painted white. I have a set of the original Chevrolet center caps and trim rings for 16" 1 ton truck. They will look great. I only have 3 of the trim rings but I only need 3. 1 for the spare also. Take Care and Be Safe. Tires and wheels are my next thing to get completed. Next week. I don't think the trailer wheels and tires need balanced. But I may just do it. It has shock absorbers so it may as well have balanced tires. The HMMWV tires and wheels that were on the trailer were balanced.
Fantastic, happy for you.
 

cucvrus

Well-known member
11,474
10,441
113
Location
Jonestown Pennsylvania
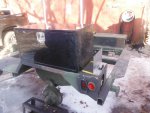
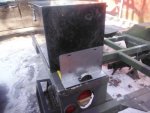
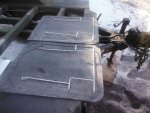
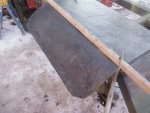
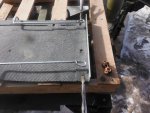
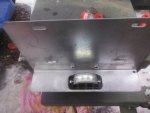
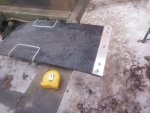
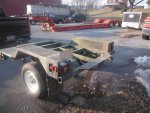
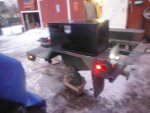
I came home and went out in the cold again and worked on the trailer. The toolbox will be mounted on the left fender. DSCF8298.JPG I also will be mounting a lighted license plate bracket on the top of the fender. DSCF8299.JPG The plastic tent pegs are for props only. The license bracket is galvanneal steel and will be bolted on the top rear area. I also picked up some scrap rubber mudflaps, DSCF8300.JPG some anti-sail brackets, and 2 pieces of 2 X 2 extruded aluminum. All used scrap material. I cut the mudflaps to fit the underside of the fenders. I used the straight edge method on the first but felt like I needed to put a huge amount of force into a new utility knife blade. I needed a hook blade and didn't have one handy. DSCF8301.JPG DSCF8302.JPG I opted to use the tin shears. That was a bit slower, but I felt much safer. Anti-sail bracket is 5" wider. I used the Sawzall to cut 5 inches out of the center. I will weld them together. They may be longer then needed but I never cut something twice and it was still too short. As an extra bonus I cut the radius in the other side of the bottom edge of the mudflap, so they are uniform. DSCF8303.JPG DSCF8304.JPG That is all I wanted to get completed today. And we are working mandatory overtime this week so it will be after lunch Saturday before I get to do more work. Take Care and Be Safe.
 

Mullaney

Well-known member
Steel Soldiers Supporter
Supporting Vendor
7,776
19,903
113
Location
Charlotte NC
I came home and went out in the cold again and worked on the trailer. The toolbox will be mounted on the left fender. View attachment 857111 I also will be mounting a lighted license plate bracket on the top of the fender. View attachment 857112 The plastic tent pegs are for props only. The license bracket is galvanneal steel and will be bolted on the top rear area. I also picked up some scrap rubber mudflaps, View attachment 857113 some anti-sail brackets, and 2 pieces of 2 X 2 extruded aluminum. All used scrap material. I cut the mudflaps to fit the underside of the fenders. I used the straight edge method on the first but felt like I needed to put a huge amount of force into a new utility knife blade. I needed a hook blade and didn't have one handy. View attachment 857114 View attachment 857115 I opted to use the tin shears. That was a bit slower, but I felt much safer. Anti-sail bracket is 5" wider. I used the Sawzall to cut 5 inches out of the center. I will weld them together. They may be longer then needed but I never cut something twice and it was still too short. As an extra bonus I cut the radius in the other side of the bottom edge of the mudflap, so they are uniform. View attachment 857116 View attachment 857117 That is all I wanted to get completed today. And we are working mandatory overtime this week so it will be after lunch Saturday before I get to do more work. Take Care and Be Safe.
.
I like the toolbox! Big enough to have enough stuff in it to handle a problem if the need arises. Those No Sail flaps will be perfect too...
 

cucvrus

Well-known member
11,474
10,441
113
Location
Jonestown Pennsylvania
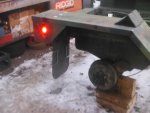
Today my goal is easy. Or I want to think it will be. I want to get the trailer securely up on blocks. the jack stands are wobbly and for my next few projects I am going to have my head and body under the chassis. I think it should be on wood blocks and unshakable. I am also going to study my hi lift jack. I don't remember it being such a PITA to use. I will discover the issue or I will recycle it. It can't be that hard.
I am on it. I bet it is real oil that it needs. Neglected but never forgotten. I kept it inside since new. But I think oil is all I need.
 

ezgn

Well-known member
650
1,039
93
Location
Lake Elsinore Ca.
Today my goal is easy. Or I want to think it will be. I want to get the trailer securely up on blocks. the jack stands are wobbly and for my next few projects I am going to have my head and body under the chassis. I think it should be on wood blocks and unshakable. I am also going to study my hi lift jack. I don't remember it being such a PITA to use. I will discover the issue or I will recycle it. It can't be that hard.
I am on it. I bet it is real oil that it needs. Neglected but never forgotten. I kept it inside since new. But I think oil is all I need.
Great jacks, I had one on my cj5 and it saved us in a remote area of Baja Ca.
 

cucvrus

Well-known member
11,474
10,441
113
Location
Jonestown Pennsylvania
I managed to figure out the issue with the Hi Lift jack. It was nothing more than the pipe handle was missing, and I was using small breaker bar to jack it up. Once I put the correct size pipe in the hole it worked perfect as designed. Imagine that.
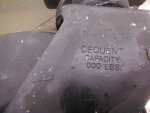
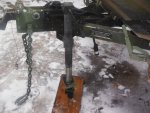
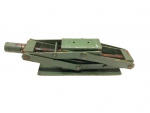
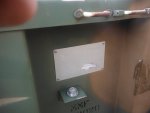
I was able to jack the 4 corners and securely supported on wood blocks. The front wheel is not supposed to be on this trailer. I actually picked up the jack at the pick-up point and it was in the back of another trailer. Check out the weight capacity. DSCF8305.JPG DSCF8306.JPG That is very light weight. I was still trying to figure out the Jack, Adapter. DSCF8307.JPG DSCF8308.JPG DSCF8309.JPG The jack works great and easily elevates the tongue and lowers it with ease. And I finally figured the Jack Adapter. 1643410676749.png
The Jack adapter goes on the top of the HMMWV scissors jack and sets on top, and the fish mouth goes up on the lower side of the outer axle stubs and jacks up the trailer. DSCF8267.JPG DSCF8266.JPG DSCF8249.JPGI also wanted to show the inner fender overhang I have with the 18" toolbox. DSCF8310.JPGThe Jack adapter can stay with the trailer. I will be putting a HMMWV scissors jack in the toolbox along with all the tools needed to change a trailer tire if the need arises. Take Care. Mandatory work tomorrow so I doubt I will get a lot completed. I want to get the mud flaps hung and that is about all I can do till I get the wheels back from being blasted and coated. The plastic clearance light holders are on back order. I will be OK with these, and I can get it inspected and titled with the existing light pockets. More Later.
 
Last edited:

ezgn

Well-known member
650
1,039
93
Location
Lake Elsinore Ca.
I managed to figure out the issue with the Hi Lift jack. It was nothing more than the pipe handle was missing, and I was using small breaker bar to jack it up. Once I put the correct size pipe in the hole it worked perfect as designed. Imagine that.
I was able to jack the 4 corners and securely supported on wood blocks. The front wheel is not supposed to be on this trailer. I actually picked up the jack at the pick-up point and it was in the back of another trailer. Check out the weight capacity. View attachment 857229 View attachment 857230 That is very light weight. I was still trying to figure out the Jack, Adapter. View attachment 857231 View attachment 857232 View attachment 857233 The jack works great and easily elevates the tongue and lowers it with ease. And I finally figured the Jack Adapter. View attachment 857237
The Jack adapter goes on the top of the HMMWV scissors jack and sets on top, and the fish mouth goes up on the lower side of the outer axle stubs and jacks up the trailer. View attachment 857236 View attachment 857235 View attachment 857238I also wanted to show the inner fender overhang I have with the 18" toolbox. View attachment 857234But the Jack adapter can stay with the trailer. I will be putting a HMMWV scissors jack in the toolbox along with all the tools needed to change a trailer tire if the need arises. Take Care. Mandatory work tomorrow so I doubt I will get a lot completed. I want to get the mudflaps hung and that is about all I can do till I get the wheels back from being blasted and coated. The plastic clearance light holders are on back order. I will be OK with these, and I can get it inspected and titled with the existing light pockets. More Later.
Excellent. Be careful to not over exceed the weight capacity. A few ounces could make a big difference.
 

cucvrus

Well-known member
11,474
10,441
113
Location
Jonestown Pennsylvania
While everyone was sitting in the house because it was too cold to come out, I was out working on the trailer chassis. I made brackets and assembled the mud flaps and anti-sail brackets. DSCF8311.JPG I used my Hi Lift jack to push out the left rear corner fender. I used a flat washer to secure the broken light bracket for now. DSCF8312.JPG I also had a change of plans for the license plate bracket. Less holes to drill and no void between toolbox and bracket. DSCF8313.JPG It works for me. I bolted everything together. I am going back out. I was expecting snow and had planned on cleaning my garage but I am taking advantage of the cold dry weather. More later.
 

cucvrus

Well-known member
11,474
10,441
113
Location
Jonestown Pennsylvania
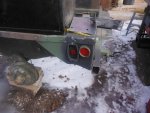
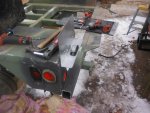
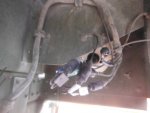
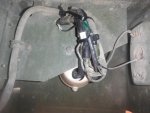
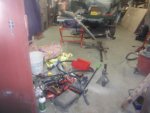
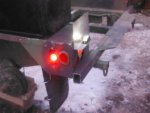
I went back out and braved the cold again. I made great progress and completed the lighting repairs. License light and bracket. I changed location. DSCF8316.JPG This is how the wires were up under the rear at the newer LED Truck Light taillamps. DSCF8317.JPG I straighten them out and wire tied them up in place. DSCF8318.JPG I used self-tapping 5/16" TX40 drive bolts and I still nutted the back side. I am not a huge fan of self tapping into aluminum. DSCF8319.JPG I went around and checked all the lights. I still have some wire tie work to do. The wiring is not very secure in the corners. I think someone messed with the lights or the mishandling did the damage on the corners also. DSCF8321.JPG DSCF8322.JPG DSCF8323.JPG DSCF8324.JPG DSCF8325.JPG As you can see it is getting dark. And when the sun goes down it gets colder. I never had a chance to clean my shop this weekend, but I made great progress on my trailer project. that counts. The shop and tools are in a mess at the moment. DSCF8320.JPG When precipitation falls from the sky I retreat inside. These cold dry days I take full advantage of outside. I hauled wood and worked outside all day. Fun. Take Care. I have a 3rd Chevrolet wheel for a spare tire.
 

ezgn

Well-known member
650
1,039
93
Location
Lake Elsinore Ca.
I went back out and braved the cold again. I made great progress and completed the lighting repairs. License light and bracket. I changed location. View attachment 857442 This is how the wires were up under the rear at the newer LED Truck Light taillamps. View attachment 857443 I straighten them out and wire tied them up in place. View attachment 857444 I used self-tapping 5/16" TX40 drive bolts and I still nutted the back side. I am not a huge fan of self tapping into aluminum. View attachment 857445 I went around and checked all the lights. I still have some wire tie work to do. The wiring is not very secure in the corners. I think someone messed with the lights or the mishandling did the damage on the corners also. View attachment 857447 View attachment 857448 View attachment 857449 View attachment 857450 View attachment 857451 As you can see it is getting dark. And when the sun goes down it gets colder. I never had a chance to clean my shop this weekend, but I made great progress on my trailer project. that counts. The shop and tools are in a mess at the moment. View attachment 857446 When precipitation falls from the sky I retreat inside. These cold dry days I take full advantage of outside. I hauled wood and worked outside all day. Fun. Take Care. I have a 3rd Chevrolet wheel for a spare tire.
Excellent job, you do good quality work.
 

ssdvc

Well-known member
971
639
93
Location
CT
Nice fabrication work Rick.

Way back when, some of our CUCV's, running out in the big sand, ran full length flaps across the back, attached under the bumpers to try and keep the dust down (useless, but a good attempt). Some had adapted Hummer flaps for both the front and rear wheel wells. I am wondering if I could adapt some flaps to fit on my 09? Maybe it would prevent some of the salt and crap from getting up under my truck in the winter.
 

cucvrus

Well-known member
11,474
10,441
113
Location
Jonestown Pennsylvania
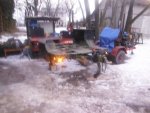
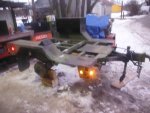
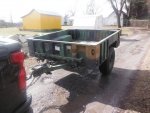
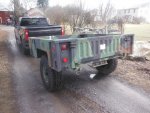
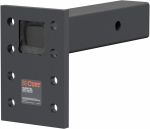
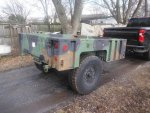
I was out buying a new toy this AM. It was not the one I wanted but it will be just fine. I looked hard to find a decent M1102. I came across one that was an hour away and I grabbed it. I was bidding on GovPlanet but I can't sit and monitor that. DSCF8328.JPG I towed it home and it trailered great. Like nothing back there. DSCF8329.JPG If I was to raise my pintle another notch it would tow better. I have a M1028 pintle hook mounted to a 1644085179842.png
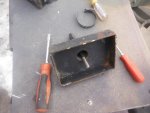
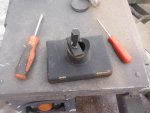
Adjustable receiver. But with the hole drilled thru the receiver to retain the swivel of the hook it makes it null. I have to make one and use my M1031 pintle hook. DSCF8330.JPG DSCF8331.JPG DSCF8332.JPG I have it home safe and parked. I removed the front jack and took it in the basement for repair. It may be beyond repair. I am going to try and find one that is useable for parts. The gears are fine. It is the crank and the tin cover. I may disassemble and put the crank in a press. But the cover tin is beyond repair. DSCF8333.JPG I have it apart. I think, the jack is jacked. And that is about all I am going to say about that. Be Safe and have a Great Day.
 

ezgn

Well-known member
650
1,039
93
Location
Lake Elsinore Ca.
I was out buying a new toy this AM. It was not the one I wanted but it will be just fine. I looked hard to find a decent M1102. I came across one that was an hour away and I grabbed it. I was bidding on GovPlanet but I can't sit and monitor that. View attachment 857974 I towed it home and it trailered great. Like nothing back there. View attachment 857975 If I was to raise my pintle another notch it would tow better. I have a M1028 pintle hook mounted to a View attachment 857979
Adjustable receiver. But with the hole drilled thru the receiver to retain the swivel of the hook it makes it null. I have to make one and use my M1031 pintle hook. View attachment 857976 View attachment 857977 View attachment 857978 I have it home safe and parked. I removed the front jack and took it in the basement for repair. It may be beyond repair. I am going to try and find one that is useable for parts. The gears are fine. It is the crank and the tin cover. I may disassemble and put the crank in a press. But the cover tin is beyond repair. View attachment 857986 I have it apart. I think, the jack is jacked. And that is about all I am going to say about that. Be Safe and have a Great Day.
Great trailer, excellent condition, you scored.
 

ezgn

Well-known member
650
1,039
93
Location
Lake Elsinore Ca.
Nice fabrication work Rick.

Way back when, some of our CUCV's, running out in the big sand, ran full length flaps across the back, attached under the bumpers to try and keep the dust down (useless, but a good attempt). Some had adapted Hummer flaps for both the front and rear wheel wells. I am wondering if I could adapt some flaps to fit on my 09? Maybe it would prevent some of the salt and crap from getting up under my truck in the winter.
I never had to deal with living in an area where salt is used, thankfully. Whenever I launched my boat in the saltwater on the west coast I would always rinse the underneath side of the truck with fresh water. I know that is not practical living with salty conditions on the road every day, but I doubt flaps would have any kind of effectiveness under the extreme conditions of road water being flung everywhere while driving down the road.
 

cucvrus

Well-known member
11,474
10,441
113
Location
Jonestown Pennsylvania
Mudflaps that run all the way up to the top of the inside of the fender will keep the ice from building up and stressing the wiring. It may get a bit wet, but it will not take the constant pounding of the rain and snow. The anti-sail brackets do an excellent job of keeping the mudflaps in place and still give when they hit something. I have all the wires secured and greased in the sockets. Besides I doubt the Rock Crusher will be doing travel in snow and ice. This is a fair weather set up. I don't like working in the rain or snow. I have done enough of that in my working life. I am going out to work on my new acquisition. I will be changing the brake fluid on this one also. Now that I know how to do it, it is a simple task. Live and learn. Take Care. More later. The sun is out, and I am sitting here typing. Not good time management.
 

flyfishtrailer

Well-known member
Steel Soldiers Supporter
566
1,083
93
Location
Cool, CA
I was out buying a new toy this AM. It was not the one I wanted but it will be just fine. I looked hard to find a decent M1102. I came across one that was an hour away and I grabbed it. I was bidding on GovPlanet but I can't sit and monitor that. View attachment 857974 I towed it home and it trailered great. Like nothing back there. View attachment 857975 If I was to raise my pintle another notch it would tow better. I have a M1028 pintle hook mounted to a View attachment 857979
Adjustable receiver. But with the hole drilled thru the receiver to retain the swivel of the hook it makes it null. I have to make one and use my M1031 pintle hook. View attachment 857976 View attachment 857977 View attachment 857978 I have it home safe and parked. I removed the front jack and took it in the basement for repair. It may be beyond repair. I am going to try and find one that is useable for parts. The gears are fine. It is the crank and the tin cover. I may disassemble and put the crank in a press. But the cover tin is beyond repair. View attachment 857986 I have it apart. I think, the jack is jacked. And that is about all I am going to say about that. Be Safe and have a Great Day.

This was a very helpful thread for repairing my trailer leg on my M1102

(2) M1101, M1102, LTT-TQG Trailer Jack | SteelSoldiers
 

cucvrus

Well-known member
11,474
10,441
113
Location
Jonestown Pennsylvania
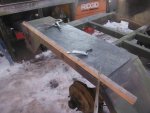
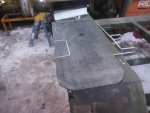
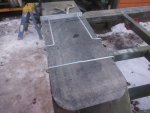
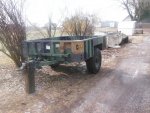
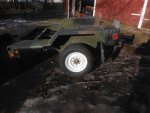
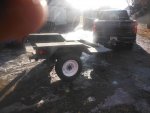
And now for something completely different. DSCF8334.JPG DSCF8335.JPG DSCF8336.JPG DSCF8337.JPG DSCF8338.JPG I like the clean look of the wheels. I am still thinking about the trailer color. I am going to paint it. I picked up new tires and the wheels have been sand blasted and painted. It dropped the height down to 28". Still 10" higher than the Rock Crusher is now but I can deal with it. I dropped the trailer off at a Pennsylvania vehicle inspection station so I can work on getting a title for it. Everything worked and I towed it to a scale and had it weighed. It was a slim 1,010 lbs. Great weight reduction program. So that gives me a 3,190 lbs. of payload. That is respectable for a single axle trailer. Take Care and Be Safe.
 
Top
AdBlock Detected

We get it, advertisements are annoying!

Sure, ad-blocking software does a great job at blocking ads, but it also blocks useful features of our website like our supporting vendors. Their ads help keep Steel Soldiers going. Please consider disabling your ad blockers for the site. Thanks!

I've Disabled AdBlock
No Thanks