• Steel Soldiers now has a few new forums, read more about it at: New Munitions Forums!

  • Microsoft MSN, Live, Hotmail, Outlook email users may not be receiving emails. We are working to resolve this issue. Please add support@steelsoldiers.com to your trusted contacts.

CUCVRUS Repair Projects

cucvrus

Well-known member
11,473
10,434
113
Location
Jonestown Pennsylvania
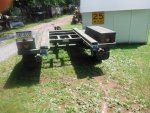
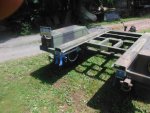
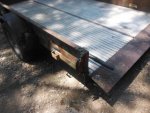
Yesterday was a wash. I went to work and pulled a muscle in my back. It hurt to breath. Minor setback. I am on the uphill side of that minor injury. That happens even to young guys. I did manage to get the long pockets off the top of my trailer. I am looking to buy a 3/16" sheet of aluminum tread plate for the top side. I priced a 4 X 8 sheet of aluminum and I was going to get it sprayed with Line X. The Line X priced me $250. Not on my list. Flat piece no taping or anything. No Way I won't pay.
Enjoy Life and Have a Great Day. I am going on vacation the rest of the week so I may get a little R & R. I won't over do it. I don't want to offend anyone.
 

cucvrus

Well-known member
11,473
10,434
113
Location
Jonestown Pennsylvania
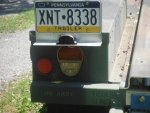
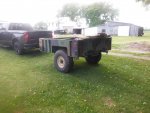
I finally received a title, VIN tag, and license plate for my M1102 trailer. I bought it with a mishandled SF97 that was worthless. It was bough 5 years ago and handed from owner to owner. That was not legal. I took the trailer to a Pennsylvania vehicle enhancement shop and had the trailer inspected for safety, and road worthiness. It passed and is a great trailer. I am in the process of fabricating a class 3 receiver hitch for the rear of the trailer and getting everything wired to 12 volt and a round 7 plug. I have undecided on the HMMWV tires and wheels. If they are the cause of the bounce when empty they are going to be flying to a new owner. I will just use stock 16" GM wheels and LT23585R16 tires on it. I like the looks but not the bounce when empty. The run flats make the tires way to heavy and unable to balance. I have not made up my mind yet on that. Take Care and Be Safe.
 

cucvrus

Well-known member
11,473
10,434
113
Location
Jonestown Pennsylvania
WOW. Ohhh what a lucky man he was. My Brother offered a fishing trip yesterday afternoon. I went along. We went to the same place in Conowingo Maryland and fished. The water was low and where I was fishing, I decided to look around for my lost camera. I knew where I was when I lost it and watched it fall from my shirt pocket. I must be lucky. I looked about an hour on and off. It is a very rocky area, and I was finding a lot of sinkers, hooks and lures. I went inland a bit and saw a green item sticking out of a rock and I knew the color. It was my Fuji camera. Old school and rugged. I took it home and looked it over. It has a few scratches on the screen but none on the lenses. It turned on and it worked. I never had the chance to take any pictures 2 weeks ago. I opened it up and no water was inside. I think I lucked out. Over the past week I was working on my projects and cleaning up a tree from a storm that rolled thru a few weeks back. That work is completed so I decided to change the 24-volt bulbs on my M1102 trailer and change the wiring to a seven-prong round. All went well. Now I must attach the VIN tag issued by Pennsylvania and get it ready for a trip. I have thought about changing the HMMWV tires and wheels for some Chevrolet truck wheels. I may just sell the entire trailer. After looking it over it may not serve my purpose. When it is parked it takes a bigger man then mee to move it. More later. I must get back to work. I can hear the grass growing.
 

cucvrus

Well-known member
11,473
10,434
113
Location
Jonestown Pennsylvania
I still have it soaking in a bowl of Rice. I think it is fine. But after 15 days in the river I am cautious. It is probably a $200. camera. I received it as a gift. Glad I found it. It may be outdated but it still serves my needs. I don't need the latest and greatest. But I do on the daily driver. No more old iron as a daily for me. Been there and done that. Take Care. SSDVC you are turning into a master mechanic.
 

ssdvc

Well-known member
971
639
93
Location
CT
LOL ! Thanks for the vote of confidence Rick, but I'm not convinced of that at all. I am muddling through and once this fusion fully heals, I'll be back crawling around, under and in my M1009. Once the new radiator is installed, it's a full exhaust and tires. After that, she should be good to go for a decent amount of time...................I hope.
 

cucvrus

Well-known member
11,473
10,434
113
Location
Jonestown Pennsylvania
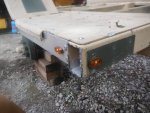
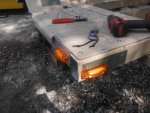
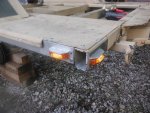
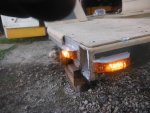
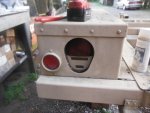
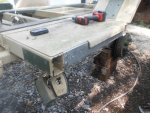
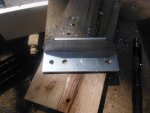
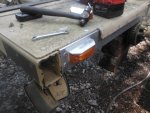
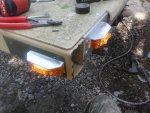
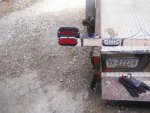
DSCF8567.JPG After thinking about the front clearance lamps over the past several months I have decided I am not going with this design. DSCF8568.JPG It is a great LED lamp I just think it is not protected and will be suspect to damage quickly. It has a glue pad on the rear of the lamp. I was surprised that I had to pry the lamp loose. I test fit these lamps in place. DSCF8570.JPG Then I came up with a plan to make some protectors from aluminum extruded angle. I got out my chop saw and went to town. DSCF8571.JPG DSCF8572.JPG That was more to my liking. I hard wired the lights and used grommets and secured the wiring up in place. Time for some painting. DSCF8577.JPG DSCF8576.JPG. I swapped out the left tail lamp and that was about it for the night. DSCF8573.JPG Or so I thought. Why not design a license plate bracket from odd parts I have. DSCF8575.JPG This bracket will work, and I can rivet it to the lower bumper. DSCF8574.JPG I taped and clamped the light and bracket for a test fit. Perfection. Of course, the tape is for fitting only. Have a Great Day and Enjoy Life.
 

cucvrus

Well-known member
11,473
10,434
113
Location
Jonestown Pennsylvania
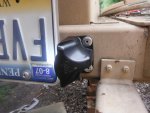
DSCF8579.JPG
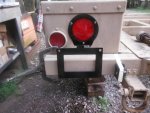
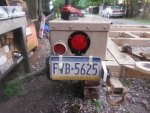
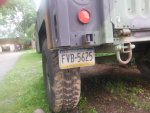
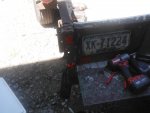
I just parked this picture here quickly and headed off to work for the day. As you can see I was designing a license plate holder and lamp attaching point. I think this will be the place. I am using standard automotive/truck parts I pick up in my travels thru life. I spend a lot of time thinking things out and try and come up with a low impact design that does not prevent the trailer or vehicle to being returned to stock with minor cost and time. I will use a heavier backing plate on the license plate when I do the attachment. It will be bolted in place and I will run a wire from the left tail lamp for an LED lamp to illuminate the plate. Keeps it legal an inspected and makes it easy traveling with no questions asked. It's a simple requirement and not worth the effort or hassle to not have it. That plate is just a plate I picked up and use for a temp plate on projects. When the holes get egged out I just get another one. Take Care and Be Safe. This trailer is all titled and licensed and I am just preparing it for Pennsylvania annual Safety inspection. I have an appointment 26 June 2022.
 
Last edited:

cucvrus

Well-known member
11,473
10,434
113
Location
Jonestown Pennsylvania
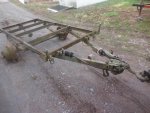
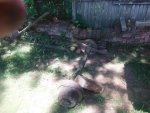
The thread title says CUCVRUS repair projects. But this is destructive projects. The M101 trailer got attention last week when someone wanted a leaf spring. I ended up selling the entire frame and making more room in my fence line. DSCF8443.JPG DSCF8583.JPG DSCF8584.JPG Everything worked out. I still have the springs, axle, drawbar with lunette eye and landing gear. Everything came apart with hand tools. Then I moved onto M1009/K5 roofs. DSCF8580.JPG DSCF8581.JPG I reduced them to a small pile. They will be run thru the crusher in a car and then off to the shredder. Not much metal there but it beats the landfill option. I am fabricating a light license plate bracket for my M1102 trailer. I changed my design from Wednesday.
 

Attachments

cucvrus

Well-known member
11,473
10,434
113
Location
Jonestown Pennsylvania
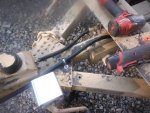
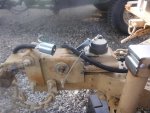
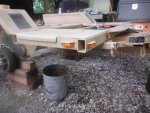
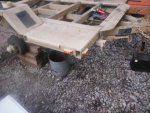
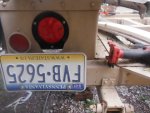
I spent a day working on my trailer and getting lights wired for it. This is the Rock Crusher trailer with the dual rear stabilizer legs. DSCF8586.JPG DSCF8587.JPG I have the crusher off the trailer and disassembled for painting. DSCF8588.JPG I am changing the taillamps and using standard LED lamps in place of the LED military lamps. DSCF8595.JPG I am going to be installing this type of Grote LED. I was told not to post my secret agent tags on the internet, so I disguised them. I made and installed the right-side front chassis reinforcement DSCF8590.JPGand added new side clearance lamps up front on the right corner.DSCF8589.JPG DSCF8591.JPG DSCF8592.JPG DSCF8593.JPG DSCF8594.JPG I used grommets and secured the wiring tightly in place. I done more work on the license plate.
 
Last edited:

cucvrus

Well-known member
11,473
10,434
113
Location
Jonestown Pennsylvania
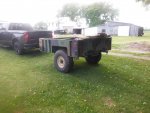
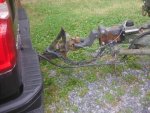
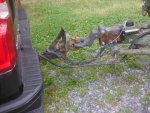
I added a new LED license plate lamp and riveted it fast to the rear tube. DSCF8596 - Copy.JPG DSCF8597 - Copy.JPGI have all the wiring in place and secured. Next, I loaded some scaffold into the M1102 trailer and hauled it to a job site. Busy, busy. I have the trailer listed for sale and if it doesn't sell, I will use it and need to make a new pintle hitch. This hitch I built from a CUCV pick up hitch about 25 years ago. I used it a lot but need to make one that has a higher pintle hook. I may just weld a Pintle from an M1031 onto a new riser. Unless the holes align then I will bolt it into place.
DSCF8598 - Copy.JPGDSCF8599.JPG It is thrust out there pretty far on this hitch.
 

ezgn

Well-known member
650
1,039
93
Location
Lake Elsinore Ca.
I added a new LED license plate lamp and riveted it fast to the rear tube. View attachment 871584 View attachment 871585I have all the wiring in place and secured. Next, I loaded some scaffold into the M1102 trailer and hauled it to a job site. Busy, busy. I have the trailer listed for sale and if it doesn't sell, I will use it and need to make a new pintle hitch. This hitch I built from a CUCV pick up hitch about 25 years ago. I used it a lot but need to make one that has a higher pintle hook. I may just weld a Pintle from an M1031 onto a new riser. Unless the holes align then I will bolt it into place.
View attachment 871583View attachment 871586 It is thrust out there pretty far on this hitch.
The further out the better in my opinion. Good work.
 

ezgn

Well-known member
650
1,039
93
Location
Lake Elsinore Ca.
I spent a day working on my trailer and getting lights wired for it. This is the Rock Crusher trailer with the dual rear stabilizer legs. View attachment 871573 View attachment 871574 I have the crusher off the trailer and disassembled for painting. View attachment 871575 I am changing the taillamps and using standard LED lamps in place of the LED military lamps. View attachment 871582 I am going to be installing this type of Grote LED. I was told not to post my secret agent tags on the internet, so I disguised them. I made and installed the right-side front chassis reinforcement View attachment 871577and added new side clearance lamps up front on the right corner.View attachment 871576 View attachment 871578 View attachment 871579 View attachment 871580 View attachment 871581 I sed grommets and secured the wiring tightly in place. I done more work on the license plate.
High tech security. Wow, who would ever had thunk it.
 
Last edited:

cucvrus

Well-known member
11,473
10,434
113
Location
Jonestown Pennsylvania
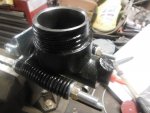
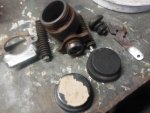
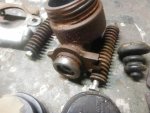
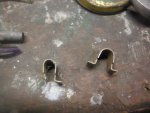
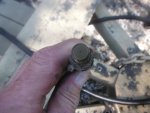
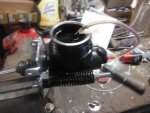
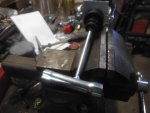
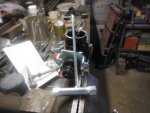
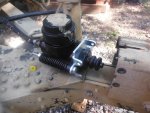
Today after work I had a short time before I was going away with the family tp eat. I thought I would assemble my master cylinder and bench bleed it. The cover was mangled. DSCF8600.JPG I have the new one but decided to hammer out the old one and challenge my skills. Everyone can add new parts. The real challenge is fixing what you have. DSCF8601.JPG I think that will work and I can store the new one. I attached the new master cylinder to the vise and clamped it in place. DSCF8602.JPG Added an adapter for bench bleeding the air from the cylinder. DSCF8603.JPG DSCF8604.JPG The old one as you can see is mangled and not repairable. I was going to braze it but decided to spend the coin on a brand new one. Safety is priceless. Hacking brakes is not a good idea. DSCF8605.JPG DSCF8606.JPG How does one go about breaking a spring clip? DSCF8607.JPG Check out the pin hole adapter that goes from the master cylinder to the brake line. DSCF8608.JPG With the master cylinder bled out and all new DOT 5 fluid in the reservoir I am ready to install the master cylinder. DSCF8609.JPG Well maybe another day. Time to get cleaned up and ready to go away. Take Care.
 

cucvrus

Well-known member
11,473
10,434
113
Location
Jonestown Pennsylvania
I used the Stihl saw tool as the push rod to bench bleed the master cylinder. DSCF8610.JPG It worked great. DSCF8611.JPG The cylinder all bled and attached to the trailer by the hose. Done for the day. Does anyone know if the small shock is supposed to be extended and have pressure or it just pulls out and stays out and pushes in and stays in. I will need to take another trailer apart to look if no one knows that answer. I looked on etrailer.com and it appears to stay in or out. Odd shock. It does have resistance both ways but does not push out or compress on its own. Replacement Shock for Titan Model 6 and 10 Brake Actuators Titan Accessories and Parts T1242600 (etrailer.com) DSCF8612.JPG
 

cucvrus

Well-known member
11,473
10,434
113
Location
Jonestown Pennsylvania
Once again I found no help here on this site. I found the answer myself on the surge brake shock question. I took an operational trailer surge brake apart and discovered the shock to be the same condition and operational. I went and researched the shock and found the answer on Google.
Q & A Icon
How the Shock Absorber Works on a Surge Brake Actuator
Question:
I have read two answers at your site to the question of when the surge break shock should be replaced, but they leave me wondering how a good shock should work. Does it merely dampen the movement each way, but not return on its own to the fully extended position ? That is, it is not spring loaded to return to full extension on its own ? Thanks! P.S. just got an order from you of brake and bearing parts came quickly and worked well.
asked by: Andy
Checkmark Icon
Helpful Expert Reply:
The Replacement Shock for Titan Model 6 and 10 Brake Actuators part # T1242600 only works one way. When the brakes are applied it eases the movement of the trailer forward onto the brake actuator. There is no return spring, the tow vehicle would then pull the actuator to reload the shock. For example, if the trailer was unhooked from the tow vehicle and you were able to depress the actuator, it would not extend back until manually pulled back out.

This answer made prefect sense since I suspect this trailer was dropped hard on the hitch or a fork was jammed in the master cylinder area and broke the master cylinder. I suspect the drop because I think the fork would have ripped the hose from the cylinder. I will be getting this trailer brake back together over the holiday weekend and with a little hope all the air bled from the brake system with my mighty vac. I bought 2 new LT22575R16 E range tires and will be doing away with the extra heavy HMMWV 12 bolt run flat wheels and tires. Don't need that extra weight and rolling resistance. I bought E range to maintain the safety of the 4200 GVWR rating of the trailer. Normal 16" P tires would be over loaded and not hold up well. Besides NOT pass the annual safety inspection required in Pennsylvania on trailers over 3000 lbs. I will get pictures. Take Care and keep in mind etrailer.com is a great source for all your trailer needs on M1102 brake system. Very affordable. Lots of good videos. Take care . Enjoy the July 4th weekend.
I hope someone else finds my research useful.
 

cucvrus

Well-known member
11,473
10,434
113
Location
Jonestown Pennsylvania
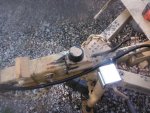
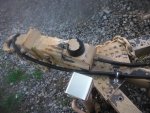
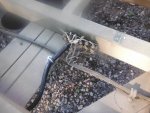
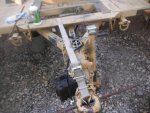
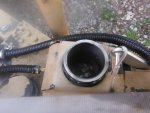
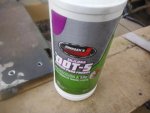
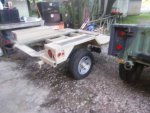
Last night after a HOT day at work I was torn between sitting in the A/C or working outside. I decided NOT to mow grass as I was alone. I worked on my trailer project. I need to get it completed and get it up to the vehicle enhancement shop so I can get a title for it. I reassembled the hitch after cleaning and greasing all the moving parts and pins. DSCF8613.JPG The bent-up master cylinder cover looks great. I really like salvaging parts and reusing them. Anyone can use new parts. This is not a new trailer, and it will not require new parts. DSCF8614 - Copy.JPG I secured and sealed all the connections at the junction box for the wiring. I added a new Grote 4 wire pigtail to run up to the 7-pin/prong/spade round trailer connector. I prefer the 7 pins over the flat 4 even with 4 wires. It holds up longer and stays tight in the plug. DSCF8615 - Copy.JPG DSCF8616 - Copy.JPGDSCF8617 - Copy.JPG Then I was onto bleeding the brakes. Let me tell you the mity vac is a waste of time. I used it many times, but I choose the ratchet strap. DSCF8619 - Copy.JPG It worked best. Make it tight and bleed. Loosen the strap pull the hitch back out and tighten the strap again. I was able to bleed all the old green/yellow fluid out and get the new fresh air free purple fluid out the bleeders. DSCF8618 - Copy.JPG I refilled the master cylinder, and that job was completed. DSCF8620 - Copy.JPG I was on a roll. Just me and my XM radio on channel 313 Rock Bar and I was tearing it up. I jacked up the trailer and put the new tires and wheels on. Looks great. DSCF8621 - Copy.JPG I will be getting this to the garage for enhancement. Take Care and have a great weekend. I am going to make progress on many things over the weekend. Most no reportable but non the less progress.DSCF8622 - Copy.JPG
 

cucvrus

Well-known member
11,473
10,434
113
Location
Jonestown Pennsylvania
Back from the road test. I need to purchase or fabricate a hitch that is the right height. The hitch I used was too short and made hooking up and unhooking a task. The jack will not go low enough. I have the other hitch, but my wiring was too short. DSCF8599.JPG So, I either lengthen the wiring or raise the hitch. But I think I will need to do both. The only thing that I can tow it with correctly is the M1028 and I don't plan to many trips with that truck in summer weather. DSCF8598 - Copy.JPG This set up is the same. The nose of the trailer is too low. I have work to do. I went and looked at new hitches and nothing suited me. So off to the fabrication process I go. Not today. I have lots of other property work to do. Joy it is going to be a hot one.
 

cucvrus

Well-known member
11,473
10,434
113
Location
Jonestown Pennsylvania
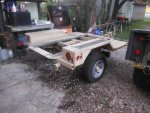
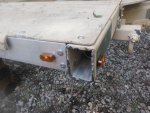
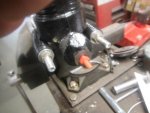
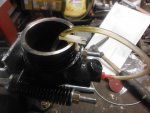
Picked up a set of Grote LED taillamps with Grote brackets. They were on a chassis that came in for a body. They had a special grounding wood mount. All the wires were all blue and the brackets were new. Someone spent some time, expense, and effort to make this light bar. I disassembled it and cut up all the wiring for scrap. The wood I am using on a project that came to mind. DSCF8623.JPG My utility trailer that I had the past 35 years was getting abused when I loaned it out. The left taillight was wire tied in place the past 2 years. I noticed when it was returned it was hanging by the wires. The person was sad, and I told them it was not their damage. The metal had been bent so many times and straightened out it broke off. DSCF8624.JPG I enjoyed the salvaging of used parts to do the repair. DSCF8625.JPG I went around the entire trailer and fixed wiring that was loose and replaced broken reflectors and cracked clearance lamps. Good as new. It could use a new paint job, but that CARC 3 color camouflage I painted it 25 years ago has held up well. The trailer was $750. new back in 1987 and I have used and abused it. I replaced the axle once after I hauled a tractor on it and the aluminum floor was bought as scrap. Have a Great Day and enjoy life.
 

cucvrus

Well-known member
11,473
10,434
113
Location
Jonestown Pennsylvania
I did manage to assemble another hitch from parts and hitches I had around the farm. WOW. I am a collector of things. No trash. But I basically have just about anything I need to repair trucks and buildings as a DIY farmer/mechanic. Which is nice. Have a Great Day. Pictures later of my handy work. Or butchering. Opinions matter very little to me.
 
Top