gimpyrobb
dumpsterlandingfromorbit!
- 27,791
- 791
- 113
- Location
- Cincy Ohio
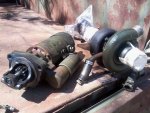
PM sent!Hey Matt, no I'm going to use the turbo off of my old engine. I still need to find an exhaust manifold gasket for it.
Steel Soldiers now has a few new forums, read more about it at: New Munitions Forums!

PM sent!Hey Matt, no I'm going to use the turbo off of my old engine. I still need to find an exhaust manifold gasket for it.
 .
.


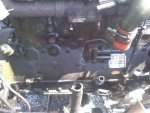
Thought I had a LDT manual. All I have is for the LDS.Can anyone point me to where I might find the torque specs for:
A. Valve cover bolts
B. Pressure plate bolts
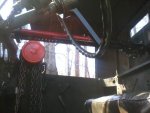
C. Turbocharger mounting nuts
...and the valve cover needs 35-60? Sumptins not right there.From the Continental Aviation and Engineering Corporation manual for the LDS-456-1A, 1968
Turocharger to exhaust manifold bolts: 23 to 27 lb/ft.
The spec for the rocker covers is a lb/in not lb.ft so 30~60 lb/in isn't very much....and the valve cover needs 35-60? Sumptins not right there.
")
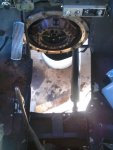
Dont think these specs are correct, didn't get anywhere near that before I stripped out two pressure plate mounting holes on the flywheel. Don't know what the heck to do now! Heli coil? Longer bolt? Wider bolt?Pressure plates...............115-120 Ft lbs
What size bolt is it????Dont think these specs are correct, didn't get anywhere near that before I stripped out two pressure plate mounting holes on the flywheel. Don't know what the heck to do now! Heli coil? Longer bolt? Wider bolt?