• Steel Soldiers now has a few new forums, read more about it at: New Munitions Forums!

  • Microsoft MSN, Live, Hotmail, Outlook email users may not be receiving emails. We are working to resolve this issue. Please add support@steelsoldiers.com to your trusted contacts.

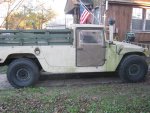
Juan's M998 HMMWV

juanprado

Well-known member
Steel Soldiers Supporter
5,635
2,953
113
Location
Metairie/La (N'awlins)
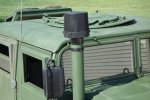
There is a rubber collar to mesh the pipe to it and it is all the way down. It is actually shorter than another style I passed on.

Part of the reason they are taller is that there is a fan blade inside that spins to force more air flow down the pipe.
 

Attachments

Action

Well-known member
3,576
1,559
113
Location
East Tennessee
Now that one looks like a convoy light got painted over. I know what they do. I have seen some with the green pipe cut shorter and they looked good.
 

juanprado

Well-known member
Steel Soldiers Supporter
5,635
2,953
113
Location
Metairie/La (N'awlins)
washer pump

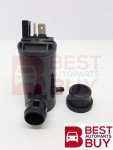
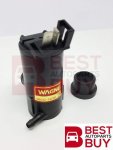
My Windshield washer pump was out since I picked it up. I shopped around and saw the OE military pump was $70-$90. Nuts for a universal pump I used to sell at parts stores for $10-$20. This is not a mission critical part put a simple deal.

Epay has universal 24v pumps for Asian trucks and cars. Wagner is a well known brand. $9 from Thailand. I can wait for delivery. Took about a week. eBay item number: 252455337560

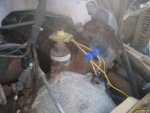
Simple 2 wire hot/ground. Cut off oe harness from original pump to retain the plug grommet through body and OE wiring. 2 slip on crimp connectors and good to go. This pump has the hose pointing straight down but the hose fits on it great anyway. The pump grommet fits the washer bottle perfectly and just for giggles I siliconed the bottle grommet, the pump tube, and the body plug.

Squirts water and works perfect. $9 anyday over $90
 

Attachments

Awol

Well-known member
537
529
93
Location
MA
You got a great deal! It sounds like its coming along nicely. That washer pump saved you some cash.
 

juanprado

Well-known member
Steel Soldiers Supporter
5,635
2,953
113
Location
Metairie/La (N'awlins)
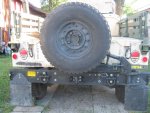
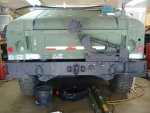
Rear Air Lift Bumper and accessories like a lego set

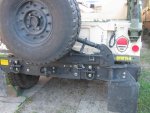
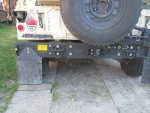
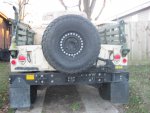
This summer I got a rhino tire carrier and a set of mud flaps at Southern Metals. I purchased an airlift bumper with all 4 brackets and 2 outer braces off epay reasonable. Seller would not ship and my brother in Ca was kind enough to pick up and GoldnEagle arranged bumper shipping to me reasonable. Since my brother was coming to New Orleans a few weeks after pick up all the brackets and braces flew free courtesy of southwest. Now the boxes were all opened by TSA and I had their cute blue logo tape on everything and those nice slips informing me everything had been open and inspected. I guess it all passed.

I found the bumper reinforcement plate at a Military NOS supplier/reseller. The 4 frame shims and trailer connector mount plate came off epay.86humv helped me with the inner braces.

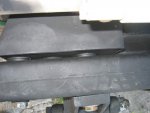
The bumper was NOS and had never been mounted but it had a zillion DRMO, GL, and UPS stickers on it. Some of the stickers literally pealed the carc off and there were places were the carc was lifting off. I would say 60% plus had a crappy paint job with no adhesion that came off easily. No primer or any coat underneath. I sanded the paint off with those sponge like fiber discs. The crazy part was like 5% of the paint had stuck on like cement and literally had to be ground off. I rattled can with krylon self etching primer and flat black rusty metal paint.

The lego set fun began.

I had an a2 bumper with the hole for the tear drop shackles. I could not find them anywhere. I researched and found the OE manufacture. They wanted a cool $89 each. I could not justify $200+ in shackles that hopefully I would never need. I opted for the standard shackle 2 bolt mount from kascar $5 each. I already had 3 shackles and ordered another from Kascar I think maybe $23 for all new parts. 4 are needed. 2 for the bumper ends and 2 for the shackle mounts.

It took me a while to strip, paint and disassemble the original one as I could only work on it an hour here and there as I am very busy with scout recruiting in Aug and Sept including most Saturdays. It also did not help that every time I had a few minutes free, it would of course rain buckets here in the tropics.

Now the TM's tell you the bolt length but when you add a reinforcement plate, shackles mounts, mud flaps, and tire carrier all that goes out the window. Took a few trips to exchange grade 8 fasteners and have all the right stuff. Of course finding reasonable fasteners at tractor supply is nice but they don't have stores in urban or suburban markets. I picked up some on out of town trips and got fleeced at home depot/lowes.

Got a day off and the fun started. This is definitely a 2 person job if available. I mounted the body brackets and frame brackets and started the lego set by using a bolt here and there to start and shifting components around. To make things easier I unbolted the bottom bolt on the tire carrier pivot so I only dealt with the mounting plate and the bump plate. My daughter and wife helped hold stuff while playing lego set.


Got everything sort of mounted loosely and Houston we have a problem. The a2 bumper with the tear drop shackles has a raised collar on the outside of the bumper. It would not nestle flat against the brackets. Did some research and found the epay vendor had given me a1 body brackets and not A2 brackets with a hole for that collar to go through. I had 3 choices, unbolt everything and get correct brackets, unbolt everything and drill large hole through thick metal x2 (did not look like any kind of fun with a hole saw), or since I had lost my helpers chose to remove each bolt and add 3 fender washers to each bracket bolt on the inside out of sight. Inner and outer braces are slotted on both ends so no adjustments needed there. Everything was flat,level and good to go.

The tire carrier will also need fender washers to offset the width of the mud flap bracket on the other side in between the carrier and bumper.

Un bolt original wiring plug bracket and loom clamp to body. Cable will now stretch to reach the bumper mounting plate and install cover.

Next problem. Mounted pintle and it is now way too loose. Even with reinforcement plate, everything is narrower than the OE mwo bumper width. Pintle needs a spacer collar with lube fitting on back. Found a civilian one on epay reasonable. Holland part number ph-t-60-aos-l-8

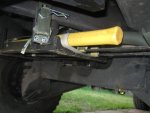
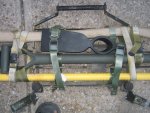
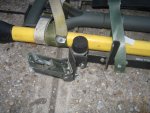
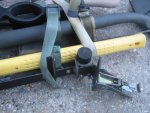
last part of project was to install pioneer tool rack and catches on inner diagonal braces. Frame bracket was already there and just needed to be loosened and adjusted. I had gotten the wrong pioneer tray but vendor made it right with refund so I can get the correct angle brackets for latches from kascar $5 each. Chief had a great right up on the tools. I added straps for piece of mind and added hair pins as another member suggested for more piece of mind to the latches. All is rock solid and no movement.

Lots of work and tm prep time but It really dresses my hmmwv up and I think it looks great. I also like the fact that I now have a spare and don't need to take up space in the bed. Kind of pricey as with the tire/rim,bumper, carrier, bolts, pioneer rack etc is came up to a $1000 investment
 

Attachments

Last edited:

camoyj7

Member
926
18
18
Location
wonder lake IL
I had same issue with A1 brackets with a A2 bumper. I mounted the bumper then transfer punched it to mark where the hole needed to be. I used a Blair hole saw and it cut through the aluminum bracket fast and clean.
 

Attachments

juanprado

Well-known member
Steel Soldiers Supporter
5,635
2,953
113
Location
Metairie/La (N'awlins)
hood upgrades

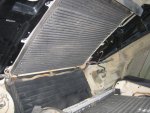
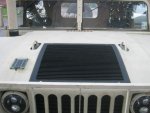
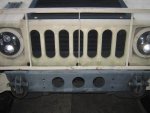
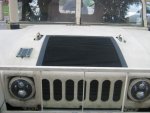
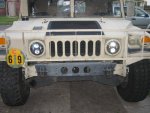
The parts m1038 I got with GoldnEagle had a supplemental armor front and top grill. I liked the look much better than the original 1/4 mesh chicken wire so we pulled them off the parts truck. I painted them flat black and installed on mine. I like how it came out and these puppies are heavy! Can definitely feel the weight when I open the hood now.

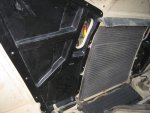
Some members have reported the temp goes up with less cooling and some had said no difference. I haven't yet had a chance to see real world temps. I do know that someone posted on G503 pics of the correct way to mount them. The parts truck had the top grill upside down. The narrow slots go at the top. If the temps go up, then plan b is to install an electric 24v fan that I picked up a few years ago from a member parting a/c mrap condensers as I am also upgrading to a 200 amp alt in the future so the extra load is no big deal.

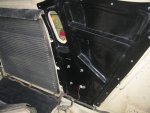
Chris~IroncladGa was kind enough to put some hood reinforcement kits 2510-01-547-7220 on pay it forward and I took advantage of his offer. Pretty straight forward install. Move some wire loom bolts out of the way, glue panels on with the enclosed double sided tape, drill holes following panel pattern, install 3/16 rivets. For me that was the killer as you need gorilla grip hands to squeeze a manual pop rivet tool to install/cut those 30 rivets.

My pulse tech battery solar panel was already drilled to the hood so I had to remove it and drill 5 holes through the new panel and reinstall. Some of the existing well nuts were dry rotted and fell apart and I picked up new ones at home depot for the grill insulation.

fsearls92 sold me a bridge plate and I was pleasantly surprised that the numbers and c plate facing inside were yellow so I reversed them as I like the look better than the green. For now I zip tied to the grill in a spot that does not seem to bother the headlights. I guess later if that is the spot I will drill through the lower part of the brush guard to bolt but that is some thick metal.
 

Attachments

Last edited:

juanprado

Well-known member
Steel Soldiers Supporter
5,635
2,953
113
Location
Metairie/La (N'awlins)
some progress

I took a ride to a veterans parade this weekend an hour away on the Interstate at 65mph. The Temp gauge was maybe 5 degrees higher with the supplemental front and top grill at 80-85 outside. No big deal and I am glad I changed them.

Picked up a $5 self cancelling turn signal switch at the GA rally on one of the tables. Works perfectly. Now to find the cancelling ring reasonable and an a2 black thicker steering wheel. :)

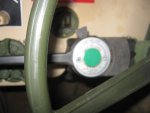
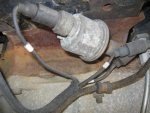
My truck's wait light did not appear to be working since I got it. I did see at night that it would come on for a nanosecond and then off. During the day you could not see it. Other members on other threads said they changed the Glow Plug controller and the problem was fixed. Found an Epay seller uaintl-2008 selling used ones for $28 shipped or offer. Looks like they had 30 of them. Good vendor with good feedback so I took a parts changing gamble. Offered $20 and they accepted it. Same part number and nsn as the one on my truck. I do not know which box I have as the label is gone or facing the inside. This one is gold/yellow and works perfectly. Wait light works as it supposed to. Takes an 1-1/2 wrench/socket to change. Dab of dielectric silicone . Label on part does say to change it cold or wait 10 min before starting. I did it stone cold. $20 and issue over :p
 

Attachments

Rjins

New member
18
0
1
Location
Tipp City, Ohio
Looks Great Juanprado! My story is the same. Someone here in Ohio bids up Hmmwv but the 2 mans were going cheaper! I too took a gamble on several that ended up going for more than $10k, before I too got lucky on this 2 door! I also got lucky and got it for $6700. Mine also was very mechanically sound. In the middle of filter changes. I too had crap for batteries and converted to 24Ts. Battery hold downs work fine on them, but I placed some bracing between the batteries to make them solid in the box. While I was at it wired in a cutoff switch in the battery box. Post pics of your conversion to 4 doors. Have fun in the mud!
image.jpg
 
Last edited:

juanprado

Well-known member
Steel Soldiers Supporter
5,635
2,953
113
Location
Metairie/La (N'awlins)
Nice truck Rjins!

I now have accumulated all the parts except one minor brace for the conversion and it is on the schedule ;-)

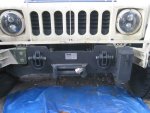
Current project to install winch. Got it mounted today and got some tips:

I used a farm jack to hold the existing frame bracket with the hood and also because of the weight of the brush guard as I did not want to remove it and reinstall.

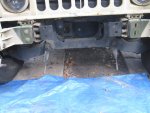
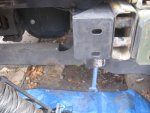
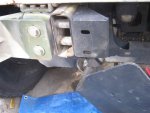
Right and left winch mount frame brackets do make a difference! I had gotten the brackets loose with no box or part number and I guessed wrong :-( The first pic is wrong with the blue tarp. The brackets need to have the solid lip to the top as there is a clearance issue with the winch. I had originally mounted the lip down. Correct way is the 2 individual pictures.

I just left the winch on one lower bolt while I flip flopped the brackets. Made it easier to just lift one side when finished.

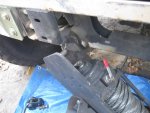
I had to remove the left caliper to install the longer lower control arm bolt. As others have posted use a jack to get the weight off the ground and screw the old bolt out at the same time you are pushing the new one on. Caliper bolts are 7mm allen. Standard kelsy hayes brake set up.

fellow member scubacat was selling the winch box in the classifieds so I installed it since the bolts were already out from the brush guard and simple 2 bolt mount through frame bracket.

Except for the double work of the upside down brackets; not to bad of a job.

I have not done hydraulics or electrical yet as I waiting for one hose and the wiring harness to arrive.
 

Attachments

juanprado

Well-known member
Steel Soldiers Supporter
5,635
2,953
113
Location
Metairie/La (N'awlins)
Mile Marker Winch Hydraulics and Electrical

I did not have the hoses or electrical harness except for the controller when I picked up the winch.

The hoses are easy to find on ebay and ss suprman sells one of them.

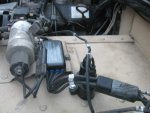
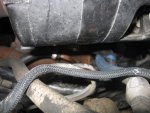
Others advised on getting a good 19mm line wrench. I would say a crowfoot and stubby 19mm are also handy. Taking the hose off the hydroboost and running the 2 hoses up from the winch is the easy part. Taking off the fitting off the gear was an exercise in tight fitting quarters but not too bad. I must say starting the fitting on the new hose to the gear was **** well impossible. I thought I had started it by hand and used a wrench to ever so slowly turn it. Along the 50 times or so I tried, I must have stripped the fitting first threads. The hoses are all field replaceable assemblies so I took off the original fitting off the old hose and installed on the new hose.

I filled up the pump and turned the wheels right and left like a car pump install on ground. Instructions said to jack up both sides and turn wheel something like 40 times lock to lock. I thought that was ridiculous. I checked fluid, no foam, topped off and drove it to check for leaks. All good and I am glad I did not spend all that time bleeding it.

Mile marker was very easy to order the parts I needed. I ordered the winch plug, wiring harness, data plates, Emergency U tube bypass. Maybe $100 direct if I remember correctly. I ordered with their part numbers not nsn or military part numbers. They did question why I wanted them when I got a price quote and again when I ordered. All I said is I have a surplus humvee with a surplus winch and they were ok selling to me.

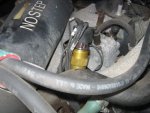
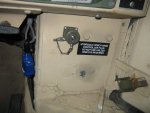
Drill hole in lower dash, install plug and run wire harness. Add Circuit breaker next to fan clutch valve. One wire Y off the temp sensor and others to front of winch. Wiring pretty straight forward using install manual. Tested it with my sons help and all is good!
 

Attachments

juanprado

Well-known member
Steel Soldiers Supporter
5,635
2,953
113
Location
Metairie/La (N'awlins)
New Shoes

Right before the end of the year I went to Ft Riley, Kansas to pick up some GL goodies and also deliver a puppy in Houston. I was staying the night in Oklahoma City. On craigslist was a seller in Norman, ok selling hmmwv tires and rims. All flavors and rim styles. I settled on BF goodrich Baja "d' load range on 24 bolt even spaced black wheels. No need to worry about color or painting to match. They were like new. One tire was 100% other 4 were maybe 95% $1100 for all 5 mounted and ready to go. Not having to mess with run flats or assemble o rings and used valve stems was worth the extra price but I think $225 for like new 24 bolt bajas was a good deal. One of the selling points I thought was good is that he told me that unmounted tires could be a roll of the dice. He says he gets many like new un mounted tires with thorn and cactus holes in sidewall. Not exactly what I would run into LA but peace of mind that i was getting quality product with minimal labor on my part.

I picked up 4 24 bolt staggered load range E wheels for CsmDavis at $50 each with used orings and used valves which I thought was reasonable. Anyone in OkC or travelling through, I would recommend these folks.

Local old school shop with someone I knew form my Western Auto Days in another lifetime balanced them for me. Surprise as one had beads! I left that one alone and made it my spare. Others balanced ok just using weights on the inside. I have a small fortune in lead when prices go up :)

Torque to 100ft lbs and very pleased with traction and looks. One thing I noticed is that they are actually taller than the goodyear mtr radials. I know they are marked the same size but the bajas are about 1 1/2 inches taller. Nice extra boost to top speed. There is a million opinions on air pressure. The 5 I got ranged from 10-50lbs. Since I am not armored and will not be carrying anywhere that weight, I settled for 30psi front and 35psi rear. handles well, rides well and I think that air pressure will work for my driving.
 

Attachments

Videris

New member
148
0
0
Location
San Diego CA
Right before the end of the year I went to Ft Riley, Kansas to pick up some GL goodies and also deliver a puppy in Houston. I was staying the night in Oklahoma City. On craigslist was a seller in Norman, ok selling hmmwv tires and rims. All flavors and rim styles. I settled on BF goodrich Baja "d' load range on 24 bolt even spaced black wheels. No need to worry about color or painting to match. They were like new. One tire was 100% other 4 were maybe 95% $1100 for all 5 mounted and ready to go. Not having to mess with run flats or assemble o rings and used valve stems was worth the extra price but I think $225 for like new 24 bolt bajas was a good deal. One of the selling points I thought was good is that he told me that unmounted tires could be a roll of the dice. He says he gets many like new un mounted tires with thorn and cactus holes in sidewall. Not exactly what I would run into LA but peace of mind that i was getting quality product with minimal labor on my part.

I picked up 4 24 bolt staggered load range E wheels for CsmDavis at $50 each with used orings and used valves which I thought was reasonable. Anyone in OkC or travelling through, I would recommend these folks.

Local old school shop with someone I knew form my Western Auto Days in another lifetime balanced them for me. Surprise as one had beads! I left that one alone and made it my spare. Others balanced ok just using weights on the inside. I have a small fortune in lead when prices go up :)

Torque to 100ft lbs and very pleased with traction and looks. One thing I noticed is that they are actually taller than the goodyear mtr radials. I know they are marked the same size but the bajas are about 1 1/2 inches taller. Nice extra boost to top speed. There is a million opinions on air pressure. The 5 I got ranged from 10-50lbs. Since I am not armored and will not be carrying anywhere that weight, I settled for 30psi front and 35psi rear. handles well, rides well and I think that air pressure will work for my driving.
Looks very clean and mean. Nice work on it bro. Makes mine look like a turd. Haha.
 

juanprado

Well-known member
Steel Soldiers Supporter
5,635
2,953
113
Location
Metairie/La (N'awlins)
Tach / Radio Deck updates

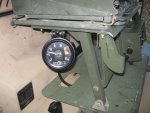
Picked up a tach from TnRiverJet and finally got around to installing it. I used excellent ideas and wiring here:
http://www.steelsoldiers.com/showthread.php?153495-hmmwv-tachometer-installation

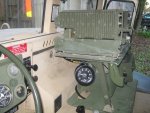
My mounting solution was to use a tach mounting cup from Autometer part number 5204 and hang it on bottom of the top radio shelf. I had to cut the studs off the back of the tach as the cup does not have the depth for the rear bracket OE stud set up. The tach is slightly longer so I painted the outer part of the gold case black so it is not noticeable.

I did wire the ground to the ground stud by the top left of the doghouse as I thought that was better than at a gauge. I already had a hole with the rubber grommet and steel cup on the passenger side by the tunnel. I removed the cut remains of the old cabling from the radio and used this to run all the wires for the tach into a loom and under the radio tray. I drilled a small hole in the firewall behind the gauges to run the wires out and down the main harness to the tach drive and to the hole already there.

I did verify the block numbers and I do have a 6.2L. She does run excellent. Some had suggested that I had a replacement 6.5L. My top speed is 69/70

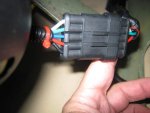
I bought a 5 wire Gm style weather tight male/female pigtail from China vendor on ebay very cheap as a quick disconnect at the tach incase I need to pull the radio shelves to get into the doghouse.

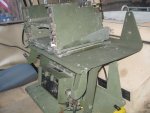
Mounted the Vic plate with a vic 3 master control box to the front of the shelves. I hope down the line to get the rest of the components. Need the crew stations and hiway cables. Ontop is a sincgars mt6352 mount with a dual radio am7239 base with the amp. I have a look alike trainer sincgars radio to install as one of the next projects.

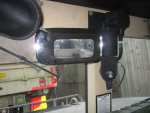
Another member had suggested the CIPA 11050 marine suction cup mirror and I am very happy with it for my rear view mirror.
 

Attachments

Last edited:

juanprado

Well-known member
Steel Soldiers Supporter
5,635
2,953
113
Location
Metairie/La (N'awlins)
Parking Brake handle upgrade

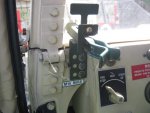
Even though New Orleans is below sea level and flat, my drive way has a very slight slope. I have already thumped the stock emergency brake handle twice while installing my radio deck. 1st time gently rolled into my wife's durango :( and I learned to chock the wheels so no foul 2nd time. :)

Deuceman was selling the locking version with a push button very reasonable so I took the plunge. Pretty straight forward with 6 bolts. The front vertical bolt was more of a challenge to hold. My wife helped from up top and I undid from the bottom. Definitely a 2 man operation. Unhook wiring clamp, unsnap boot out of way. Pull cotter pin to disengage the yoke for the brake rod. What I found when I pulled it was the top half of the rubber dust boot was not in great shape. The boot has a metal frame and it had rusted. The front bolt that had given me trouble to grip had fallen deeper down as the shell under it was rusted away. I did not have a boot so ordered from amtak on epay and waited for it to come in. (part number label in pics)

Re installed and used washers under the bolts just because I always use washers :-o and incase the boot rusted away in 20 years, the next guy would have an easier time. Had to spin the handle a few times to adjust cable. No more thumping handle with my belly by accident..... Might have been a good idea to install rivet nuts but I did not think I would be doing this again.

Seems like a must have for my northern and hilly friends.
 

Attachments

juanprado

Well-known member
Steel Soldiers Supporter
5,635
2,953
113
Location
Metairie/La (N'awlins)
Push Button Light Switch MVLS upgrade

Yes, I have read all about them. Even read the paper from the college engineering students who designed the switch as a school project for the military. Have seen the fire threads....but I have one in my 5 ton and really like the functionality. Don't flame me, no pun intended.

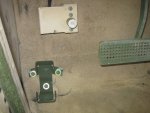
Saw this variant on epay made by Nartron 19207-12484558 ,mfr 32498 not the original manufacture Esterline advanced input systems. Brand new, I offered $212, I have seen the vendor accept $150 all the way to $350. Could not get them to take my $150 :mad: What caught my eye is that the face is much deeper than the other ones I have seen/own. I had heard how the original mounting tabs would not work for the pushbutton. This switch fit perfectly with no adjustments like it was meant to fit a hmmwv.

I ran the extra ground wire from switch out the side firewall hole for main harness by the brake pedal and up to the ground stud by the corner of the doghouse/ firewall where the dash grounds. In the future I will add an octpus. Re connected battery and tested. All is good.
 

Attachments

Last edited:

Trailboss

Well-known member
Steel Soldiers Supporter
1,577
139
63
Location
Norwood LA
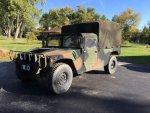
I took the Student Of The Year in my M998 at the small annual School parade for Metairie Academy.:clinto:
Juan, I know it was a small parade, but couldn't you have at least knocked some of the algae off, or covered it with more Mardi Gras decorations? :-D
Amazing how fast that stuff grows on everything here. Truck is looking good!
 

juanprado

Well-known member
Steel Soldiers Supporter
5,635
2,953
113
Location
Metairie/La (N'awlins)
Juan, I know it was a small parade, but couldn't you have at least knocked some of the algae off, or covered it with more Mardi Gras decorations? :-D
Amazing how fast that stuff grows on everything here. Truck is looking good!

thank you Sir,

I am going for natural 3 plus color. Must be at least 15 shades of green there. It is nuts as my 5 ton is the same.CARC paint is so porus like a school biology project here in the tropics....
 

juanprado

Well-known member
Steel Soldiers Supporter
5,635
2,953
113
Location
Metairie/La (N'awlins)
M-16 Rifle Mounts

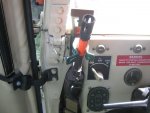
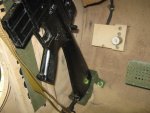
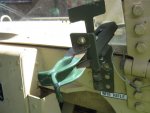
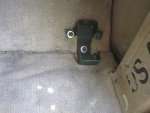
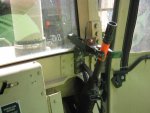
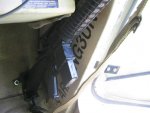
Installed the newer style multi piece m16 rifle mounts. Pretty straight forward. Dash mounts 1/4 hole and bolts. Bottom cups are 5/16. Left side dash needs small hand to screw those washers and nuts on as a real tight fit.

I adjusted mine for the m16 training rifle I have. Ymmv
 

Attachments

Top
AdBlock Detected

We get it, advertisements are annoying!

Sure, ad-blocking software does a great job at blocking ads, but it also blocks useful features of our website like our supporting vendors. Their ads help keep Steel Soldiers going. Please consider disabling your ad blockers for the site. Thanks!
I've Disabled AdBlock
No Thanks