- 5,766
- 3,195
- 113
- Location
- Metairie/La (N'awlins)
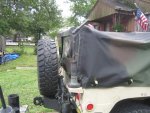
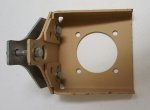
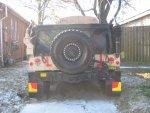
Rear Bumper updates
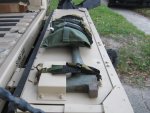
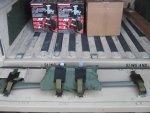
There was during the spring an ebay seller with a surplus store in Pensacola selling the pintle extensions very reasonable. Since my wife and daughter were going to Pensacola for a dog show, I struck a side deal and she picked it up for me. Some of the ebay sellers are asking crazy money for these
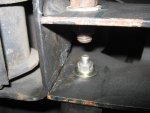
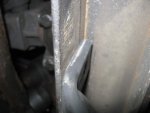
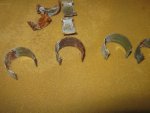
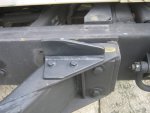
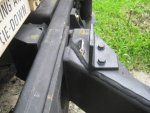
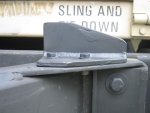
The tm calls for 5-3/4 bolts but I used 6 inch. I could not find anyone with the backing plates that go on the outside so GoldnEagle made me 2 out of his scrap pile. I chose to leave the bumper strengthening plate on anyway and bolted the pintle extension to the outside of it.
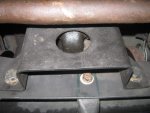
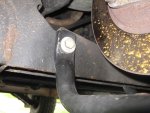
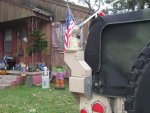
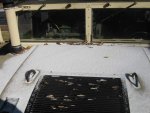
You lose the original bump stop bracket of the tire carrier with this set up so GoldnEagle made me a simple L stop bracket. Tapped the extension 5/16 and on the outside bolt also used a lock nut with a longer through bolt. With the arm down and resting, the weight does the trick and everything is solid and does not move. I had to shave and slightly angle the fitting on the bottom of the tire carrier that holds the lock down pin for clearance.
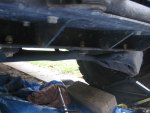
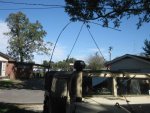
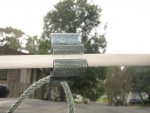
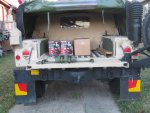
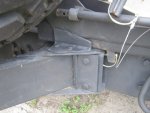
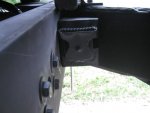
The wiring harness needs to be loosened from the body and slightly pulled forward to make enough room for the trailer plug with the extension. I wrapped the exposed wiring with wire loom tubing. I could not find the oe bracket reasonable as I was quoted $75 for a simple 45* bracket. Zev had a bracket in his scrap pile and I can not recall if it came from a dolly we scrapped or a m931 tractor? Turned it sideways and drilled the bolt holes and it fit perfectly. Tested to make sure a 90* would work and my m101 cable has plenty of room to hook up and slack.
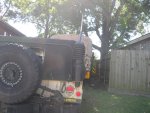
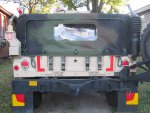
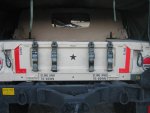
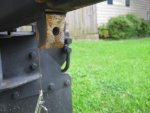
Last year when I installed the airdrop, I could not find reasonable tear drop shackles as I was finding $90-120 each. Walker Wreckers in Ca on ebay is selling them for $39 each so I grabbed a pair and updated since I have an a2 bumper.
If anyone goes this route, I have like 18 extra castle nuts for them")
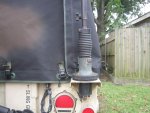
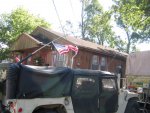
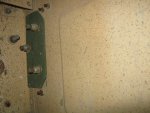
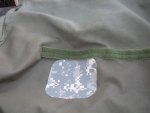
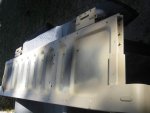
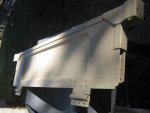
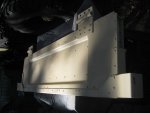
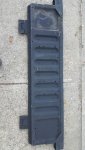
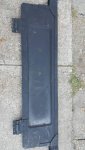
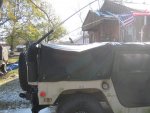
I had purchased multiple dilenation stickers from a Europe surplus dealer to use on my trailers a few years ago but took a set and installed on a thin sheet metal plate and sandwiched under the mud flap. In Europe, They have a hard plastic backing plate but I improvised. I like the reflective visibility at night for safety.
There was during the spring an ebay seller with a surplus store in Pensacola selling the pintle extensions very reasonable. Since my wife and daughter were going to Pensacola for a dog show, I struck a side deal and she picked it up for me. Some of the ebay sellers are asking crazy money for these
The tm calls for 5-3/4 bolts but I used 6 inch. I could not find anyone with the backing plates that go on the outside so GoldnEagle made me 2 out of his scrap pile. I chose to leave the bumper strengthening plate on anyway and bolted the pintle extension to the outside of it.
You lose the original bump stop bracket of the tire carrier with this set up so GoldnEagle made me a simple L stop bracket. Tapped the extension 5/16 and on the outside bolt also used a lock nut with a longer through bolt. With the arm down and resting, the weight does the trick and everything is solid and does not move. I had to shave and slightly angle the fitting on the bottom of the tire carrier that holds the lock down pin for clearance.
The wiring harness needs to be loosened from the body and slightly pulled forward to make enough room for the trailer plug with the extension. I wrapped the exposed wiring with wire loom tubing. I could not find the oe bracket reasonable as I was quoted $75 for a simple 45* bracket. Zev had a bracket in his scrap pile and I can not recall if it came from a dolly we scrapped or a m931 tractor? Turned it sideways and drilled the bolt holes and it fit perfectly. Tested to make sure a 90* would work and my m101 cable has plenty of room to hook up and slack.
Last year when I installed the airdrop, I could not find reasonable tear drop shackles as I was finding $90-120 each. Walker Wreckers in Ca on ebay is selling them for $39 each so I grabbed a pair and updated since I have an a2 bumper.
If anyone goes this route, I have like 18 extra castle nuts for them
I had purchased multiple dilenation stickers from a Europe surplus dealer to use on my trailers a few years ago but took a set and installed on a thin sheet metal plate and sandwiched under the mud flap. In Europe, They have a hard plastic backing plate but I improvised. I like the reflective visibility at night for safety.
Attachments
-
 102.4 KB Views: 133
 -
 60.6 KB Views: 113
 -
 49.1 KB Views: 100
 -
 67.2 KB Views: 100
 -
 60.4 KB Views: 99
 -
 77.1 KB Views: 98
 -
 61.3 KB Views: 98
 -
 50.7 KB Views: 93
Last edited: