-
Steel Soldiers now has a few new forums, read more about it at: New Munitions Forums!
M1009 Little Red Riding Hood.
- Thread starter cucvrus
- Start date

More options
Who Replied?cucvrus
Well-known member
- 11,478
- 10,507
- 113
- Location
- Jonestown Pennsylvania
 I managed to get the right rear mount in place.
  This is the right rear.
  The left mid cargo area without the mount. Now with the mount and bushing in place.
  Both cab mounts. Like I said oil and grease and run the bolt in and out a few times. Get it so you could install it with fingers. Avoid stripping and cross threading the caged nuts. You will be happy you did get them clean and easy to tighten.
 I did more work on the M1009, mowed all the grass and worked on another project. I am tired. Be Safe and Take Care.
cucvrus
Well-known member
- 11,478
- 10,507
- 113
- Location
- Jonestown Pennsylvania
I reinstalled the 4WD shifter. I used Stainless steel bolts because I have a lot of them. And you will never see them anyway. 
 I looked underside and hooked up the linkage to the transfer case. I noticed that the speedometer cable just swings in the breeze,
 and I added a rubber coated P clip and fastened it to the bolts thread from the center cover.
  Nice and secure now like it should have been from new. Take Care.
I looked underside and hooked up the linkage to the transfer case. I noticed that the speedometer cable just swings in the breeze, and I added a rubber coated P clip and fastened it to the bolts thread from the center cover. Nice and secure now like it should have been from new. Take Care.cucvrus
Well-known member
- 11,478
- 10,507
- 113
- Location
- Jonestown Pennsylvania
I mentioned that the caged nuts for the rear bumper outer brackets are lost with the new Energy Suspension body mounts. I am fine with that; I just upgrade to 1/2" and hold the bolts from the hole in the rear of the frame. I had the brackets powder coated 25 years ago. 
 Bolt placed in from the inside and the nuts go on the outside.

 I need to study all the brackets and figure out how to reassemble. I got it. I need to wait to complete the assembling till I get the lifting/tie down tubes painted. I figured it out. It was like a puzzle. It only aligns one way so after I figured it out it went quick.

 Take Care I hope to get more done tomorrow. I need to get the bumpers installed for alignment and bracket adjustment only. Then I will remove them again for the entire body repaint.
Bolt placed in from the inside and the nuts go on the outside. I need to study all the brackets and figure out how to reassemble. I got it. I need to wait to complete the assembling till I get the lifting/tie down tubes painted. I figured it out. It was like a puzzle. It only aligns one way so after I figured it out it went quick. Take Care I hope to get more done tomorrow. I need to get the bumpers installed for alignment and bracket adjustment only. Then I will remove them again for the entire body repaint.
Last edited:
cucvrus
Well-known member
- 11,478
- 10,507
- 113
- Location
- Jonestown Pennsylvania
My Son got that for me as a Christmas gift. I never need anything bigger than that. If I do I have other issues. I fixed a lot of bent stuff with that bar. It is a Snap-On I never ask what he paid for it. I had a prybar I made, and he never liked it because I was always slipping off with it.Damn nice pry bar !
cucvrus
Well-known member
- 11,478
- 10,507
- 113
- Location
- Jonestown Pennsylvania
I was out early this AM trying to beat the heat. I had 2 cab mounts left from the kit and then it struck me. They are for the radiator core support. I changed them. They were easy since I had that core support off 25 years ago and replaced the hardware at that time. I used the big green pry bar to support the core support while I changed them. They are all loose but installed now. I want to install the bumpers and get the body properly aligned. For now, I am going to be happy getting all my tools put away and sweep the shop. I sure don't envy anyone having to replace the body mounts on a rusty CUCV with the bumpers and all still attached. The key that I see is having the fuel tank removed. Sure, it can be done but it would take time and patience. I had both for this job. Be Safe and Take Care.
cucvrus
Well-known member
- 11,478
- 10,507
- 113
- Location
- Jonestown Pennsylvania
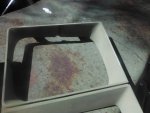
We have all had days like this. I started out putting my tools away and as the day went on other things came to mind. I did get all my tools put away and the shop floor is swept clean. Then I thought I would try and find a few inner front fender nuts; I know I have them but where? I dumped out a few old fastener boxes and began to strike it rich.  I found enough clip nuts and bolts to assemble eh front inner fenders.
  I ran them all thru a tap and die and am ready to assemble the inner fenders. Next, I need to locate a set of D ring tubes so I can sand and paint them. I put the inner fender clip nuts into the right fender and moved onto another project. I will get back at it tomorrow after work.
  Take Care and Be Safe. More Later.
I found enough clip nuts and bolts to assemble eh front inner fenders. I ran them all thru a tap and die and am ready to assemble the inner fenders. Next, I need to locate a set of D ring tubes so I can sand and paint them. I put the inner fender clip nuts into the right fender and moved onto another project. I will get back at it tomorrow after work. Take Care and Be Safe. More Later.- 8,245
- 20,816
- 113
- Location
- Charlotte NC
.We have all had days like this. I started out putting my tools away and as the day went on other things came to mind. I did get all my tools put away and the shop floor is swept clean. Then I thought I would try and find a few inner front fender nuts; I know I have them but where? I dumped out a few old fastener boxes and began to strike it rich. View attachment 874717 I found enough clip nuts and bolts to assemble eh front inner fenders. View attachment 874718 I ran them all thru a tap and die and am ready to assemble the inner fenders. Next, I need to locate a set of D ring tubes so I can sand and paint them. I put the inner fender clip nuts into the right fender and moved onto another project. I will get back at it tomorrow after work. View attachment 874719 Take Care and Be Safe. More Later.
Always nice when you can walk over to the "Stash" and find the parts to finish up a project without having to order parts!
cucvrus
Well-known member
- 11,478
- 10,507
- 113
- Location
- Jonestown Pennsylvania
Today after work I needed to locate some D ring tubes for an M1009. Over the years I have misplaced things, but it all works out. I just keep finding things.
 This is the 4 tubes with extra parts attached. All separated and the front brackets that I had powder coated 20 years ago.
  The parts on the left are all extra parts.
  I have been sorting and that helps find things a bit quicker. Working 10 hours on my FT job makes me tired but as long as I make slight progress, I am OK with that. Now to get these parts back in a bin so I can locate them if anyone else or myself ever need them.
  Thats a wrap for the night. Take Care and Be Safe.
This is the 4 tubes with extra parts attached. All separated and the front brackets that I had powder coated 20 years ago. The parts on the left are all extra parts. I have been sorting and that helps find things a bit quicker. Working 10 hours on my FT job makes me tired but as long as I make slight progress, I am OK with that. Now to get these parts back in a bin so I can locate them if anyone else or myself ever need them. Thats a wrap for the night. Take Care and Be Safe.cucvrus
Well-known member
- 11,478
- 10,507
- 113
- Location
- Jonestown Pennsylvania
Today I am going out to gather up all the attaching parts that get painted 383 green only and can be painted before final assembly. That is one of the most time-consuming times as I must hand sand and examine each part carefully, so I am sure to get proper adhesion and appearance of the finished parts. I have the D ring tubes and will gather everything together and turn on the XM and sand away. Most of these parts are good with 180 grit sandpaper. No need to get crazy. I see once someone wrote on here that they wet sanded a CUCV grille. I would like to see a video on that. I done a lot of sanding of small parts in my life but never went crazy as that. I mean wet sanding a classic car and using a squeegee. OK. I don't get involved in that. I am limited to flat paints and occasionally a Kubota tractor or tractor related parts. No shiny classic paint jobs in my barn. Pictures later. take Care and hopefully have a successful day getting something done. A few years back I had a Kubota tractor come here for repairs. It was smashed in the front and the Kubota grille was over $500. I made one from a damaged reefer vent cover that came off a Thermo-King unit.


 Sometimes you have to spend things other than money. Time well spent.
Sometimes you have to spend things other than money. Time well spent.cucvrus
Well-known member
- 11,478
- 10,507
- 113
- Location
- Jonestown Pennsylvania
I am back in after spending time getting all the parts gathered together. I have a shortage of a few parts. Nothing to affect this current build but a few that I am low on. The upper grille trim that attaches to the radiator support is a hard item to find clean undamaged. I have a few with minor damage and only 2 clean ones. That is fine with me I only have 2 CUCV's to complete. and also, the short tubes for the front D rings. I am sure there are more parts I am running low on. I am in the refresh and change my shirt. It is currently 93* and 92% humidity. Lovely. A few pictures for you. And then back to work. I think climbing the barn ladder and looking for parts was much hotter than sanding will be. I will seat myself and get to it.  I remember when I bought my first CUCV back in 1995. Everyone said the ballast resistors went bad all the time and that they needed bypassed. So, I saved and bought everyone I ever seen. After 25 years I never had one go bad. I call BS on that. Most times it is some other issue or modification that causes the issues that the resistors took the blame for. Anyway, I have a few of them. Cowl screens. The 1984 cowl screen is different than all the others. This is a 1984
  The reason the stem holes are smaller is because 1985 GM trucks were equipped with wet arm wipers.
  I will use the 1984 cowl screen to keep it correct for the year. It has to be one that requires the most sanding. Be that as it may. I can do it. OK. I have all the parts that need sanded spread out before me. If you get bored and want to help, I have left and right-handed sandpaper.

I also attached a few pictures that some people PMed me about. A complete M1028 tie down system with all hardware.

 The 3 M8 valve cover studs that got thrown out by the neighbor.
I also found a nice cache of M1009 tailgate parts. New GM window guides and 3 new Genuine GM regulators. NOT A C Delco.
 Take Care and thank you for looking. Good Luck on your projects. I must get back out there.
I remember when I bought my first CUCV back in 1995. Everyone said the ballast resistors went bad all the time and that they needed bypassed. So, I saved and bought everyone I ever seen. After 25 years I never had one go bad. I call BS on that. Most times it is some other issue or modification that causes the issues that the resistors took the blame for. Anyway, I have a few of them. Cowl screens. The 1984 cowl screen is different than all the others. This is a 1984 The reason the stem holes are smaller is because 1985 GM trucks were equipped with wet arm wipers. I will use the 1984 cowl screen to keep it correct for the year. It has to be one that requires the most sanding. Be that as it may. I can do it. OK. I have all the parts that need sanded spread out before me. If you get bored and want to help, I have left and right-handed sandpaper.I also attached a few pictures that some people PMed me about. A complete M1028 tie down system with all hardware.
The 3 M8 valve cover studs that got thrown out by the neighbor. I also found a nice cache of M1009 tailgate parts. New GM window guides and 3 new Genuine GM regulators. NOT A C Delco.
Take Care and thank you for looking. Good Luck on your projects. I must get back out there.
Last edited:
Sezzo
Well-known member
- 152
- 308
- 63
- Location
- Bamberg (Germany)
One day we will see this masterpiece fully assembled and ready to go and we know that every single bold was optimized for better performance. That’s a great build, Rick. Looking forward to it. Take care.
cucvrus
Well-known member
- 11,478
- 10,507
- 113
- Location
- Jonestown Pennsylvania
Well, the end of the day has come quickly. I sweated out a few gallons of water. I didn't get everything sanded but I did manage to get a lot done. The cowl screen with the tan 686 CARC was a showstopper. I did get over 1/2 of the things sanded and cleaned. I left the big stuff for another day. No pictures I left the camera in the barn. I am in the A/C and NOT returning outside anymore today. I refuse. Take Care and Be Safe.
cucvrus
Well-known member
- 11,478
- 10,507
- 113
- Location
- Jonestown Pennsylvania
I attempted to work in the shop Monday and Tuesday after sweating at work for 10 hours. It never happened in the shop. I retired to the A/C and cleaning up a downed tree on the property. I can never escape the tree issues. Unless I cut them all down. I have enough firewood split and stacked for a few years. I look forward to just a little progress after work today. maybe. 82% humidity is the issue.
cucvrus
Well-known member
- 11,478
- 10,507
- 113
- Location
- Jonestown Pennsylvania
I was out in the garage tonight and I sanded a few more parts. I was working on the tailgate torq rods. They are always rusty and crusty and binding in the plastic grommets that hold them.  I removed the plastic sheath and sanded the rod that rides inside the plastic sheath till it was smooth and the plastic spins freely on it. I am going to paint the rods but not the area that the sheath fits into. That area I will thoroughly grease during assembly and after paint.


 I promise that the cleaning and lubing of the gate hinges and the torque rods will have a positive effect on ease of opening and closing that M1009 tailgate. I have a full day of real full-time work so I will be limited to my CUCV project. I want to get the rest of my parts sanded. Take Care and Be Safe.
I removed the plastic sheath and sanded the rod that rides inside the plastic sheath till it was smooth and the plastic spins freely on it. I am going to paint the rods but not the area that the sheath fits into. That area I will thoroughly grease during assembly and after paint. I promise that the cleaning and lubing of the gate hinges and the torque rods will have a positive effect on ease of opening and closing that M1009 tailgate. I have a full day of real full-time work so I will be limited to my CUCV project. I want to get the rest of my parts sanded. Take Care and Be Safe.cucvrus
Well-known member
- 11,478
- 10,507
- 113
- Location
- Jonestown Pennsylvania
I was out after lunch and started sanding more parts. I have to stay at it to get it done. I hand sanded the grille trim and headlamp bezels. I discovered I had a broken tab on one left bezel, and it was mop painted with CARC. 


 I know where there is one that the broken one will work perfect.
 Won't matter for this wall hanger.
  I wanted to sand 2 sets for my last 2 builds. I hated to see the silver one that had 5 coats of paint on it.
 I looked around in my stash and found another set with the factory paint. Sands easy with 180 grit. Take Care.
I know where there is one that the broken one will work perfect. Won't matter for this wall hanger. I wanted to sand 2 sets for my last 2 builds. I hated to see the silver one that had 5 coats of paint on it. I looked around in my stash and found another set with the factory paint. Sands easy with 180 grit. Take Care.Attachments
-
 92.1 KB Views: 13
cucvrus
Well-known member
- 11,478
- 10,507
- 113
- Location
- Jonestown Pennsylvania
I had to go upstairs and look for a few more parts. I found some neat stuff I didn't even know I had.  Brand new cab mount base washers, excellent used ones.
 Keep in mind I was stripping CUCV's in 1995 and stashing parts from the ones I didn't repair. I was picky back then. I found another upper grille trim piece. I need one for my last build.
 I found these nice OEM under fender inner fender splash guards. And I found the newer model front D ring tubes.
  The older on early models is the crushed one because it had not crush tube inside. I sanded enough for 2 units. I think the stored one has all 4 tubes still attached. I am prepared.
  Sanded and ready for sealer and paint.
 . Now onto the Grille.
Brand new cab mount base washers, excellent used ones. Keep in mind I was stripping CUCV's in 1995 and stashing parts from the ones I didn't repair. I was picky back then. I found another upper grille trim piece. I need one for my last build. I found these nice OEM under fender inner fender splash guards. And I found the newer model front D ring tubes. The older on early models is the crushed one because it had not crush tube inside. I sanded enough for 2 units. I think the stored one has all 4 tubes still attached. I am prepared. Sanded and ready for sealer and paint. . Now onto the Grille.cucvrus
Well-known member
- 11,478
- 10,507
- 113
- Location
- Jonestown Pennsylvania
I had this grille on an M1009 that I changed the color to 686 TAN.  The paint is really nice so I will just scrub it and sand it with 180. I sanded it and scrubbed it really well.
  Nice and clean.
  So clean it received Gold Bowtie of excellence.
  Then onto the brush guard. I am tired of sanding for 1 day. I will get that next time.
  This was my home-grown winter front.
  4 bolts and the cover were off. Then 4 J bolts and the cover bracket was off. Agin a nice clean freshly CARC painted brush guard. Nicer than most I see. I will scuff it and re paint it with the 383-water base CARC. I am happy with the progress and the heat has let up for now. I am not working at The PARF this year so I can make progress weekly here on the M1009. I have wheels to sand and paint, and I was in horror at the price of 6 new tires. I am staying the course and doing it like it is supposed to be done. No generic tires with white letters for this truck. German M1008 was I able to get black wall tires for the BIAB1? I don't remember. But I am thinking the Goodyear MTR Kevlar in 31X 10.50X15 will make it look great . Take Care and Be Safe. I have a lot of work to do here.
The paint is really nice so I will just scrub it and sand it with 180. I sanded it and scrubbed it really well. Nice and clean. So clean it received Gold Bowtie of excellence. Then onto the brush guard. I am tired of sanding for 1 day. I will get that next time. This was my home-grown winter front. 4 bolts and the cover were off. Then 4 J bolts and the cover bracket was off. Agin a nice clean freshly CARC painted brush guard. Nicer than most I see. I will scuff it and re paint it with the 383-water base CARC. I am happy with the progress and the heat has let up for now. I am not working at The PARF this year so I can make progress weekly here on the M1009. I have wheels to sand and paint, and I was in horror at the price of 6 new tires. I am staying the course and doing it like it is supposed to be done. No generic tires with white letters for this truck. German M1008 was I able to get black wall tires for the BIAB1? I don't remember. But I am thinking the Goodyear MTR Kevlar in 31X 10.50X15 will make it look great . Take Care and Be Safe. I have a lot of work to do here. - 114,408members
- 167,301threads
- 2,355,076posts
- 1,526online users