• Steel Soldiers now has a few new forums, read more about it at: New Munitions Forums!

  • Microsoft MSN, Live, Hotmail, Outlook email users may not be receiving emails. We are working to resolve this issue. Please add support@steelsoldiers.com to your trusted contacts.

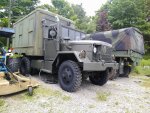
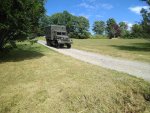
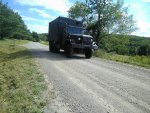
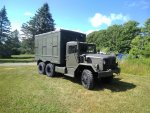
My 1971 Am General m109a3 RV build

muthkw25

Well-known member
Steel Soldiers Supporter
475
546
93
Location
Sayre, PA
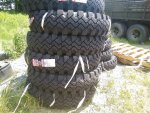
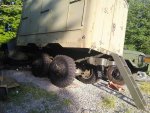
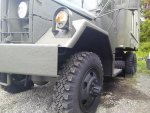
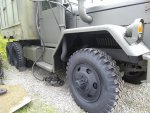
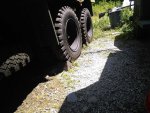
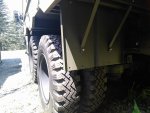
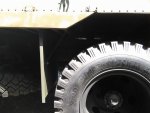
Lots of progress has been made in the last week and a half. I got 11 brand new 9r20 power king super traction hd tires will all new tubes for the truck. I wanted a more aggressive stock tire to keep the same power and torque but also have better traction. I broke all 11 tires down and sanded and primed and painted them and reassembled. Fuel tank came in and put brand new gaskets and fuel sending unit in the tank. Checked for leaks and no issues. Tank is squeaky clean. Painted the tank. The truck turns amazing with the 9r20 radials, just like my cargo does with g177 tires. Excited to get it finished up and take it for a spin.
 

Attachments

cattlerepairman

Well-known member
Steel Soldiers Supporter
3,256
3,354
113
Location
NORTH (Canada)
May I ask what your reasoning is for keeping the 9.00-20 tire size? I have had them on my truck originally, driven it long distance that way and I would never go back after changing to 11.00R20 size. The lower rpm alone are worth it for me.

Sent from my SM-G950W using Tapatalk
 

frank8003

In Memorial
In Memorial
6,426
4,985
113
Location
Ft. Lauderdale, Florida
Lots of progress has been made in the last week and a half. I got 11 brand new 9r20 power king super traction hd tires will all new tubes for the truck. I wanted a more aggressive stock tire to keep the same power and torque but also have better traction. I broke all 11 tires down and sanded and primed and painted them and reassembled. Fuel tank came in and put brand new gaskets and fuel sending unit in the tank. Checked for leaks and no issues. Tank is squeaky clean. Painted the tank. The truck turns amazing with the 9r20 radials, just like my cargo does with g177 tires. Excited to get it finished up and take it for a spin.
You the Busy |Beaver
Got to be a prize on here someplace for that effort that fruitful
 

muthkw25

Well-known member
Steel Soldiers Supporter
475
546
93
Location
Sayre, PA
May I ask what your reasoning is for keeping the 9.00-20 tire size? I have had them on my truck originally, driven it long distance that way and I would never go back after changing to 11.00R20 size. The lower rpm alone are worth it for me.

Sent from my SM-G950W using Tapatalk

I wanted to keep the original size because I will be towing a trailer with the build. Wanted the truck to have the same torque and power while towing up grades. The new tires are a heavier ply then the stock tires and have more aggressive look while still giving me a radial tread for longer tread life. I have 11r20s g177s on my cargo truck and also wanted a different look. Im not worried about top end speed.
 

muthkw25

Well-known member
Steel Soldiers Supporter
475
546
93
Location
Sayre, PA
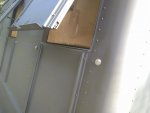
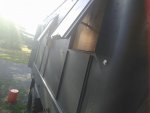
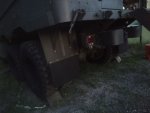
Well I got alot accomplished since last update. Got the whole outside box sanded and primed. Applied herculiner to the roof to seal the top and seams to prevent any water leaks. Painted the whole outside as well. Gotta get a couple more coats but it's starting to look like a truck. Dad helped wire up a civy flasher box that clinto made up, then wired up the trucklite led brakelights. Alternator was adjusted because it was overcharging slightly and just fine tuned it and is working great. Got the mudflaps installed and applied bedliner to them to protect them from the stones. Used all stainless steel hardware to mount up the mudflaps. Waiting for the new rubber mud flaps to come in. Painted up the reflector frames to match the truck. Just waiting to apply 2nd coat to the box before mounting them up. Lastly I removed one of the benches from inside the 109. Talk about heavy!
 

Attachments

muthkw25

Well-known member
Steel Soldiers Supporter
475
546
93
Location
Sayre, PA
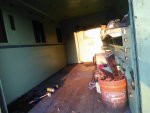
Since last update I managed to remove the benches inside the box. What a pita. But good news is I was able to get them out and start cleaning up the inside. I ended up removing the old screens and installed brand new ones with copper screen and new stainless hardware. Plan is to tape them up and save me time after painting since they will be installed. Started taping off the lights, data plates, etc. Removed the rear fan to prep for an inside air conditioner.

Plan is to refinish one of the filing cabinets to use and attach an inside air conditioner to the top of it.
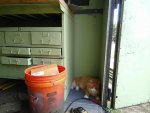
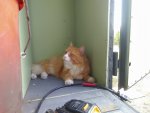
My cat decided to check out the box as well.

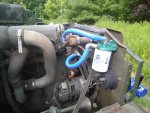
New rubber mudflaps came in for the truck. Also installed a coolant filter and water pump heater. It's a Katz model 11619 600w. Get on Amazon it's much cheaper. Filter base and filter is from Napa. Works great. Will be excited to see how well it works after.
 

Attachments

cattlerepairman

Well-known member
Steel Soldiers Supporter
3,256
3,354
113
Location
NORTH (Canada)
That's all nice and stuff, but the MAIN thing is that the CAT approved!

Seriously, this seems to be coming together nicely and looks sharp.

Sent from my SM-G950W using Tapatalk
 

muthkw25

Well-known member
Steel Soldiers Supporter
475
546
93
Location
Sayre, PA
That's all nice and stuff, but the MAIN thing is that the CAT approved!

Seriously, this seems to be coming together nicely and looks sharp.

Sent from my SM-G950W using Tapatalk
Thank you! It has been coming along great. Today I got the rest of the windows tapped of and dad and I finished the deadbolt on the box so someone can't lock me inside the box. Prepping the Walls and floor and getting ready to paint this weekend. Getting excited to see the final product!
 

archmark

Member
267
20
18
Location
Woodway, TX
Made some great progress in the last few days. Power cable is made and using the original large 2 prong 60amp cord for 110v. Installed all LEDs in interior lights as well as the 2-24volt lights with leds. Whole box inside is LEDs.

I also purchased a new air filter from power driven diesel "dust bowl" model. Filter flows better, is synthetic and truly reusable. Filter should have a much better cfm as well. It is a 5.5" inlet and 7" long. Sits perfectly and attaches great. If you cut the bowl out of the bottom of the filter housing you could get more air flow or get the 9" long filter, I chose to not cut out the bottom so it has support sitting inside.

Next I found out the box on the m109a3 might be a m185 box. Found the tag and thought it was interesting, I'm sure many vans had either or box.

I removed the pioneer tool kit. I have no need for it on the truck. If I use it, I'll put it on the shelter. This makes it much easier to access the spare tire and if I move the spare tire it will be needed for a generator box or storage box.

Removed old reflectors. Truck will get 8 brand new ones.

I then decided that I want to finish the inside cab before working on the rest of the truck. Didn't want to paint the outside and then get dirt and crap from the cab so I figured I'd start inside and go out. I taped off all the windows and windshields, I removed all data plates. I purchased new stainless steel hardware for the dataplates, got a new turn signal switch, shifter boot covers, and a new black shifter handle. I was told it was used on REO m35a2s. Not sure exactly if that's true but it looks cool and looking cools 90% of it.
The data plate in the cab will tell you if it's an M109 or M185. The other sure way to tell is by looking on the upper front passenger side of the box. If there
are two plugs for the shore power, then you have an M185 (the electronics repair version of the shop truck). If you have just one plug then you have an M109A3 (the general purpose repair version of the shop truck). Mine had been registered for years as an M109A3 but the data plate was almost illegible but the dual shore power plugs was the giveaway that what I had was really an M185A3. If yours is an M185A3 and your data plate is legible, sometime please make a scan of it & send it to me & when I get it reproduced I'll send you a free one...
 

muthkw25

Well-known member
Steel Soldiers Supporter
475
546
93
Location
Sayre, PA
The data plate in the cab will tell you if it's an M109 or M185. The other sure way to tell is by looking on the upper front passenger side of the box. If there
are two plugs for the shore power, then you have an M185 (the electronics repair version of the shop truck). If you have just one plug then you have an M109A3 (the general purpose repair version of the shop truck). Mine had been registered for years as an M109A3 but the data plate was almost illegible but the dual shore power plugs was the giveaway that what I had was really an M185A3. If yours is an M185A3 and your data plate is legible, sometime please make a scan of it & send it to me & when I get it reproduced I'll send you a free one...
Data plate shows it's a m109a3 but it has two outlets on the passenger side. And the data tag on the box above the pioneer tool kit says it's a m185 so they must have removed the old box and just put a m185a3 box on the truck, or tbe data plate could be wrong.
 

archmark

Member
267
20
18
Location
Woodway, TX
Data plate shows it's a m109a3 but it has two outlets on the passenger side. And the data tag on the box above the pioneer tool kit says it's a m185 so they must have removed the old box and just put a m185a3 box on the truck, or tbe data plate could be wrong.
You have yourself a true Unicorn!!
 

muthkw25

Well-known member
Steel Soldiers Supporter
475
546
93
Location
Sayre, PA
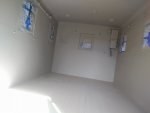
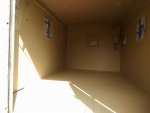
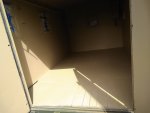
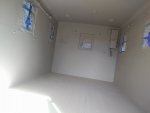
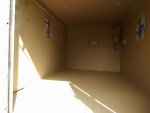
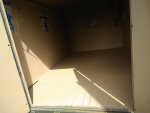
Since last update I was able to prep the inside for paint. And got the walls lightly sanded and the floor vacumed multiple times. Decided to paint the box with 686 card tan. Color really lightens up the inside. Floor is going in next.
 

Attachments

muthkw25

Well-known member
Steel Soldiers Supporter
475
546
93
Location
Sayre, PA
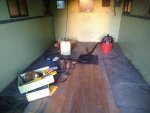
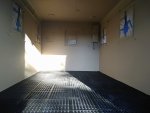
Got the floor installed recently and took the tape off the windows and all the controls inside the box. I bought 3/4" x 3'x3' rubber mats from tractor supply that connect together. These have holes so if water spills it can evaporate and not sit on the wood surface and cause any rot. They works great in my cargo truck so I gave it a shot. So far I like the look of the floor. Makes the box look larger. I got the table and chairs assembled. Other items for the inside are on the way. Did a 2nd coat on the box outside. Have one more coat to do and it should be solid.
 

Attachments

archmark

Member
267
20
18
Location
Woodway, TX
What's your thoughts on doing the floor in diamond plate and then having Rhinoliner applied? I really like the rubber mats. The inside really looks good now!!!
 

muthkw25

Well-known member
Steel Soldiers Supporter
475
546
93
Location
Sayre, PA
What's your thoughts on doing the floor in diamond plate and then having Rhinoliner applied? I really like the rubber mats. The inside really looks good now!!!
Thank you for the compliment!

You could do that but diamond plate would be expensive with the rhinoliner. But it could be doable. It might not be comfortable to walk on with bare feet. As long as the floor is sealed up nicely with paint and the Mats protect the wood, it should be ok. It would be up to you what you want.
 

archmark

Member
267
20
18
Location
Woodway, TX
Well I got alot accomplished since last update. Got the whole outside box sanded and primed. Applied herculiner to the roof to seal the top and seams to prevent any water leaks. Painted the whole outside as well. Gotta get a couple more coats but it's starting to look like a truck. Dad helped wire up a civy flasher box that clinto made up, then wired up the trucklite led brakelights. Alternator was adjusted because it was overcharging slightly and just fine tuned it and is working great. Got the mudflaps installed and applied bedliner to them to protect them from the stones. Used all stainless steel hardware to mount up the mudflaps. Waiting for the new rubber mud flaps to come in. Painted up the reflector frames to match the truck. Just waiting to apply 2nd coat to the box before mounting them up. Lastly I removed one of the benches from inside the 109. Talk about heavy!
Did you have the outside bead/soda blasted or just hand sanded? What primer did you use, with an airless?
 

archmark

Member
267
20
18
Location
Woodway, TX
Lots of progress has been made in the last week and a half. I got 11 brand new 9r20 power king super traction hd tires will all new tubes for the truck. I wanted a more aggressive stock tire to keep the same power and torque but also have better traction. I broke all 11 tires down and sanded and primed and painted them and reassembled. Fuel tank came in and put brand new gaskets and fuel sending unit in the tank. Checked for leaks and no issues. Tank is squeaky clean. Painted the tank. The truck turns amazing with the 9r20 radials, just like my cargo does with g177 tires. Excited to get it finished up and take it for a spin.
Where'd you buy the tires? Prices on Amazon are considerably higher than some of the online dealers that also offer free shipping...
 
Top
AdBlock Detected

We get it, advertisements are annoying!

Sure, ad-blocking software does a great job at blocking ads, but it also blocks useful features of our website like our supporting vendors. Their ads help keep Steel Soldiers going. Please consider disabling your ad blockers for the site. Thanks!

I've Disabled AdBlock
No Thanks