QUADJEEPER
Member
- 797
- 8
- 18
- Location
- Winter Springs, FL
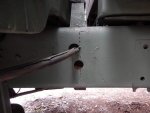
Sawsall. Fairly easy except when I came to a crossmember. :/The project looks great:
Sawzall? Circular saw?
Just being nosey, QUADJEEPER, but wondering how you made the cuts?
Steel Soldiers now has a few new forums, read more about it at: New Munitions Forums!


Sawsall. Fairly easy except when I came to a crossmember. :/The project looks great:
Sawzall? Circular saw?
Just being nosey, QUADJEEPER, but wondering how you made the cuts?
Ha ha ha ha!!! Not in a million years! Oh, I'm sure she is a keeper, don't get me wrong. But I'd never have the time if I was a slave, er, married. Thanks for the approval. Really electrical is easy, just think of a water hose. In one end, out the other. A hole is a leak, or a short. A kink is a stoppage, or an open circuit. Too much pressure, burst hose, melted wire. Too small of a hose, poor flow, not enough voltage for proper work. Easy. Just don't let the smoke out!I just finished reading the entire thread. Took me a few days, but I must say, you have done one heck of a job. The electrical work you have done is remarkable. It far exceeds my ability. I am also quite impressed by the speed that you have done it in. Then I got to the, I'm not married post. Now I don't feel so bad taking 3.5 years to do my build. I'll trade you, my wife, for a few hours of labor. I have a lot of electrical work that needs to be done on my camper. Let me know if your interested. I could fedex her to Florida this week.
That's one way to look at it:Ha ha ha ha!!! Not in a million years! Oh, I'm sure she is a keeper, don't get me wrong. But I'd never have the time if I was a slave, er, married. Thanks for the approval. Really electrical is easy, just think of a water hose. In one end, out the other. A hole is a leak, or a short. A kink is a stoppage, or an open circuit. Too much pressure, burst hose, melted wire. Too small of a hose, poor flow, not enough voltage for proper work. Easy. Just don't let the smoke out!
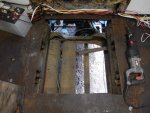
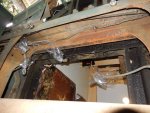
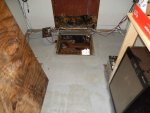
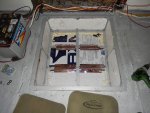
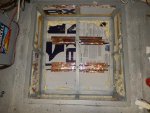
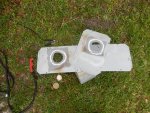
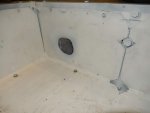
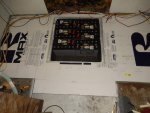
 Picked up a load of plywood and sheet foam for the floor. Then installed a crossbrace in the front edge of the box to help offset removing the 1st and 2nd braces for battery box clearance. I don't think it is going to go anywhere. Finished installing the fuel tank brackets and relocating the left box locator bracket. Just set the fuel tank in place to see how it fits and looks. Will be pulling it back out to relocate the filler and also to remove the toolbox so I can change out the master cylinder bracket.
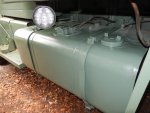
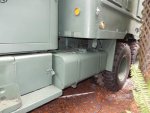

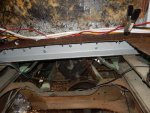
I will be cutting out the filler neck, cutting a new hole for it on the other end of the tank, and brazing it in. Will make a sheet metal filler panel for the old location.How will you modify the fuel tank?
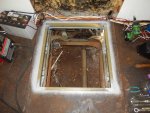
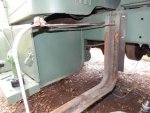
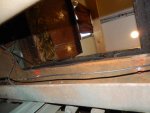
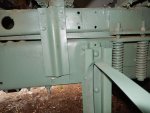
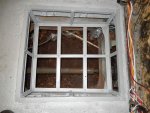
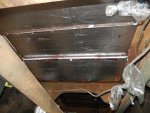
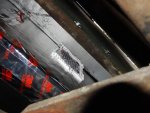
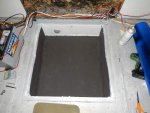
That looks really sharp:Another sluggish day, been fighting some health issues. Got a little boost from RAYZER today. He came by to liberate some parts, and then helped me ( he did it all ) replace my worn out passenger door latch. I did get the battery compartment frame started. Cut it out of bed frames and welded/bolted it in. Now I need to frame down to the floor of the compartment and get it lined.
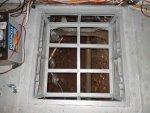
Thanks AA. It is bed frame steel, still in the green color that it was painted. Just looks like an odd shade due to the flash.That looks really sharp:
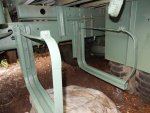
- Is that angle-iron brass?
- Or is it painted desert-tan?
Can't really tell which, but looks real great.
Reminds me of the joke about Tootie Greene:Thanks AA. It is bed frame steel, still in the green color that it was painted. Just looks like an odd shade due to the flash.
No, that puts the filler near the frame and under the cab, too far back to use, especially with a fuel can.Can you just flip the tank around or swap it end for end?
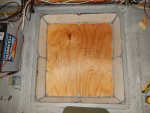
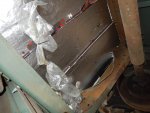
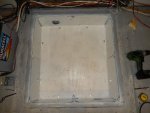
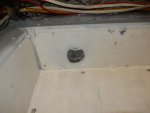
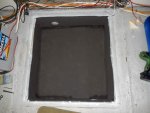
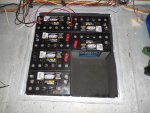
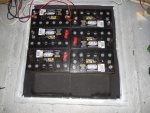
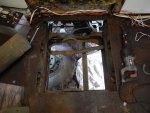
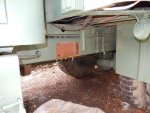
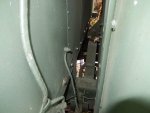
That looks really sharp QUADJEEPER.Well the battery compartment is pretty much done. Cut out the front and rear panels for the vents, added hardware cloth on the outside and screen inside to keep some of the critters out. Painted both sides of the plywood floor and bolted it down. Sealed it all the way around other than a drain point at the rear. Floor slopes down to the rear to help drain. Then I lined the box with a rubber mat type of material to somewhat cushion the batteries and give me a bit of insulation just in case I drop a hot cable down the side of a battery.
Yes, it is approx. 1/8" thick. It is for use under laminated wood floors. Ray ( RAYZER ) sourced it for me.That looks really sharp QUADJEEPER.
Is the liner 1/8"? And where did you get it?
We get it, advertisements are annoying!
Sure, ad-blocking software does a great job at blocking ads, but it also blocks useful features of our website like our supporting vendors. Their ads help keep Steel Soldiers going. Please consider disabling your ad blockers for the site. Thanks!