cucvrus
Well-known member
- 11,478
- 10,505
- 113
- Location
- Jonestown Pennsylvania
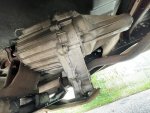
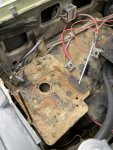
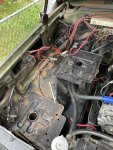
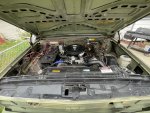
I would tighten all the adapter to transfer case bolts 9/16" hex head and top off the fluids in the transmission and the transfer case and go from there. Install the drive shafts before you do the fluid top off. The PS bracket can be welded and you can change the flex plate yourself. No need to remove the transmission. You need 4 - 3/8" 16 x 4" grade 8 bolts. Remove the transmission bolts the cross member to frame bolts and the transmission lines. Of course anything attached to the transmission. Slide the transmission back on the 4 bolts. 2 on each side of the transmission to engine. Sure wouldn't be worth $600. to me. Even if I spent 2 days doing it leisurely. The rear main seal is under the rule. If it ain't broke don't fix it same as the harmonic balancer. You can look and examine that balancer. But of course you can throw money at everything. That is up to you. I never replaced a harmonic balancer and I had them checked by old school mechanics. My machine shop mechanic showed me a 52 Chevy truck that is all original and said he could change everything but everything works so he just maintains it as it currently is. Good Luck. Do as you wish. I hope you stay positive. Owning a CUCV is an adventure all along the way. Have a Great Day.