• Steel Soldiers now has a few new forums, read more about it at: New Munitions Forums!

  • Microsoft MSN, Live, Hotmail, Outlook email users may not be receiving emails. We are working to resolve this issue. Please add support@steelsoldiers.com to your trusted contacts.

Was looking for a shop in or near Milwaukee to work on M1008; then did it all myself!

cucvrus

Well-known member
11,474
10,441
113
Location
Jonestown Pennsylvania
I would tighten all the adapter to transfer case bolts 9/16" hex head and top off the fluids in the transmission and the transfer case and go from there. Install the drive shafts before you do the fluid top off. The PS bracket can be welded and you can change the flex plate yourself. No need to remove the transmission. You need 4 - 3/8" 16 x 4" grade 8 bolts. Remove the transmission bolts the cross member to frame bolts and the transmission lines. Of course anything attached to the transmission. Slide the transmission back on the 4 bolts. 2 on each side of the transmission to engine. Sure wouldn't be worth $600. to me. Even if I spent 2 days doing it leisurely. The rear main seal is under the rule. If it ain't broke don't fix it same as the harmonic balancer. You can look and examine that balancer. But of course you can throw money at everything. That is up to you. I never replaced a harmonic balancer and I had them checked by old school mechanics. My machine shop mechanic showed me a 52 Chevy truck that is all original and said he could change everything but everything works so he just maintains it as it currently is. Good Luck. Do as you wish. I hope you stay positive. Owning a CUCV is an adventure all along the way. Have a Great Day.
 

retro_life

Well-known member
243
629
93
Location
Los Angeles, California
I would tighten all the adapter to transfer case bolts 9/16" hex head and top off the fluids in the transmission and the transfer case and go from there. Install the drive shafts before you do the fluid top off. The PS bracket can be welded and you can change the flex plate yourself. No need to remove the transmission. You need 4 - 3/8" 16 x 4" grade 8 bolts. Remove the transmission bolts the cross member to frame bolts and the transmission lines. Of course anything attached to the transmission. Slide the transmission back on the 4 bolts. 2 on each side of the transmission to engine. Sure wouldn't be worth $600. to me. Even if I spent 2 days doing it leisurely. The rear main seal is under the rule. If it ain't broke don't fix it same as the harmonic balancer. You can look and examine that balancer. But of course you can throw money at everything. That is up to you. I never replaced a harmonic balancer and I had them checked by old school mechanics. My machine shop mechanic showed me a 52 Chevy truck that is all original and said he could change everything but everything works so he just maintains it as it currently is. Good Luck. Do as you wish. I hope you stay positive. Owning a CUCV is an adventure all along the way. Have a Great Day.
Thank you, this is the type of answer I was hoping for. I degreased and sprayed the tranny area while there was a break in the rain. Tomorrow I will get under there and try to get a good luck at everything and take some photos. That does make sense that the bolts may have backed out on the adapter from the vibration… that would definitely be the best case scenario if I could tighten them down and seal the leak. The leak isn’t too bad. It’s just a few drops after I get done driving snd the oil has been slung around inside. Also when I pulled the rear drive shaft a good amount of oil was leaking from the yoke hole. So it didn’t lose a ton of oil.

The harmonic balancer seems to be fine, I was just thinking it would be good to change it, but from what you just said im thinking I’ll be ok leaving it be. I will snap some photos of it too.

I feel like a crazy SOB… but I also pulled the trigger on the GVOD. I called them and talked about it with them and they said they were 4 weeks out so I just ordered it…. I know I’m nuts but I really love the truck snd want to enjoy the cruise. I’m fully committed on this now.. too much money and time to turn back lol

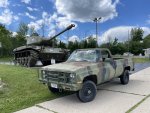
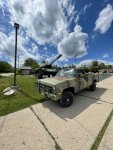
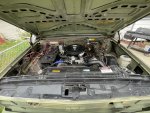
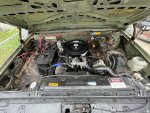
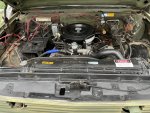
Here’s some pics I took out front of a VFW while I was on the way to get the new tires the other day.
 

Attachments

Rutjes

Well-known member
Steel Soldiers Supporter
359
272
63
Location
Amersfoort, The Netherlands
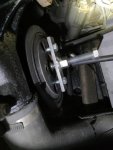
For the damper, I recently put Dayco on my K1500 6.5 and one on my friends M1008. I made my own puller and installer. Do you have a welding machine there? It's not too expensive and since you want to do it right, just change it. Get a new crank pulley to go with it, it has a large rubber part in it as well. You'll know for sure the damper isn't going to destroy your crank.

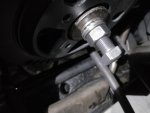
You'll need a long M16x1.5 bolt, I believe mine was 100mm long, I'd go a bit longer next time and 2 nuts. The thread is very important. This is fine thread, you do not want to use the wrong thread and strip the thread from the crank!. Use a fairly thick flat piece of steel and drill 3 holes. Center hole to fit the M16 bolt through and 2 10mm holes to attach it to the damper. Weld one of the M16 bolts on-top of the center hole (lock it in place with the bolt and remaining nut). You are now ready to pull the old damper off. Take the crank bolt out, remove the washer and put the crank bolt back in all the way. Mount the puller and start turning the M16 bolt until the balancer pops off. Remove the crank bolt. Btw, you might want to chamber the tip of the M16 bolt a bit.

For the installer, I re-used the M16 bolt. Get the balancer going by hand. Now put the nut on the M16 bolt all the way and slide the big washer on. Thread the installer bolt in as far is it will go. Now start turning the nut. You might want to put some lubricant between the bolt and washer to limit rotational force, we want it to push only. I used a bearing. My installer bolt did not bottom out in the crank so the further the damper was on the more I threaded it into to the crank just to make sure I didn't strip the crank thread. The further the damper goes, the tougher it will get. Just keep going till it bottoms out.

Keep these tools in your CUCV specific toolbox.

Oh, find a way to keep the engine from turning over when removing and torquing the crank nut. I used a long piece of angle iron and drilled 2 holes to mount it to the damper.

38ba30f7-53f5-4964-93ad-4aa3c4ccb623.jpg e709b164-dfe0-44ae-bc06-631d54a4bf21.jpg 6dbd14e3-c2ab-4a99-b100-a8437ebfe074.jpg
 
Last edited:

cucvrus

Well-known member
11,474
10,441
113
Location
Jonestown Pennsylvania
Thank you, this is the type of answer I was hoping for. I degreased and sprayed the tranny area while there was a break in the rain. Tomorrow I will get under there and try to get a good luck at everything and take some photos. That does make sense that the bolts may have backed out on the adapter from the vibration… that would definitely be the best case scenario if I could tighten them down and seal the leak. The leak isn’t too bad. It’s just a few drops after I get done driving snd the oil has been slung around inside. Also when I pulled the rear drive shaft a good amount of oil was leaking from the yoke hole. So it didn’t lose a ton of oil.

The harmonic balancer seems to be fine, I was just thinking it would be good to change it, but from what you just said im thinking I’ll be ok leaving it be. I will snap some photos of it too.

I feel like a crazy SOB… but I also pulled the trigger on the GVOD. I called them and talked about it with them and they said they were 4 weeks out so I just ordered it…. I know I’m nuts but I really love the truck snd want to enjoy the cruise. I’m fully committed on this now.. too much money and time to turn back lol

Here’s some pics I took out front of a VFW while I was on the way to get the new tires the other day.
Love the stock patina. Rare find. Keep after the rust and maintain that stock paint as long as possible. I have an M1009 I should have left untouched. But once I fixed the torn antenna holes it was game over for the stock paint. Nice truck. You are going in the right direction.
 

ezgn

Well-known member
650
1,039
93
Location
Lake Elsinore Ca.
Thank you, this is the type of answer I was hoping for. I degreased and sprayed the tranny area while there was a break in the rain. Tomorrow I will get under there and try to get a good luck at everything and take some photos. That does make sense that the bolts may have backed out on the adapter from the vibration… that would definitely be the best case scenario if I could tighten them down and seal the leak. The leak isn’t too bad. It’s just a few drops after I get done driving snd the oil has been slung around inside. Also when I pulled the rear drive shaft a good amount of oil was leaking from the yoke hole. So it didn’t lose a ton of oil.

The harmonic balancer seems to be fine, I was just thinking it would be good to change it, but from what you just said im thinking I’ll be ok leaving it be. I will snap some photos of it too.

I feel like a crazy SOB… but I also pulled the trigger on the GVOD. I called them and talked about it with them and they said they were 4 weeks out so I just ordered it…. I know I’m nuts but I really love the truck snd want to enjoy the cruise. I’m fully committed on this now.. too much money and time to turn back lol

Here’s some pics I took out front of a VFW while I was on the way to get the new tires the other day.
Change the harmonic balancer with a new G.M. balancer. My balancer seemed fine also. After I replaced it the new balancer smoothed out the entire engine. The engine ran and idled much better.
 

retro_life

Well-known member
243
629
93
Location
Los Angeles, California
Hoping you put a stop on the rear driveshaft repair as shaft will need shortened with OD unit! (Believe this to be true?)
Yes I know that but I have 4 weeks to wait for the GVOD so I’ll just get it cut down later or get another drive shaft made so I can still keep the stock one… I know that sounds wasteful but I wanna be able to drive her in the mean time. I also have another cucv back at home that could use a fresh drive shaft.
 
Last edited:

retro_life

Well-known member
243
629
93
Location
Los Angeles, California
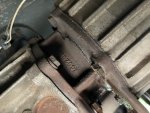
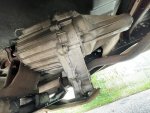
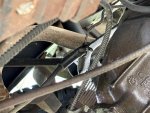
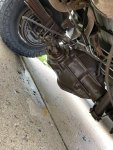
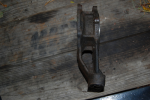
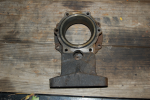
I found the crack and I think I got really lucky. The crack is on the adapter and the trans and transfer case look to be fine. I guess I’ll order a new adapter and some new mounts and replace them. Is there a source out there for new adapters or am I just going to have to grab a used one off eBay?
 

Attachments

Last edited:

M1009_SPAIN

Active member
73
161
33
Location
Spain
You are doing a great job, that cucv will be as fresh from the factory. I love jobs like this, I am immersed in one, which I could not be doing without the incredible help of CUCVRUS, what happens is that in my country there is almost nothing in stock of spare parts and I have to import them from USA with the shipping time what this entails,

the other day I bought two delphi chfp906 pumps because the one I have is broken and it takes almost a month to arrive.

And so with all the pieces ... it is a beautiful, long and sometimes desperate process because of the wait
 

retro_life

Well-known member
243
629
93
Location
Los Angeles, California
You are doing a great job, that cucv will be as fresh from the factory. I love jobs like this, I am immersed in one, which I could not be doing without the incredible help of CUCVRUS, what happens is that in my country there is almost nothing in stock of spare parts and I have to import them from USA with the shipping time what this entails,

the other day I bought two delphi chfp906 pumps because the one I have is broken and it takes almost a month to arrive.

And so with all the pieces ... it is a beautiful, long and sometimes desperate process because of the wait
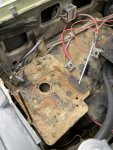
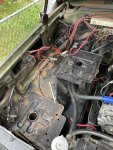
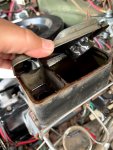
Thanks so much! I hate waiting for parts too, but in the mean time I try to get other little things fixed. Today I replaced a broken battery tray stud. I had to drill out the broken piece and then I cut down some threaded rod to the correct length and threaded it into the hole. I add a nut on the bottom to give it extra strength and prevent it from pulling out.

I’m going to paint the battery trays but they were really rusty and had flaky old paint all over them so I hit them with a wire brush. I made sure to cover the motor with a thick trash bag while doing this. The rain was starting so I had to stop at that, but tomorrow I will try to get them painted and also clean off all the dirty on my fender wells. This dirt is very stubborn to come off.
 

Attachments

cucvrus

Well-known member
11,474
10,441
113
Location
Jonestown Pennsylvania
Thanks so much! I hate waiting for parts too, but in the mean time I try to get other little things fixed. Today I replaced a broken battery tray stud. I had to drill out the broken piece and then I cut down some threaded rod to the correct length and threaded it into the hole. I add a nut on the bottom to give it extra strength and prevent it from pulling out.

I’m going to paint the battery trays but they were really rusty and had flaky old paint all over them so I hit them with a wire brush. I made sure to cover the motor with a thick trash bag while doing this. The rain was starting so I had to stop at that, but tomorrow I will try to get them painted and also clean off all the dirty on my fender wells. This dirt is very stubborn to come off.
I found the crack and I think I got really lucky. The crack is on the adapter and the trans and transfer case look to be fine. I guess I’ll order a new adapter and some new mounts and replace them. Is there a source out there for new adapters or am I just going to have to grab a used one off eBay?
Hey I have that adapter piece. I sort of figured something was cracked or broken. Didn't want to throw that out there but did want you to know parts are available. Still a relatively easy fix. No worries. Now that you found the crack lets get busy removing the adapter. It is scrap. Don't let anyone tell you to weld it. It will never be in perfect alignment again. Closely examine the rear section and flange area of the transmission. Use gum cutter and clean that area and examine closely from TH400 case cracks. Lifting with forklifts tends to break stuff. I will be away most of the day but will check back. You are doing great and the topside of this truck is in great condition. The hardest part now is getting the bolts from the flange to the transmission apart. Lets hope it isn't a major player in this job. That steel bolt into the aluminum can present an awesome challenge. Good Luck. Pull the transfer case drain the night before you want to pull the adapter. If you already have it out. Good for you.
 

retro_life

Well-known member
243
629
93
Location
Los Angeles, California
Hey I have that adapter piece. I sort of figured something was cracked or broken. Didn't want to throw that out there but did want you to know parts are available. Still a relatively easy fix. No worries. Now that you found the crack lets get busy removing the adapter. It is scrap. Don't let anyone tell you to weld it. It will never be in perfect alignment again. Closely examine the rear section and flange area of the transmission. Use gum cutter and clean that area and examine closely from TH400 case cracks. Lifting with forklifts tends to break stuff. I will be away most of the day but will check back. You are doing great and the topside of this truck is in great condition. The hardest part now is getting the bolts from the flange to the transmission apart. Lets hope it isn't a major player in this job. That steel bolt into the aluminum can present an awesome challenge. Good Luck. Pull the transfer case drain the night before you want to pull the adapter. If you already have it out. Good for you.
it’s raining pretty bad today so I won’t be able to get to it right now. But please send me a PM and let me know if you do have an extra adapter you can sell to me. Thanks a lot I appreciate it.
 

retro_life

Well-known member
243
629
93
Location
Los Angeles, California
New issue discovered.... So my brake pedal has always been pretty loose and spongy. You'd press it down all the way and then right at the end of travel of the pedal would it apply the brake and stop the vehicle. So I popped open the master cylinder and saw that the fluid level was really low on the front reservoir. I went out and bought a bottle of DOT 5 and topped it off. The pedal immediately began to firm up and the brake pedal was feeling great. But as I started pumping the pedal I could hear a wooshing air sound and the pedal softened up and became spongy again.

I started investigating around the front of the vehicle and couldn't see any leaks. I then looked at the rear and saw all that precious DOT 5 fluid leaking down on top of the rear diff and onto the ground... :mad:

So I guess the rear brake line is shot. Any tips on fixing this?

Thanks!
 

Attachments

cucvrus

Well-known member
11,474
10,441
113
Location
Jonestown Pennsylvania
All easy stuff. Do you have a double flaring tool. If not you need one. You need to located the line that is leaking. From afar I am guessing the 1/4" line that travels the length of the truck on the right frame rail. Disconnect it at the flare and union and replace that section with the Nickel copper 1/4" brake line. If you are lucky you can get a 6 ft piece and do it with 1 double flare or make it fit by forming it to fit neatly and secure. I have the adapter I know it for a fact. I will get it out and get some pictures. 1624759507789.png1624759556821.png
Is this the piece you need? Not my picture. I copied it in images. I have several of them.
 

cucvrus

Well-known member
11,474
10,441
113
Location
Jonestown Pennsylvania
After thinking about the leak and the crack. I gave thought to the fact that you said it was a slight leak and that would be correct for a crack like that. I also think that tells us that the transmission to transfer case seal is not leaking at this time. If it were it would be pushing oil out and leaking more. So if I were doing this job. I would remove the transfer case. And slide the transmission back and change the flex-plate. I would reinstall the transmission bolts and using a 2 x 10 wood support the transmission at the rear of the pan flange. Slight support is all that is needed. No need to push it thru the floor boards. I would remove the cross member and then remove the adapter. The bolts going to the transmission flange can be stubborn at times. That steel to aluminum thing is going on there. Others I removed with a slight tug. While there replace the transfer case mounts. 1624792837774.png
Retain the original bolts. I choose the Energy Suspension set because it can be installed easily and basically out last the truck. No spongy rubber from grease and oils. Good Luck and Report Back. I am really enjoying helping you and others out. It's a Simple Task. Reference my Little Red Riding Hood Thread. I hope you find some useful tips to help you along. M1009 Little Red Riding Hood. | Page 10 | SteelSoldiers
 

retro_life

Well-known member
243
629
93
Location
Los Angeles, California
All easy stuff. Do you have a double flaring tool. If not you need one. You need to located the line that is leaking. From afar I am guessing the 1/4" line that travels the length of the truck on the right frame rail. Disconnect it at the flare and union and replace that section with the Nickel copper 1/4" brake line. If you are lucky you can get a 6 ft piece and do it with 1 double flare or make it fit by forming it to fit neatly and secure. I have the adapter I know it for a fact. I will get it out and get some pictures. View attachment 837984View attachment 837985
Is this the piece you need? Not my picture. I copied it in images. I have several of them.
Yes this is the part I need to replace. Please send me a PM when you find one.

I will investigate the brake line issue in the mean time.

Also, if I just want the transmission mounts and not the combo kit with the motor mounts, is this what I'd need?

Thanks for your help!
 
Last edited:

cucvrus

Well-known member
11,474
10,441
113
Location
Jonestown Pennsylvania
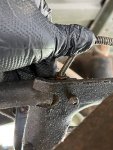
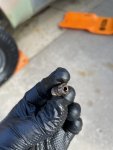
Looks like it’s just one of the hard brake lines going from the rubber hose block to the driver side rear wheel. I shook it and it broke right off.
Just pick up a section of 3/16" nickel copper brake line and form it to fit. You will need a double flaring tool when you cut the line. Very easy fix. I know you have it in you. Good Luck. I will get back to you on the adapter.
 

retro_life

Well-known member
243
629
93
Location
Los Angeles, California
Just pick up a section of 3/16" nickel copper brake line and form it to fit. You will need a double flaring tool when you cut the line. Very easy fix. I know you have it in you. Good Luck. I will get back to you on the adapter.
You mean to create a whole new brake line from that brake drum to the T-block?

Is there anyway I can just flare the line that’s on there and add a new fitting? I’ve never done this before so I have no idea.

Thanks so much

Update** ok I did some homework and I see what you’re talking about. I went ahead and ordered some 3/16 copper nickell line, fittings and a double flare tool. I also got some spring wrap for the brake line. Pretty cool that I will learn to make brake lines in a pinch!
 
Last edited:
Top
AdBlock Detected

We get it, advertisements are annoying!

Sure, ad-blocking software does a great job at blocking ads, but it also blocks useful features of our website like our supporting vendors. Their ads help keep Steel Soldiers going. Please consider disabling your ad blockers for the site. Thanks!

I've Disabled AdBlock
No Thanks