• Steel Soldiers now has a few new forums, read more about it at: New Munitions Forums!

  • Microsoft MSN, Live, Hotmail, Outlook email users may not be receiving emails. We are working to resolve this issue. Please add support@steelsoldiers.com to your trusted contacts.

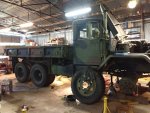
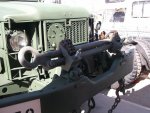
What did you do to your deuce this week?

MudMarine

Member
117
15
18
Location
Jacksonville NC
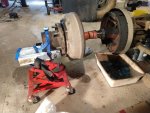
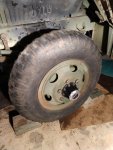
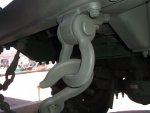
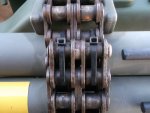
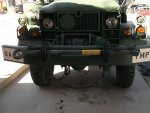
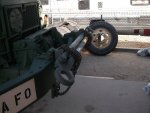
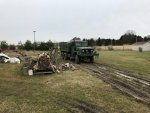
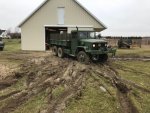
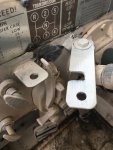
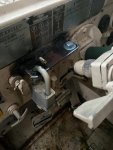
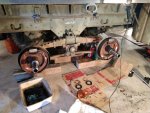
- Repacked front bearings
- Repacked passenger rear and intermediate axle wheel bearings
- Greased trunion bearings
-Upgraded the AVM hubs
-Replaced front brake lines
-Replaced passenger side airpack to fix our leak. (AirForce dual system truck)
- Oil and filters
- Fuel filters
- Air filter
- Trans oil
- T-case oil
- all 3 diff oil
- one wheel cylinder (so far)
- Replaced leaking air tank (previous patch still holding though!)
- Installed side pull drain valves
- Replaced lower radiator hose
- Replaced batteries with new military ones
- aaannnd I'm pretty sure I'm forgetting some more stuff while I sit here because I'm tired from working all week!

Still got plenty more to go!
IMG_20200309_134932610.jpgIMG_20200309_111545035.jpgIMG_20200308_214853506.jpgIMG_20200306_164854963.jpg
 

Tracer

Well-known member
Steel Soldiers Supporter
6,556
13,941
113
Location
Hawthorne, NV.
G'day everyone,.....


Would love to see more detailed pic's of how you have mounted your tow-bar.
DSCF2508.JPGDSCF2509.JPG


Aussie.
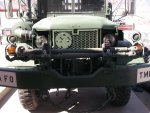
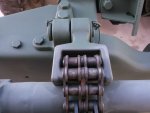
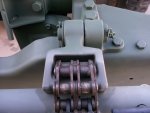
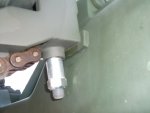
Aussie, I'll try and make this brief, if that's possible. I developed this Tow Bar mount because I have had major back and neck surgery. Carrying the tow bar in the bed of my truck made it nearly impossible to use, as I cannot lift the tow bar out, or return it to the truck bed. I noticed in a You Tube video taken at the War & Peace gathering in the UK, that several M35 trucks had their tow bars stowed on the winch with leather straps. Good idea I thought, but I wanted something more secure. So after staring for a couple hours at a pair of tow bar clamps I had purchased. I thought the tow bar clamps would fit the shackle pins on my truck, and they did. So as you can see they are the same width as the shackles with no modifications required to any parts. In Pic 3. I purchased some really hard 1/4 thick rubber and cut a couple of strips, and glued them to the truck to act as bumpers for the tow bar clamps so they wouldn't bang on the truck bumper. To secure the tow bar to the truck, I pre adjust the chains and install the tow bar in the chain loop one side at a time, then center the tow bar, then snug the chains down so the tow bar is tight. Then I use a couple of heavy duty tie wraps to secure the excess chain length to the axle clamps. To install the tow bar on the truck, all you do is loosen the chains, then drop the tow bar one side at a time, then attach the tow bar feet that I keep stored in the truck tool box, then remove the axle clamps and store them in the truck tool box, and then attach the tow bar to the truck one side at a time. It helps to pull the tow bar T-Handles when installing the tow bar. Then re-install the shackle pins and bobby pins, re-insert the T handles to the tow bar, and your good. If you want to keep shackles on the front of your truck, I recommend using as I have, M35A3 shackles as they mount on the bottom of the front bumper, this will give you a place to secure your winch chain. To use the M35A3 shackles you'll need to use longer 11" bolts thru the top shackle mounts thru to the bottom shackle mounts. Also this tow bar mounting allows you to easily rotate the tow bar up 180 degrees so you can still use the winch. see pics. This tow bar application will also work on trucks with out a winch. Last thing, no parts here have been injured to make this modification, all parts can be returned to their original intended function. I apologize for this not being brief, but I'm a little on in years so I have a tendency to ramble. The important thing is to explain this the best I can. I also have over 1600 miles on this modification with absolutely no problems. If you have any questions feel free to ask.
DSCF2501.JPGDSCF2502.JPGDSCF2503.JPGDSCF2504.JPGDSCF2505.JPGDSCF2506.JPGDSCF2507.JPG
 
Last edited:

Aussie Bloke

Well-known member
725
373
63
Location
Lost, out bush in OZ
G'day everyone,....


Tracer: absolutely BRILLIANT!

Don't worry about how long your post is, its more detailed that way, just the way I like it.

That's a Brilliant idea you had, I'm gonna have to copy it!

Thanks mate.


Aussie.
 

Merc1973

Active member
308
38
28
Location
Sykesville, MD
Replaced the belts. Generator belts were toasted. Not a job working on the deuce without a bloody knuckle... Very easy with the air compressor wrenches. Not sure how tight to make the belts. My laptop is down so cant see TMs
 

cattlerepairman

Well-known member
Steel Soldiers Supporter
3,256
3,355
113
Location
NORTH (Canada)
For air compressor belt, a trick:

Put belt on, spin pulley halves by hand as tight as possible without pinching belt (turn engine/pulley by hand). Then start engine and run for a few 5-10 seconds . Stop engine and check belt tension. If too loose, run engine again. Tighten lock bolts.

For alternator: loosen adjuster bolt, put belts on, use pry bar to push alternator outwards in bracket until belts are tight. Tighten bolt. Check belt tension. Depress belt in the middle with your thumb. 1/2 in deflection is good.

Sent from my SM-G950W using Tapatalk
 

HDN

Well-known member
2,112
5,088
113
Location
Finger Lakes Region, NY
I might downsize it myself. I don't think it's much good at 250. I haven't examined the system in great detail, but I'm not sure it can handle anywhere near 200 without breaking something.

It took me about an hour total to do because I had to work around some stiff hoses. I managed to reuse the existing compression fitting on the main copper pipe with a turn or two of teflon tape on the collar.
 

Maverick1701

Well-known member
1,433
181
63
Location
Lubbock, TX
I burned a holiday on my "friday" (weds) and spent the day enjoying a truck work day. I replaced all the fuel filters (I'm still recovering from an algae bloom in my fuel tank), flushed/bled the brake system, and gave it a quick rinse to clean off all the west texas dirt.

Everything went pretty smoothly. I found 2 brake bleeders that were completely clogged. A little blast of high pressure air and the obstruction was blown free. After I cleared out the clogs, my "soldier b" aka the wife had pedal duty while I open/closed the bleeders.

That little tire step I bought from northern tool a few years ago. I can reach everything in the engine bay (I'm 6.5ft tall) from the ground....but for longer jobs that involve reaching over the fender and way down inside the bay, it sure makes life easier on my back.
 

Attachments

Tracer

Well-known member
Steel Soldiers Supporter
6,556
13,941
113
Location
Hawthorne, NV.
Maverick, that step is a great idea. I'm 6' 2" and I'm usually on a step ladder trying to work under the hood. Not a real stable set up, especially when I'm trying to reach across the engine bay. I'm gonna google northern tool and see if they still have them in stock........thanks!
 

davidb56

Well-known member
1,020
1,237
113
Location
Bonners Ferry Idaho
Im worked on the "Apocalypse" snow plow mountIMG_0305.JPG today. its a fixed V and I want it to move straight up and down, like a grader has, instead of up and tilting like the store bought ones.
 

davidb56

Well-known member
1,020
1,237
113
Location
Bonners Ferry Idaho
the arms are 1x3 bar stock and are heavy. Thats why they are temporary wired like that, so it doesn't bonk me in the head while Im doing the 45 mounts to the frame by the spring perch.
 
Top
AdBlock Detected

We get it, advertisements are annoying!

Sure, ad-blocking software does a great job at blocking ads, but it also blocks useful features of our website like our supporting vendors. Their ads help keep Steel Soldiers going. Please consider disabling your ad blockers for the site. Thanks!

I've Disabled AdBlock
No Thanks