combatmech
Active member
- 1,213
- 5
- 38
- Location
- Carrollton, Texas
Installed the spare tire carrier from my first truck.
Steel Soldiers now has a few new forums, read more about it at: New Munitions Forums!

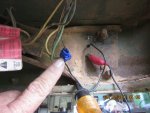
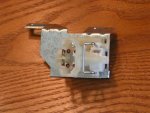
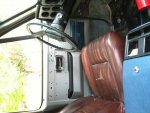
Long story short, while getting my 2nd column switch to replace the 1st "defective" one, I discovered that you have to remove the packing brace so that the switch will go all the way down and click. Column switch works fine now.My hi beams didn't work so I replaced the switch. No hi beams.... I unplugged the connection from the brand new installed switch and plugged it into a brand new foot switch. Hi beams!


replaced drivers door hinges. What a pain.... but we got it!!![[thumbzup]](https://www.steelsoldiers.com/images/smilies/icon_smile_thumzup.gif "Thumbs Up [thumbzup]")

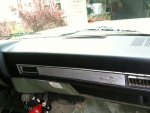
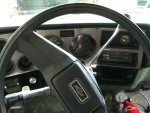
") Something else I won't have to replace. I also now know that the GEN1 and GEN2 lights don't exist on the M1010, and the idiot light next to the voltmeter is a "door ajar" light for the rear doors... though the bulb is burned out / socket melted, so I suspect it wasn't working right anyway. I'll probably mount a 12V voltmeter next to the 24V, and put a momentary SPDT there, so I can momentarily check the RV batteries, or it'll normally read the 12V value with the ignition on.
Something else I won't have to replace. I also now know that the GEN1 and GEN2 lights don't exist on the M1010, and the idiot light next to the voltmeter is a "door ajar" light for the rear doors... though the bulb is burned out / socket melted, so I suspect it wasn't working right anyway. I'll probably mount a 12V voltmeter next to the 24V, and put a momentary SPDT there, so I can momentarily check the RV batteries, or it'll normally read the 12V value with the ignition on.
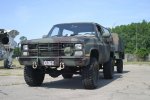
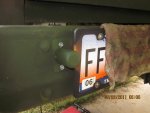
Nice looking truck.rattle can paint job, and installed a new GP card...Tim