robson1015
Active member
- 515
- 135
- 43
- Location
- New Concord, Ohio
Just wondering if the dash ever got painted ????
Steel Soldiers now has a few new forums, read more about it at: New Munitions Forums!


I'm not painting the dash. I decided that I would at least leave something original on my deuce project.Just wondering if the dash ever got painted ????
")
It almost seems that way; like it was divined by Providence or something.Your truck is perfect for rescuing people!! Great job!!

let me know if you want to sell it and get a 3 horn version. I want the big nathan bad for my m931 bobbed 5 tonWell, the size of my horn finally matches the size of my bobbed deuce! Maybe in good spirits I should shorten the horn to only 3 bells instead of 5?
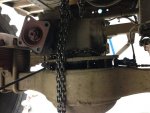
They warned me this horn setup would suck up some air. Boy does it! Just a few seconds takes 25 psi. I'm told the horn setup can use 70 scfm wide open, and my compressor only puts out 13.2 scfm. Of course I'm not going to use it for long bursts. I only want it for the occasional nut job that pulls out in front of a 13,000 lb military vehicle going 55 mph.
I can't find the size of the factory deuce air tanks. By using the outside diameter I came up with 20 gallons each. I'm thinking 30 gallons total. Anybody know for sure?
Comments:
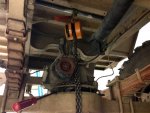
- Nathan Airchime K5LA train horn
- Air compressor governor is set for 125 psi (cut-in 105 psi)
- Horns are so well hidden nobody saw them at a car show today
- Mounted manual valve between deuce air ride seats
- Tested at 100 ft = 116.4 dB
- Tested at 3 ft = 149.4 dB
As always, more pics (and videos) can be found at my personal deuce website: http://www.hanksdeuce.com
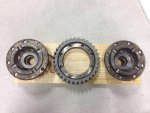
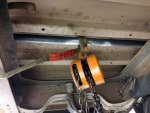
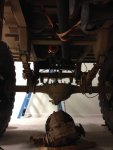
That's no just reward for all the real superb good you did during the flooding. It stinks for sure.Funny thing is I always get onto people for not getting out of the throttle while their truck is bouncing while under a strain while pulling. I don't remember my bobber bouncing that much, but it probably only takes a little bit of shock load from the larger (53") tires to cause catastrophic axle part failure from a stock axle setup. You could say I knew this was coming.
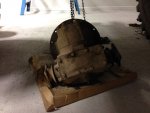
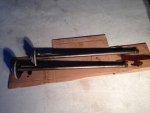
I doubt anybody wants my factory deuce axle shafts. I'll keep 'em for sentimental reasons. Show and tell.Can you get any trade-in for the old axles?
Ought to make a killer paper weight.I doubt anybody wants my factory deuce axle shafts. I'll keep 'em for sentimental reasons. Show and tell.


HanksDeuce is a Class Act, reflected both in his truck and what he does with it. He makes all of us here look good.Hank, I like your style and the way you get out and utilize your truck while having lots of fun doing it! I have in enjoyed reading your posts. Keep up the good work and great documentation.
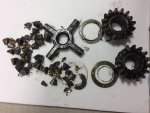
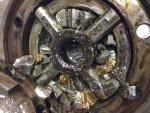
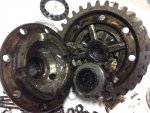
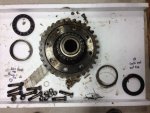
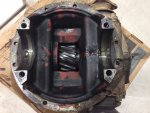
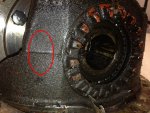
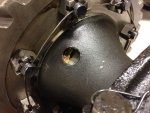

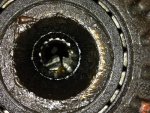
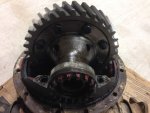
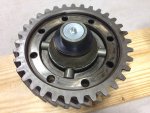
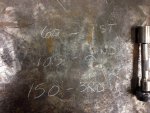
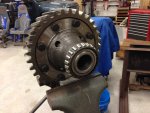
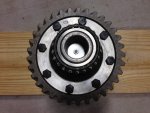
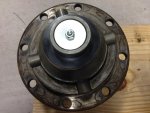
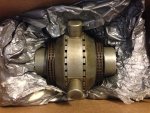
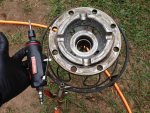
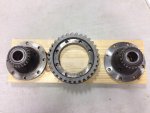
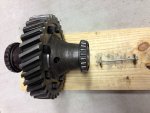
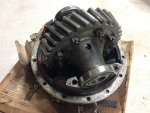
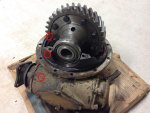
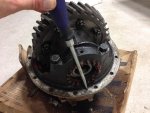
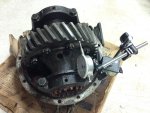
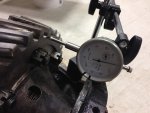
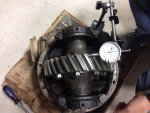
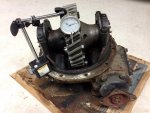
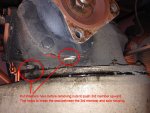
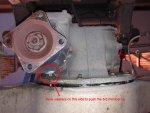
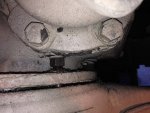
Okay, I finally got time away from work to tear apart the 3rd member of the rear axle. The pictures pretty much speak for themselves. Kaboom! I'm surprised the cross made it.