• Steel Soldiers now has a few new forums, read more about it at: New Munitions Forums!

  • Microsoft MSN, Live, Hotmail, Outlook email users may not be receiving emails. We are working to resolve this issue. Please add support@steelsoldiers.com to your trusted contacts.

New to me Deuce with matching trailer - wrenching post

banditt1979

Well-known member
273
738
93
Location
Cincinnati, OH
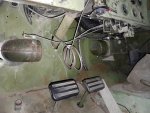
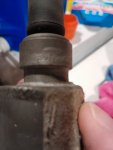
Ordered a new 60psi sending unit earlier this week and received it today. Pulled out the old one and lo & behold:
20220915_164957.jpg

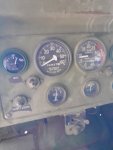
Sorry for the blurry picture but that is a 120psi sending unit! Had to remove it with a pair of channel locks, destroying it unfortunately. But now my oil pressure looks much better:
20220915_170638.jpg
Hold between 55-60psi at 1500rpm at around 140 degrees. Here it is at idle. I'm feeling a lot better about the condition of the bottom end now.

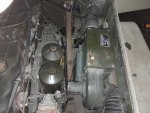
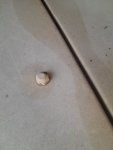
Also noticed this little guy on the hood.
20220915_191206.jpg

Looks like all I'll need for windshield washing is the pump handle and some hoses. Can't complain!
 

banditt1979

Well-known member
273
738
93
Location
Cincinnati, OH
Replaced my rubber fuel lines last night. The return line had visible cracks in the rubber and practically broke in half when I folded it. Also have a pair of IP oil lines in the queue. Hope to get those on sometime next week and also service the front bearings and boots. I'd like to get a couple shakedown runs in before winter and also install the heater.
 

banditt1979

Well-known member
273
738
93
Location
Cincinnati, OH
Finally started the front axle hub teardown/boot replacement/repack on Sunday. Got the passenger side broke down, most of it cleaned and installed the boot and knuckle. Should've gone with regular boots but I used zipper style. It went on ok but the manufacturer put a rivet on the zipper almost right on top of where the inside clamp goes. Checked it several times and it isn't coming off. Sorry no pic, it was getting dark and I was trying to get to a stopping point. Finished today with gobs of red n tacky. Maybe get the other side this weekend. Then no more excuses-shakedown run!
 

banditt1979

Well-known member
273
738
93
Location
Cincinnati, OH
Figured I'd link my dual circuit brake conversion here:


banditt1979

Well-known member
273
738
93
Location
Cincinnati, OH
It's been a while so I figured I'd post an update. Replaced my rebuilt mc with a new unit a few weeks ago, today I adjusted the last 2 passenger rear brakes and was able to grease everything. Got the heater box installed earlier this week and received a switch and resistor. Need to get air hoses for the box in the cab and mount it and the electronics. Then change oil in all axles, trans and transfer case. Maybe this year I'll actually get to drive it!
 

banditt1979

Well-known member
273
738
93
Location
Cincinnati, OH
20230228_193325.jpg
20230228_193349.jpg

This evening I installed the diverter box, defrost hoses and connected the controls. Need to find a 4" piece of duct to connect the diverter to the elbow. I have a piece that came with the truck but it is a little tired and rusty. Hope to snag a piece of angle from work and mount the switch. I've got a pair of Four Seasons valves on the way tomorrow. Maybe I'll get the heater project wrapped up this week!
 

banditt1979

Well-known member
273
738
93
Location
Cincinnati, OH
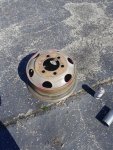
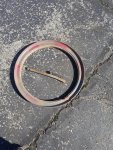
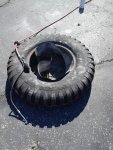
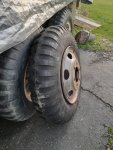
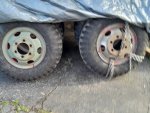
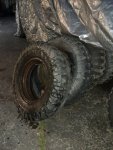
Today after a brief visit with the inlaws I was able to get a new tire, tube and flap mounted on the spare wheel that didn't have a tire mounted before. Then I finally was able to get the goodyear removed from another spare. Turns out when the tire was mounted, the ring must have caught some of the rubber under it which made it nearly impossible to remove. Eventually, persistence won and after quite a bit of cutting and prying I got it off. Gonna do a final cleaning tomorrow and mount another new tire so I will have 2 new tires on the front and 2 spares. All 8 of the rears are in very good shape with no cracks and hardly any wear.
20230304_120922.jpg

20230304_120931.jpg

20230304_120908.jpg
The new tires I bought had been sitting stacked on each other and the beads were almost touching each other so I used a piece of pipe to spread them out enough to get the tube and flap installed.

20230304_181910.jpg

There it sits with 5psi. Tomorrow I'll wrap a long chain around it, clamp on a chuck and pump it up out in the middle of my back yard where if it blows, no one or nothing will get hurt.

20230304_181921.jpg

Tomorrow's project. I already knocked down the rust with a flap wheel and hit it with rust reformer.

It was several months in the making to get that stubborn tire off, today was a victory!
 

banditt1979

Well-known member
273
738
93
Location
Cincinnati, OH
This afternoon I was able to get the other wheel assembled and both wheels pressurized to 35psi with no explosions! I'll call it another victory and maybe tomorrow I'll get them installed on the front. In unrelated news, the 1970 1/2 Firebird got a new set of shoes today as well. It was a good day at the compound. Hope to finish up the heater installation this week.
 

banditt1979

Well-known member
273
738
93
Location
Cincinnati, OH
Are you securing your wheels with a cage or heavy chains when inflating the tires on the rims after mounting? I'd prefer a cage but I used chains when I did mine.
The first wheel I wrapped a chain around 3 of the wheel openings 3 times and bolted the ends, mostly because the first wheel I assembled didn't already have a tire on it and I wasn't sure if the ring would seat correctly. The second one I did not wrap up but the family were inside, the wheels were about 50ft away and I was in my garage. The second one had a tire mounted previously so I wasn't too worried about it.
 

banditt1979

Well-known member
273
738
93
Location
Cincinnati, OH
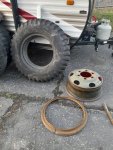
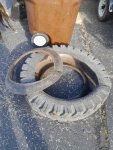
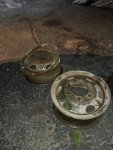
The duck bill hammer made all the difference. Got the other 2 extra tires removed today, took about an hour total including getting some tools out, getting more tools out, getting the rings off, putting tools away, washing my hands and coming inside.
20230309_190349.jpg
20230309_190331.jpg

Now that those are off and I have 2 new tubes waiting, I'll go ahead and mount 2 more new tires on these wheels and have 4 total good spares ready to go.
 

banditt1979

Well-known member
273
738
93
Location
Cincinnati, OH
Got some time today to change the axle oil in all 3 axles. Front axle oil came out nice and clean, the rears both started out black then clean again. Weird. Both rears dumped oil out of the full plug and seemed to have some pressure build up. Tomorrow I will pull all the axle vents to make sure they aren't blocked. Thankful for the warm weather here in Green Township Ohio!
 

cattlerepairman

Well-known member
Steel Soldiers Supporter
3,263
3,387
113
Location
NORTH (Canada)
Got some time today to change the axle oil in all 3 axles. Front axle oil came out nice and clean, the rears both started out black then clean again. Weird. Both rears dumped oil out of the full plug and seemed to have some pressure build up. Tomorrow I will pull all the axle vents to make sure they aren't blocked. Thankful for the warm weather here in Green Township Ohio!
The rubber in the axle vents can become sticky as it ages and the vents won't vent so good anymore. You can use a 1/8 NPT hose barb instead and run a hose up to the frame with a cheapo in line fuel filter at the end to keep water out and let it vent freely. Just a thought. Pressure buildup in the axle housings is bad news because it can really make the axle seals leak. Frustrating when you just re-did them and they oil again.
 

cattlerepairman

Well-known member
Steel Soldiers Supporter
3,263
3,387
113
Location
NORTH (Canada)
Is there a better way to clear the vent tubes besides trying to blow them out with compressed air?
The little mushrooms? They have a crimped-on cap that you can carefully un-crimp with a small screwdriver. Inside is a - booooiinnnggg, there it went, never to be seen again - small spring and a rubber disc. The stuff is clean-able; I would likely use something non-sticky rubber friendly. I just use soapy water.
You can re-crimp with the screwdriver. As long as the cap moves and does not pop off you are good.
 
Top
AdBlock Detected

We get it, advertisements are annoying!

Sure, ad-blocking software does a great job at blocking ads, but it also blocks useful features of our website like our supporting vendors. Their ads help keep Steel Soldiers going. Please consider disabling your ad blockers for the site. Thanks!

I've Disabled AdBlock
No Thanks