• Steel Soldiers now has a few new forums, read more about it at: New Munitions Forums!

  • Microsoft MSN, Live, Hotmail, Outlook email users may not be receiving emails. We are working to resolve this issue. Please add support@steelsoldiers.com to your trusted contacts.


Successful Deuce Recovery

silverstate55

Unemployable
Steel Soldiers Supporter
2,068
855
113
Location
UT
Started working on mounting up the front wheels & tires...the fronts are 395/85R20 Michelin XZLs with the Kevlar run-flat inserts. The tar-like crap inside of these tires is a real pain to clean out, but at least all the dirt & debris inside the tire sticks to the tar. I cleaned out as much as I could.

With the run-flat inserts, it is easier to lay the tire down on its side, and then line up the inner wheel half (so that the valve stem fits into the run-flat inner groove) so that I can insert the wheel half into the tire. It went in about 3/4 of the way, so I flipped the tire/wheel over and propped the wood blocks under the wheel in order to try to seat the inner tire bead on the inner wheel half. It made it far enough down that I could just fit the outer wheel half over the studs & get the lock nuts on.

I slowly cinched down 8 of the lock nuts to work the tire & run-flat insert down onto the inner wheel half until they were all seated, then installed the remaining 12 lock nuts & torqued them all. Installed a new valve core & inflated to 45 psi, then installed it on the right front.

Had a problem with one of the rear XML tires; it went flat and as I was trying to air it back up, I got a blast of air in the face...found a hole in the tread, so I had to demount it and took it to the truck tire shop. They found a "C"-shaped cut in the tread that the military tried to fix with plugs and a patch, but obviously the fix didn't work. So now it has to go out for a section repair, it should be back in 2 weeks. I might just run one of my XL spares in its place if I need to, but I'm sure I'll have the tire back before I'm ready to head to the DMV.

This has become the hardest part of this whole project! What an incredible amount of work...and I hope I don't have to do this ever again!! At least in the future when I have to change tires, it should be pretty straighforward as I've taken the time now to remove the rust & crust and restore everything properly.
 

Attachments

silverstate55

Unemployable
Steel Soldiers Supporter
2,068
855
113
Location
UT
I still have them, put off to the side out of the sun...a couple were starting to develop cracks since they are so old, but I suppose as long as the tubes hold air they are OK for short trips. I have another parts truck or two to pick up from a friend's ranch, I might use them for those trucks when I need to move them soon. If I had a full set of 10, I'd be tempted to keep them and run duals in the rear...but there's only 6, don't even have a spare.
 

silverstate55

Unemployable
Steel Soldiers Supporter
2,068
855
113
Location
UT
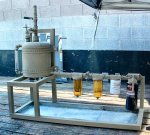
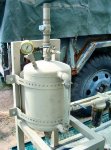
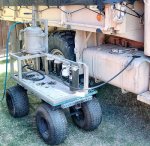
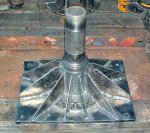
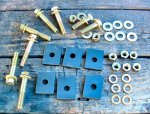
I wanted to start working on a small tailgate crane for the back of my Deuce to lift & lower spare tires and whatnot, but I can't access the rear of the truck....time to start cleaning house!

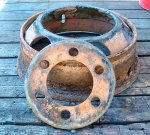
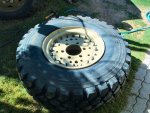
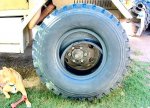
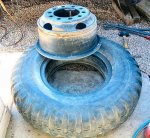
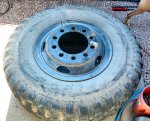
Right after I picked up this Deuce at the end of last year, I picked up 30 used wheels & tires from a SoCal vendor (20 Deuce wheels with 9.00 tires, and 10 5-ton wheels with 11.00 tires); all 30 of these were stacked up behind my Deuce, so it was time to do something with these in order to free up some room to work around. I started by demounting the 9.00 tires from the Deuce rims; the first ones were all rusted & crusty, and VERY difficult to demount. BUT, I got them done!

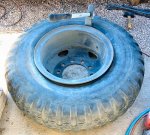
Then I demounted the 11.00 tires/tubes/flaps in order to remount them on the Deuce wheels; the 9.00 tires are all wasted and cracking/separating, so they will be disposed of soon. The 11.00 tires were specifically picked for their usability, so it's just a matter of removing the 5-ton wheels from them and reinstalling the tires/tubes/flaps on cleaned up Deuce wheels.

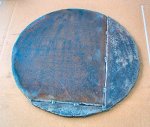
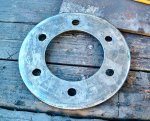
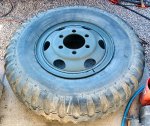
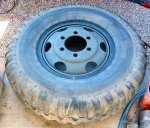
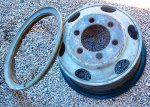
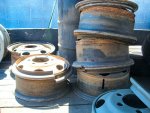
Almost every one of the Deuce wheels is heavily rusted, so I have been taking the time with my needle scaler & grinder with wire wheels to them to remove the rust, and seal them with Rust Reformer before re-use. I've varied the colors to tan, OD, flat brown, and flat black (Rustoleum Camoflage series, good stuff!), but it's only on the outer face of the wheels I've been painting & refinishing....someday I'll get the time to do something with the inner part of the wheels, but I have a feeling that they would have long been disposed of before I ever get that sort of time. Oh well.

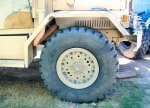
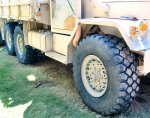
For the meantime, they make good spares for my 2 parts trucks I need to recover from the ranch they are stored on.

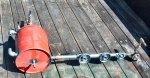
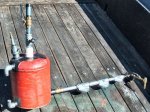
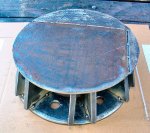
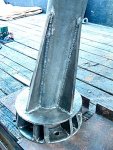
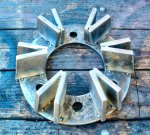
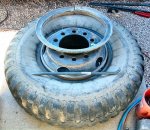
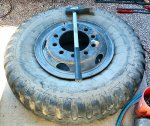
Breaking down these tires/wheels aren't difficult, and the lock rings on the Deuce wheels and the 5-ton wheels is exactly the same as far as I've been able to discover. It looks to me like the outer shell is the same for both, but only the centers are different (they measure out exactly the same). Anyway, I start by removing the valve core & letting the air completely out, then break out the duckbill sledge hammer and use it to break the bead away from the lock ring (LOTS of work for rusty wheels). Once that's done, I use my Ken-Tool Lock Ring Removal Tool to remove the lock ring, then flip it over to break loose the inside bead with the duckbill hammer.

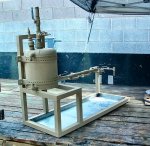
I remove the wheel from the tire/tube/flap (be careful with the valve stem!!). I clean up as much of the tire bead and flap as I can, then use dish soap and a brush to lubricate the tire bead, flap, and the wheel...afterwards I place the wheel in the tire and carefully reinsert the valve stem. Flip the tire/wheel combo over, and then reinstall the lock ring; I start with one end, hold it down with my knee, while I use my 4-lb drilling hammer to walk the lock ring into position all the way around. I give it a few taps all the way around to ensure that it's seated, then place the wheel/tire combo under my trailer and put a locking air chuck on the valve stem to seat the bead & inflate the tire. That way, if the lock ring lets go, it will simply make contact with the steel frame of the underside of my trailer. So far, so good...I've demounted 15 Deuce tires/wheels and 5 5-ton wheels/tires, and remounted 5 of the 11.00 tires on cleaned up Deuce rims. Only 10 more to go!
 

Attachments

silverstate55

Unemployable
Steel Soldiers Supporter
2,068
855
113
Location
UT
Making progress cleaning up, soon I'll have plenty of room to work in so I can put the finishing touches on this beast, and then head to the DMV.

Cut up the old broken axle today; I cut off both spindles and am keeping everything from the brakes out. Everything inside got loaded up for a scrap run. There were so many little pieces and shards throughout all of the internal parts, I decided to scrap all of them as I didn't want to take any chances. So the pumpkin & entire third member, as well as differential pieces, went into the scrap pile. I've loaded up my Deuce with scrap metal, so that after the DMV I can go straight to the scrappers and recover part of my registration fees.
 

Attachments

Dukeman

Member
188
0
18
Location
Albuquerque, NM
It is amazing what you have accomplished in the last 8-9 months. So impressed! Thanks for all your documentation and pictures. I know that even takes more of your time, but it is really helpful.
 

silverstate55

Unemployable
Steel Soldiers Supporter
2,068
855
113
Location
UT
It is amazing what you have accomplished in the last 8-9 months. So impressed! Thanks for all your documentation and pictures. I know that even takes more of your time, but it is really helpful.
Thank YOU for following along & for taking the time to post such kind comments; it makes it worth it!

I have some neat mods coming up in the next few months, hopefully they'll be of use to others. I'm almost done with my Big Cleanup, and will start this week on fabricating a tailgate crane for my spare tires (I want to add a second fuel tank where the spare holder is now).

Thanks!
 
Funny you should mention that Silverstate55, I've been tossing around the idea of a hinged rack to go behind the tailgate on the bobber broject with M105 bed and on that rack, I'd setup the original spare carrier/winch on a pivot that will rotate the secured tire tight against the rack and pin upright, as many fuel cans as I can stack on either side of the spare, and a flat rack above the spare with room for a large food storage cooler well out of reach of wild animals and a large watercooler. I was inspired by the example mounted to the Jeep in the movie "Vampires" with James Woods, and I'm thinking basically a "bobbed deuce-sized version of the same carrier rack, hinged to swing around the right side of the truck.
:driver:
 

silverstate55

Unemployable
Steel Soldiers Supporter
2,068
855
113
Location
UT
Sounds like a great plan, I'd like to see it underway & when completed. Of course the primary limiting factor for fabricating Deuce spare tire carriers is the weight of the tire/wheel; even the stock 9.00x20 tire on its steel wheel is more than I can lift....I see you include a winch in your tire carrier idea, that is a must! I'd love to fab up a swing-away spare tire carrier for my Dodge pickup, but it will probably require a small ATV winch to raise/lower the tire/wheel; those 35-inch Nitto tires are heavy!

I also plan on adding a locking tool box to the front of the cargo bed to hold personal items that won't fit in the cab while on trips, as well as a horizontal 55-gallon drum for extra fuel oil. Yes, it takes away bed space, but there's not much of any other options for what I want to use the truck for.

I'm in the process of obtaining a Special Fuel User license from the Motor Carrier Division of our NV DMV; since my truck won't be used for commercial purposes nor is it over 26K pounds, I don't need a bond and just have to pay $0.27/gallon of Special Fuel used at the end of each month. Once my Deuce is registered (got some title issues to straighten out with the DMV), I'll schedule my Class B test...eventually will be upgraded to Class A once my trailer is upgraded with a few things.

In the next few months I'll have some neat fabrications to discuss here. Meanwhile, this week I gotta get started on my new mobile UMO/WMO filtration setup as well as the tailgate spare tire crane.

Looking forward to your build thread for your bobber, especially for the spare tire carrier....I tend to be a very linear thinker, so I have to look to other folks' builds & ideas to make sure I consider alternatives.
 

silverstate55

Unemployable
Steel Soldiers Supporter
2,068
855
113
Location
UT
My daily driver has been giving me fits lately, and my Dodge has developed the dreaded "Death Wobble" at only 140K miles, so I haven't been able to spend as much time as I would have preferred lately to working on my Deuce.

I have been working on fabricating a filtration system for UMO/WMO for use in my truck. I started with a 5-gallon oil collection cansiter, the type that has wheels on the bottom & a long adjustable fill neck with a funnel for collecting oil from vehicles on a rack. However, this turned out to be a terrible mistake (explanation later). I used low-low power on my wire-feed welder to weld in fittings, and I tried to use the existing threaded holes at the top of the canister.

The first filter housing has a 40-micron stainless steel mesh filter (washable) to catch large particles & debris, the second filter is a water blocker, the third one is a 10-micron fuel filter, and the last one is a 2-micron ultra-fine filter. I used a lot of shut-off valving to provide plenty of isolation while filtering under air pressure. I fabbed the frame from some scrap steel square tubing I had lying around, and most of the work involved removing the paint & heavy rust from the steel tubing. I wanted it to fit onto an ATV flatbed cart I have, so I can wheel it around between oil storage drums and my Deuce fuel tank.

I used galvanized sheet steel to make a pan liner for the bottom, which I filled with kitty litter to contain any spills/drops.

When I did try the first test run, the choice of the thin-steel non-sealed oil collection canister proved to be a bad choice...I put a little oil in the canister, and small leaks were instantly noted. Air pressure was required to push the oil through the filters, and when I pressurized the canister to 15psi, not only did leaks abound through every weld joint, but the canister itself bulged out and nearly popped! At such low pressure!

Back to the drawing board....
 

Attachments

silverstate55

Unemployable
Steel Soldiers Supporter
2,068
855
113
Location
UT
I found I had a 4-gallon portable compressed air tank lying around, so I decided to use it as my collection canister, as the heavier-gauge walls would handle the higher air pressure just fine and would be easier to weld the steel piping into. I salvaged everything from the original oil collection canister and was actually able to make a better setup with fewer parts. I also added in a "T" fitting for the original air tank pressure gauge.

I tested it with simple compressed air when it was all done in order to check for leaks, and there were none! That's a good start! I added a few gallons of oil and applied 40psi of pressure, which did a great job of pushing the oil all through the filters. The clear tubing I'm using as a level gauge swells slightly but holds just fine up to 40 psi; when I pressurized it up to 90psi, it bulged quite a bit & I could hear air hissing out underneath the hose clamps. So I keep it limited to 40psi, which gives an output flow of several gallons per hour....not too fast but not too slow either, I'm happy with it.

Now I'm looking at an 11-gallon portable air tank I have in my garage, thinking that I could use it for a Deuce-mounted filtration system.... :mrgreen: :mrgreen: :mrgreen: :mrgreen: :mrgreen:
 

Attachments

silverstate55

Unemployable
Steel Soldiers Supporter
2,068
855
113
Location
UT
I've been working tirelessly on building a small crane to be mounted at the end of the bed, in order to lift spare tires and full WMO/UMO barrels. I have tried to fabricate this crane from scrap metal and parts on hand, but I've had to break down and buy a few things like pulleys, etc...

I started with one of the 2 spindles and hubs I removed from the demolished Deuce rear axle I swapped out several months ago; I removed the spindle from the brakes backing plate by grinding off the rivets holding them together. The hub had already been flipped for single rears, and I left it that way for simplicity's sake. I had an old wheel with a tire still mounted to it that was far older than I am, and the bolt pattern was the same as the Deuce's; I had brought this back from cleaning up my Grandfather's farm last year, in the hopes of putting it to use as a crane base...once I removed the prehistoric tire, I torched out the center and scrapped the rest. The center as cleaned up from heavy rust and old paint, then I welded the lug holes into much smaller diameters; I redrilled them to 3/4" and used a rat-tail file to enlarge them slightly in order to fit onto the Deuce hub. I had some smaller nuts with nylon lock washers that fit onto the Deuce studs, so I wanted smaller holes for a better fit.

I wanted to be able to break the crane down into subassemblies in case I needed to remove it for whatever reason, and I didn't want to kill myself in the process. So I wanted a crane base that would bolt onto the hub, which is what I used the wheel center for. I had a piece of 1/2" x 3" flat stock steel I used to cut into the angled (15-degrees) spacers to clear the hub flange cap; once they were tack-welded into place I made sure that the tops were flat and prepared to cut a circular top from some 1/2-inch rusty steel plate I had also recovered from my Grandfather's farm earlier. BUT, I didn't have a bid enough piece to cut for the circular top, so I had to do it in 3 pieces and then weld them together (as you can see in the photos below).

Once that was torched out of the 1/2-inch steel plate and the pieces welded together, I welded all the pieces together to form the crane base. I also trimmed up the spacers and cleaned everything up. I had a couple pieces of 5-inch galvanized steel pipe I found on my Grandfather's farm, and used one of these for the crane body. I stripped off as much of the galvanizing compound as I could, and wore a respirator while welding to it to avoid any of the fumes generated while welding. I used the remains of the 1/2" x 3" flat stock steel to form triangular reinforcements and welded these fully in place. I had enough 1/2" steel plate left to cut a circular top, which was later fully welded into place. The hinges/pivots for the crane arm will be located on this circular top.

Then it was off to finish the spindle base, and work on getting it mounted before I get distracted any further.
 

Attachments

silverstate55

Unemployable
Steel Soldiers Supporter
2,068
855
113
Location
UT
Once the spindles were removed from the brake backing plates by grinding off the rivets, I had to flatten the backs in order for them to lie flat. I torched off as much of the old axle housing as I could, and them used my grinder to remove the rest of the material. I cut a waffle pattern to make final removal easier, and ensured that this spindle would lie flat on the mounting plate I wanted to use.

I had found a nice rectangular 1/2" steel plate lying around my Grandfather's farm while clearing it last year, and I thought that it would be a perfect base for my Deuce tailgate crane. I ground off the thick rust as best I could, then drilled 12 holes for the studs I removed out of the old axle housing; I welded the bases of these studs into the holes drilled in the 1/2" steel plate, so I could bolt the spindle to this base. It looked good, but when I did a mockup with all the parts I had made so far, the spindle looked very wobbly and potentially susceptible to breakage. So, I warmed up the spindle & plate to warm red color with my torch, then used nickel welding rod to weld the spindle to the base.

I then used scrap pieces of steel plate (3/8" & 1/2") I had on hand to form triangular reinforcements, 12 total, to reinforce the spindle base. Once again I heated the entire assembly each time I finished a brace, in order to use the nickel welding rod to secure it into place and prevent overheating/warpage. It seems to have worked, and I just finished cleaning up the base unit.

Tomorrow I'll mark holes to drill through the Deuce bed, and start fabricating reinforcement to mount underneath the bed to prevent the crane from ripping out of the bed or toppling over.

WHEW! A lot of work, but will be worth it when finished.
 

Attachments

silverstate55

Unemployable
Steel Soldiers Supporter
2,068
855
113
Location
UT
Got the reinforcements welded in place underneath the cargo bed. I used some leftover 4-inch steel C-channel that I recovered from my Grandfather's old farm, so of course it was extremely rusty. I ground all the rust off and notched the 4 pieces to fit underneath the cargo bed. I removed the tail light and the left rear fender assembly to have room to work in. I also disconnected the batteries since I would be welding directly to the cargo bed.

I had to use my oxy-acetylene torch to cut a notch in the support piece for the C-channel to pass through. Then I pulled out the Harbor Freight 20-ton hydraulic kit to press the C-channel reinforcements flat against the bottom of the bed floor. I tack-welded them into place, then spent all day welding them into place. Considering that I was getting hot sparks raining down on me the whole time & that overhead welding is very difficult anyway, I think these came out pretty darn good.

I even placed a C-channel reinforcement ahead of the area I'm mounting the crane to, as added reinforcement. I completely welded the cross-ways bed frame supports to the bed floor all around the reinforcements to solidify things. I made sure to make short passes in different areas, to minimize distortion from overheating; then I waited for everything to cool down before I started again. That's why it took me literally all day to complete.

So now the spindle base is ready to be bolted in, and the hub set on it, greased, and sealed with the new flange I bought. More to come.
 

Attachments

silverstate55

Unemployable
Steel Soldiers Supporter
2,068
855
113
Location
UT
Got the spindle base for my tailgate crane bolted in today. I used 1/2-inch Grade 8 bolts, and I made some spacers out of 1/2-inch thick flat stock to help spread the clamping force underneath the C-channel bed reinforcement. I re-used the wheel seals, as they were both in excellent shape & I wasn't worried about axle oil leaking into the bearings. I packed the entire hub full of mil-spec wheel grease and installed a new axle flange on top.

I set the crane base on the spindle/hub unit to get an idea of how long of a boom I'll need to start fabricating tomorrow...I have a new 8-ton engine lift hydraulic cylinder I'll use to lift the boom, and a 3500-pound ATV winch (12-volt) I'll install on the end for small lifts.

ETA: I've added a photo of the completed underside reinforcements; I had to notch the splashguard in 2 spots to get it to fit around the C-channel. I cleaned everything before sealing with Rust Reformer, then a good application of Undercoating.
 

Attachments

Last edited:

islandguydon

Well-known member
Steel Soldiers Supporter
3,724
782
113
Location
Michigan
I agree with MidnightDuramax.

The fab work is excellent. I like your WMO filtration set up...[thumbzup][thumbzup]

Subscribed...!
 

silverstate55

Unemployable
Steel Soldiers Supporter
2,068
855
113
Location
UT
Thanks fellas, I appreciate it! My fab work isn't pretty, but it's strong & it works.

I've had to re-design this tailgate crane several times already, as each time I mocked it up I wasn't impressed so it was back to the old drawing board. But now it seems to be coming along just fine.

I appreciate you taking the time to look through this thread & leave comments - thank you!
 
Top
AdBlock Detected

We get it, advertisements are annoying!

Sure, ad-blocking software does a great job at blocking ads, but it also blocks useful features of our website like our supporting vendors. Their ads help keep Steel Soldiers going. Please consider disabling your ad blockers for the site. Thanks!

I've Disabled AdBlock
No Thanks