• Steel Soldiers now has a few new forums, read more about it at: New Munitions Forums!

  • Microsoft MSN, Live, Hotmail, Outlook email users may not be receiving emails. We are working to resolve this issue. Please add support@steelsoldiers.com to your trusted contacts.

What did you do to your deuce this week?

welldigger

Active member
2,602
16
38
Location
Benton LA
I was out and about and I noticed I had no blinkers. Hmmm? So I checked a few things and found out it was a bad flasher. So I pop in to a few local parts store and got the same reply 3 times nope can't help ya.

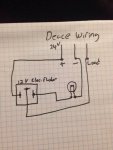
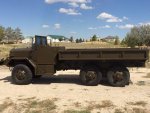
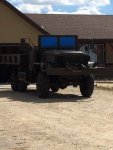
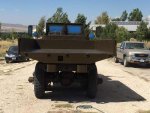
So I went down the electronic isle and grabbed a electronic 12v flasher (3 prong) and a dash light socket with bulb and a couple of wire taps. You hook everything up as directed but when you hook up the ground you put the light in line. This helps absorb the extra 12 volts that the flasher doesn't need. Presto got blinker!View attachment 516199View attachment 516200View attachment 516201
I left the OE plug in place so I can put it back factory later.
Truth be told your fix is probably better than oem. Nice job.
 

ollied

New member
224
0
0
Location
Mt. Airy Md. 21771
Bleed brakes on my m36a1 . by the way it is for sale air ps wow new cover hard top 1st $4000 takes it to a member only in maryland 240=674=6003 ps thsys why i posted here instead of 4 sale vehjcles
 

whatadeuce

Active member
Steel Soldiers Supporter
959
38
28
Location
Loxahatchee, Florida
Well I repaired the leak in my M35A2 radiator. I puled the fins around where the water was spewing out and then, after much pulling, recognized when I pulled out a sextion of vertical water tube. I then soldered one end of it, and used an epoxy on the other end. Its holding and today I ran the truck for 2 hours with no leakage, and no repair bill either
 

bruce187

New member
11
0
0
Location
jacksonville fl
I was out and about and I noticed I had no blinkers. Hmmm? So I checked a few things and found out it was a bad flasher. So I popped in to a few local parts store and got the same reply 3 times nope can't help ya.

So I went down the electronic isle and grabbed a electronic 12v flasher (3 prong) and a dash light socket with bulb and a couple of wire taps. You hook everything up as directed but when you hook up the ground you put the light in line. This helps absorb the extra 12 volts that the flasher doesn't need. Presto got blinker!View attachment 516199View attachment 516200View attachment 516201
I left the OE plug in place so I can put it back factory later.
Where does the positive from the light bulb hook up?
 

BBQROD

New member
255
-13
0
Location
Gray Georgia
The flasher requires a negative connection to chassis ground. The light goes inline there. The relay only wants 12 volts so I created a series circuit to absorb the extra 12v. ImageUploadedByTapatalk1410950938.532652.jpg if at all possible if you use a volt ohm meter, the bulb should show 7 or 8 ohms resistance. When flashing it will be kinda bright. If it is dim it's not absorbing as much voltage. The brighter the better.
 
Last edited:
718
9
18
Location
Springfield Or
The flasher requires a negative connection to chassis ground. The light goes inline there. The relay only wants 12 volts so I created a series circuit to absorb the extra 12v. View attachment 516774 if at all possible if you use a volt ohm meter, the bulb should show 7 or 8 ohms resistance. When flashing it will be kinda bright. If it is dim it's not absorbing as much voltage. The brighter the better.
The problem with this setup is one bulb burns out and you have no flashers. If you use a HEAVY DUTY two prong thermal mechanical flasher you don't need the ground. It will blink slightly faster than stock. I had this setup on my truck for about two months and I drive my truck every day. I did replace it with a new unit when one came on Ebay cheap.
 

BBQROD

New member
255
-13
0
Location
Gray Georgia
That works this was just a quick fix to get me home. Bulb shouldn't burn out though it only takes a quarter of an amp to make the relay flash. The load is on the relay not the bulb.
 

todds112

Member
672
5
18
Location
Teton Valley, ID
Did you use one of the Newstar inner clamps? I found the loops on them that the screw goes through to be a little too large so when you turn the wheel the knuckle pushes it off. I did one on mine three times before I figured that out. You should reuse your old clamp and use a new screw, or buy some N.O.S clamps.
Installed the driver side boot a THIRD time. I put the old inner clamp back on. Here's a pic of the old one and the New-Trash one.

On the bright side, I can remove and reinstall the boot in about 15 minutes now.:roll:
 

Attachments

nchittendon

Active member
544
28
28
Location
La Crosse, Wisconsin
removed the cargo cover and uprights for winter. :-( The truck looks so much better with it on there too......

Received my sugar scoop, base, and antenna. Should be getting the bracket spacer and back plate as well as tie down pretty soon. They need to be painted, and installed.
 

brianp454

Member
572
11
18
Location
Portland, OR
Nice work! I've been through all of that on my truck and feel much better that is was done.

Why do you say you "need" new front u-joints? Are you referring to the u-joints for the short shafts? Do they have extra play or obvious problem?

My truck had a bunch of muck that used to be grease in the front axles. I went trough the trouble of taking those big u-joints all apart, cleaning them, and re-assembling them. This is the only way to fully clean and proper re-pack them with grease. They are big, super-tight, and a real bear to work on. I was completely unable to do it alone and needed a buddy to hold stuff, a good press, and some properly sized short tubes and brass blocks. It was a tough job, but I got through it. My u-joiunts were in perfect condition (although the grease was badly contaminated), but the fits were very tight, which made working on them quite difficult. If you don't have the proper equipment, you might want to take them to a driveline shop where they do stuff like this all the time.


Crush36

New member
38
0
0
Location
Atlanta, Ga
Nice work! I've been through all of that on my truck and feel much better that is was done.

Why do you say you "need" new front u-joints? Are you referring to the u-joints for the short shafts? Do they have extra play or obvious problem?

My truck had a bunch of muck that used to be grease in the front axles. I went trough the trouble of taking those big u-joints all apart, cleaning them, and re-assembling them. This is the only way to fully clean and proper re-pack them with grease. They are big, super-tight, and a real bear to work on. I was completely unable to do it alone and needed a buddy to hold stuff, a good press, and some properly sized short tubes and brass blocks. It was a tough job, but I got through it. My u-joiunts were in perfect condition (although the grease was badly contaminated), but the fits were very tight, which made working on them quite difficult. If you don't have the proper equipment, you might want to take them to a driveline shop where they do stuff like this all the time.

Mine had a good bit of play in them, one side was better than the other but figured if I had them both out I might as well do both sides. Hoping they will be delivered by Tuesday, I have a mechanic coming to replace them on Wednesday.
 

mattgunguy

New member
290
2
0
Location
Springfield, Mo
More like in the last 3 weeks than just this week.

Replaced the axel boots, & regreased the front end.

Completely rebuilt the 12volt system. Blasted fire department must have added a mile of extra wire.

Replaced the pyro. Again.

Bought new shoes, 395/85/r20.

Ordered MRAP wheels & adapter plates today.
 

Attachments

TsgtB

New member
478
3
0
Location
Granbury, Tx
I was able to spend some quality time on the deuce yesterday...
got it stripped down to bare heads, working on the "hard to reach 6".

I found the 6 gallons off coolant I was missing.... in the oil pan (2 and a quarter 5gal buckets).
... but the coolant was clean... (what was left)
about half of the intake studs came out with the nuts on them.... (front head)
I found out I had no thermostat... (and most of a small thin ring inside the housing...?)
the intake and exhaust came off pretty easy, with turbo attached.
had a little surface rust on #1 intake rocker... and the rest of the valve train had a thin white foam coat from old milk shake
found a little surface rust on the body of #6 injector, hope that cylinder isn't sitting full of coolant too.
So, it was a good day of sitting on the fenders, getting to know her...
 
Top
AdBlock Detected

We get it, advertisements are annoying!

Sure, ad-blocking software does a great job at blocking ads, but it also blocks useful features of our website like our supporting vendors. Their ads help keep Steel Soldiers going. Please consider disabling your ad blockers for the site. Thanks!

I've Disabled AdBlock
No Thanks