• Steel Soldiers now has a few new forums, read more about it at: New Munitions Forums!

  • Microsoft MSN, Live, Hotmail, Outlook email users may not be receiving emails. We are working to resolve this issue. Please add support@steelsoldiers.com to your trusted contacts.

What have you done to your JEEP today

Tracer

Well-known member
Steel Soldiers Supporter
6,628
14,108
113
Location
Hawthorne, NV.
that pointless system is NICE. It's an upgrade I'm going to do on mine once I get it running right. They are dead reliable from all the reviews I see online.
Thanks Maverick. I have a good friend with a pointless conversion on his 56 Studebaker Champion. Works good. I had never heard of the pointless conversion for the M38A1. It came with a new distributor cap and rotor, and the coil looks new as well. The shaft in my current distributor wiggles around a bit so I may pull it out and go with the pointless distributor.
 

Maverick1701

Well-known member
1,433
181
63
Location
Lubbock, TX
That shop is looking real sharp, for sure, Maverick1701!

What are the wall panels (with the loose film) shown on that inside shot of the shop, are those insulated panels of some kind?
yes sir, those are the sections of insulation. They are sandwiched between the building framing and the outer skin. I wanted some kind of insulation to help keep out some heat in the summer and keep in heat in the winter.

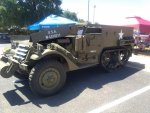
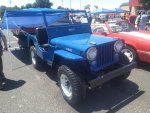
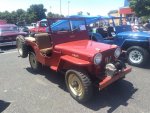
Over the weekend the family went to a local car show here in Lubbock, TX. I spotted a beautifully restored half-track, and a few vintage willys jeeps (blue 1946, red 1947 CJ2a). The red jeep still had a working rear PTO setup. However, the front pto winch was just bolted to the front bumper with no PTO hook-ups. It wasn't functional, strictly for looks. I was disappointed as I have the same winch sitting in my shop and wanted to see how he had it mounted (had if been mounted in a way it could have worked)

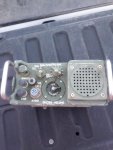
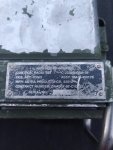
I also scored a nice radio control unit from an antique store....paid $30.

IMG_20220716_151554.jpg
IMG_20220716_150951.jpg

IMG_20220716_150940.jpg

IMG_20220716_192525.jpg

IMG_20220716_192519.jpg
 

Mullaney

Well-known member
Steel Soldiers Supporter
Supporting Vendor
7,774
19,887
113
Location
Charlotte NC
yes sir, those are the sections of insulation. They are sandwiched between the building framing and the outer skin. I wanted some kind of insulation to help keep out some heat in the summer and keep in heat in the winter.

Over the weekend the family went to a local car show here in Lubbock, TX. I spotted a beautifully restored half-track, and a few vintage willys jeeps (blue 1946, red 1947 CJ2a). The red jeep still had a working rear PTO setup. However, the front pto winch was just bolted to the front bumper with no PTO hook-ups. It wasn't functional, strictly for looks. I was disappointed as I have the same winch sitting in my shop and wanted to see how he had it mounted (had if been mounted in a way it could have worked)

I also scored a nice radio control unit from an antique store....paid $30.

View attachment 873314
View attachment 873313

View attachment 873312

View attachment 873316

View attachment 873315
.
Nice car show @Maverick1701 !

That halftrack looks pretty sweet.
The Willys were pretty neat - even in their civy colors.

:cool:
 

DeetFreek

Well-known member
221
358
63
Location
New Sharon IA
Been working on refreshing the wiring on the C over the last few days. It was a rats nest of hacked wires, crumbling insulation and just outright broken wires. So, I finally ordered some wire and Packard connectors (I know, not the correct style) to start the process.

A PO had put in a pull style light switch, took that out, had to get a new light switch since the current one was not working, as was the main power switch. Made a jumper to see if I even had power to the lighting circuits, and then found out there wasn't even a switch on the master cylinder for the brakes! 20220730_210042.jpg

I started in the engine bay and ripped out a bunch of the old wiring after identifying which line was which (that's called thinking ahead lol) and grafting new wire onto the headlight connectors and b/o lights. Ran the length, put new Packards on and taped everything up once they were all cleaned up. 20220803_212451.jpg20220808_204641.jpg20220808_204714.jpg20220809_202501.jpg20220809_204455.jpg
 

Mullaney

Well-known member
Steel Soldiers Supporter
Supporting Vendor
7,774
19,887
113
Location
Charlotte NC
Been working on refreshing the wiring on the C over the last few days. It was a rats nest of hacked wires, crumbling insulation and just outright broken wires. So, I finally ordered some wire and Packard connectors (I know, not the correct style) to start the process.

A PO had put in a pull style light switch, took that out, had to get a new light switch since the current one was not working, as was the main power switch. Made a jumper to see if I even had power to the lighting circuits, and then found out there wasn't even a switch on the master cylinder for the brakes! View attachment 875410

I started in the engine bay and ripped out a bunch of the old wiring after identifying which line was which (that's called thinking ahead lol) and grafting new wire onto the headlight connectors and b/o lights. Ran the length, put new Packards on and taped everything up once they were all cleaned up. View attachment 875411View attachment 875412View attachment 875413View attachment 875414View attachment 875415
.
Yeah... Some "wire loom" will make your wiring job appear a lot more factory than tape and you will say a lot less bad words if you ever need to work on the wiring in the future.

SummitRacing.com is a good source to buy the cloth wire loom.
 

DeetFreek

Well-known member
221
358
63
Location
New Sharon IA
.
Yeah... Some "wire loom" will make your wiring job appear a lot more factory than tape and you will say a lot less bad words if you ever need to work on the wiring in the future.

SummitRacing.com is a good source to buy the cloth wire loom.
I used the pretty, expandable mesh loom on the 53, it almost looks like old fabric loom lol and I like it better than tape.
 

DeetFreek

Well-known member
221
358
63
Location
New Sharon IA
A week's worth of evenings and a full day today and I can finally say I have all the lights working, correctly I might add, on the C. About 40' of new wire, and a couple dozen new connectors, it's good to go, and I didn't have to shell out $800 for a new harness. I will say I was quite amazed at how pristine the wire was under all the old tape, and every section that was exposed, dry rot and crumbled if you looked at it sideways!
VideoCapture_20220812-213153.jpg20220810_191939.jpg

And this is why I dislike people:
Screenshot_20220812-075509_Messenger.jpg
It's bad enough trying to save these cannon plugs, but when they're hacked into like this, and poorly if I do say so, it makes the job that much more time consuming having to chase wires to determine which circuit it is.

I had to rewire the ends of the brake switch leads, the entire front lighting harness, a good chunk of the rear lighting harness (I'm using a two brake light setup) and the dimmer switch. I'll probably do the horn at some point and the instrument cluster too.

20220810_202008.jpgreceived_1048479915873557.jpeg20220812_125402.jpg20220812_151943.jpg20220812_162513.jpg20220812_152037.jpg
The bigger chunks of what got cut out.
20220812_170707.jpg
 

JEB

Active member
130
144
43
Location
Colbert, WA
Received an invoice from the shop today.
Here is a list of work performed.
And keep in mind, this was a good looking DRIVEABLE, RUNNING, RUST FREE vehicle. It came with very limited service and repair history. Its previous owner had some stuff done, but seemed to be on a budget.
See a "before" photo on post #544 of this thread.

I asked for a reliable and safe unit, without major leaks.
More to the point, I want to drive it, not fix it, so I asked that the major systems be inspected and worked on as necessary.

So far, costs have been what I was quoted, with the exception of the unexpected costs of a new wiring harness and the replacement of the fuel tank well.

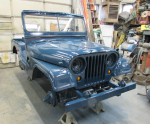
Once preliminary work was underway, I decided to have it refinished in USAF Strata Blue, no doubt adding to the amount of disassembly (not to mention eventual paint) required. And as common to USAF Jeeps of the period, the Under hood area will be left OD/green. Surprisingly, the finish in there was recent and will be left as is.

Vehicle Assessment from shop:
Test drove vehicle for 20 miles before initial diagnosis:
Engine starts, runs, and accelerates nominally and operates at correct temperature & oil pressure.
Transmission, transfer case, and drive train function nominally.
Steering is a bit lose; suspension appears to be tight.
Service brakes operate nominally, and do not pull upon hard application…but requires more pedal pressure than standard.
Parking brake operates correctly and holds.
Lighting operates correctly and generator charges at 26.7VDC at engine idle.
Front engine main seal is for sure leaking, (Class II: entire drive train underneath is wet…possibly because of this…?), valve cover gasket is leaking.
Wiring harness is old and insulation is crumbling, no apparent shorts detected.
Front & rear axle pinion seals are leaking, front diff cover gasket is leaking. (Class II)
Transfer case gaskets & seals are leaking. (Class I)
Rear body panel pushed in by < 1/2" due to Jerry can holder being pushed into body by careless backing. Will pull out with Ports Power, no new panels necessary.
Appears to be all original body panels. Jerry can holder is thin metal reproduction.
All lights work.
Two gauges inop.
Speedometer plastic lens crazed by age.
Batteries are recent.
Spark plugs and wires are good.
Steering wheel cracked and bent.
Canvas seat covers are recent. New top not installed but included .

Work Performed:
-Pulled vehicle in shop and removed hood, windshield, seats, jerry can & bracket, spare tire, front bumper rope, and battery cover.
-Removed cushions from seat frames.
-Cleaned out toolbox & glovebox, put all removed items in temp storage.
-Drained block and radiator, removed radiator hoses, removed fan shroud & radiator.
-Drained fuel tank, removed mounting strap & fuel line, removed fuel tank, cleaned out tank well.
-Removed battery cables & mounting brackets, removed batteries, removed trays & drain hose assemblies, cleaned out battery box.
-Removed instrument panel, removed ignition switch, heater switch, and light switch.
-Removed under dash primary & secondary wiring harness,
-Removed headlights, BO marker lights, and related wiring harnesses.
-Removed grill assembly.
-Removed rear lighting access cover, removed rear lights & trailer plug.
-Removed reflectors & antenna bracket.
-Removed chassis & engine wiring harness.
-Removed transmission tunnel cover and floor access pan.
-Pulled vehicle back outside, put on stands, removed wheels & drums, steam cleaned engine, chassis, brakes, and running gear.
-Put back on wheels, removed off stands, pulled back in shop, put back on stands, removed wheels again.
-Removed fan, water pump, starter, generator, distributor, fuel pump, & carburetor off engine.
-Removed front & rear driveshaft.
-Removed clutch linkage, bell crank, & parking brake lever.
-Removed transmission shift tower, shift levers, & speedo cable from transferase.
-Removed engine & transmission.
-Removed front axle ball wipe seals, steering tie-rods, drag link, bell crank, & pitman arm.
-Removed steering wheel & box assembly.
-Disassembled, cleaned, inspected, rebuilt & painted steering box steering box.
-Cleaned front axle trunnions and installed new ball wipe seals.
-Removed front & rear axle hubs, cleaned, inspected, & painted.
-Removed front & rear axle input yokes & pinion seals.
-Cleaned, painted, installed seal repair kits on axle yokes.
-Installed new front & rear axle pinion seals, re-installed yokes
-Removed service brake components, backing plates, and master cylinder.
-Rebuilt brake master & wheel cylinders.
-Cleaned & painted brake backing plates.
-Reassembled refurbished front brake components, repacked hub bearings, replaced hub front seals, installed hubs & drums.
-Blead & adjusted service brake system.
-Cleaned, prepped, & repainted generator, starter, distributor, and other engine parts.
-Replaced front & rear main seal on engine.
-Adjusted valves & oil pump timing.
-Replaced valve & side cover gaskets.
-Cleaned, prepped, and repainted engine block.
-Resurfaced flywheel/pressure plate, cleaned, prepped & painted backing plate, flywheel, & clutch assembly.
-Cleaned, prepped, painted, & installed seal repair kits on transfer case output yokes.
-Cleaned, prepped, painted, and resealed transmission/transfer case assembly.
-Cleaned & pained trans crossmember & bell housing.
-Replaced front axle ball wipes.
-Replaced worn front left outer tie-rod ends.
-Replaced steering bell crank pin, bearings, & seal.
-Installed new drag-link components, mounted & adjusted assembly.
-Installed new tie-rod end dust boots.
-Adjusted front axle wheel toe-in.
-Installed flywheel & clutch assembly with new disk.
-Re-installed transmission/t-case assembly, bellhousing, clutch release bearing & fork assembly.
-Refurbished & re-installed clutch bell-crank tube & linkage assembly.
-Installed engine & mounts.
-Re-installed exhaust manifold on engine, re-attached exhaust header pipe.
-Cleaned fuel pump & repaired stripped assembly screw.
-Installed carburetor, fuel pump, fuel line, & fuel filter.
-Installed engine PCV system, fittings, & lines.
-Cleaned & painted air cleaner assembly & mounted.
-Cleaned & painted engine oil filter assembly, mounted unit, fabricated & ran filter oil lines.
-Installed generator, starter, distributor, plugs & wires, water pump, belts & colling fan.
-Fabricated & installed distributor vent system, installed cross-over tube assembly from carb to filter.
-Drilled new holes in firewall at correct locations, installed heater fittings & hoses.
-Replaced throttle cable with longer unit, mounted throttle & choke cables.
-Removed rusted-out tank floor well, prepped tub, welded in replacement well, cleaned, prepped & painted.
-Welded over old antenna mount holes on left rear quarter panel, grounded flush & primed.
-Straightened-out pushed-in right rear crossmember & bumperette assemblies.
-Pushed-out dented-in rear panel at fuel can mount, mounted jerry can bracket.
-Capped gun pedestal mount holes with elevator bolts.
-Removed non original decals & markings off tub, front fender, rear bumperettes.
-Refilled all gear boxes with lube.
-Boiled out, cleaned, prepped, and painted radiator.
-Painted small parts strata blue & inside front grill.
-Installed front turn signal marker lights in grill.
-Re-installed front grill, radiator, and shroud.
-Installed radiator & bypass hoses.
-Remounted tires and adjusted front toe-in.
-Cleaned-out, prepped, and re-coated inside of battery box
-Chased tapped all floor tunnel cover blind nuts
-Installed floor pans & trans covers.
-Installed pedals & linkages.
-Adjusted clutch, brake & throttle pedal.
-Moved main battery disconnect position, fabricated & routed new battery cables
-Cleaned, prepped & painted battery trays.
-Routed drain tubes, mounted battery box trays, and installed batteries.
-Refurbished rear trailer plug, headlight dimmer switch, horn switch, and front black-out headlamp wires & connectors.
-Installed horn switch, rear trailer plug assembly, and dimmer switch.
-Installed rear tail/brake lights & ran rear turn signal harness.
-Reinstalled jerry can bracket w/correct spacing.

If nothing else, the list shows the amount of work necessary to get a nice Jeep.
The list is long, but the labor bill isn't outrageous, showing the simplicity of the vehicle and the competency and Jeep/MV experience of the man doing the work.

Okay, the labor bill will seem high to you guys who know what you are doing, have the tools and could do this in your sleep. :)

And remember, this was a running, and largely rust free vehicle!
If anyone is interested, I can post the parts section of the invoice as well.

The work is nearly done, all that remains now is the paint and final reassembly.
Soon at car shows when I'm asked if I did the work, I'll give my standard reply..
"No, but I personally wrote every check".
 
Last edited:

JEB

Active member
130
144
43
Location
Colbert, WA
Here is a shot of my Jeep with the first coat of Strata Blue applied.
Don't worry, in person the paint is much darker than seen here under florescent lights.
With hardner added to the paint, it will be glossy, but I don't see that as that critical on an Air Force vehicle.Screenshot_2022-11-03-15-18-33_kindlephoto-24986490.png
 
Last edited:

Another Ahab

Well-known member
18,007
4,579
113
Location
Alexandria, VA
Here is a shot of my Jeep with the first coat of Strata Blue applied.
Don't worry, in person the paint is much darker than seen here under florescent lights.
With hardner added to the paint, it will be glossy, but I don't see that as that critical on an Air Force vehicle.View attachment 884346
Wow, JEB, that paint job lools great.

Real nice!!
 

Maverick1701

Well-known member
1,433
181
63
Location
Lubbock, TX
Here is a shot of my Jeep with the first coat of Strata Blue applied.
Don't worry, in person the paint is much darker than seen here under florescent lights.
With hardner added to the paint, it will be glossy, but I don't see that as that critical on an Air Force vehicle.View attachment 884346
strata blue jeeps are just *chefs kiss* perfect!
 

Maverick1701

Well-known member
1,433
181
63
Location
Lubbock, TX
I've been tinkering the jeep and it's finally at a place where I can (somewhat) focus on the accessories.
My next goal is to get my PTO Winch setup installed.
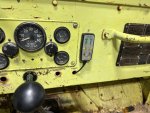
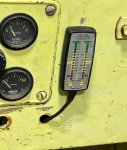
Earlier today before work I had some free time to install a dual battery monitor I had sitting around and then mess with my winch & PTOs.

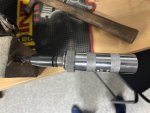
I have a Koenig PTO model 41 (truck/wagon model) and a model 51 which I'm planning on installing on my M38A1.
The 41 is in really good shape. The 51 is in okay/good condition, but definitely use-able. I'm tempted to sell the 41 (since it's for the willys truck/wagon) and then use those extra funds to more jeep stuff. I hate to waste such a nice PTO as a "parts" PTO for my 51. I'm still undecided though.

The winch has been fighting me for a while now.
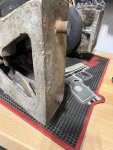
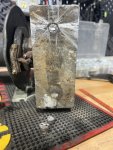
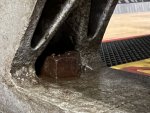
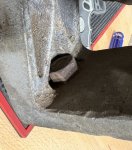
I have two mounting bolts stuck in the a-frame side of the koenig 100. It looks like the PO cut them off with a sawzall when the winch was removed..so the exposed ends of the bolts are pretty mangled. There are nuts on the inside section which has zero space for a wrench or socket. I've been soaking them on PB blaster, I've tried heat, cutting a slot on the exposed bolt and trying to turn with a large screwdriver/socket wrench, impact driver, etc. they wouldn't budge.
I finally admitted defeat and just cut off the stuck bolts. I tried drilling out the rest of the bolt but the metal is too hard...so that's a no-go.
When I finally get it mounted up I may have to drill two new holes in the a-frame section. It's not ideal, but it is all I can think of for now.
Pics:
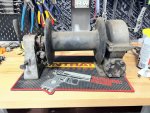
my Koenig model 100
IMG_5311.JPG

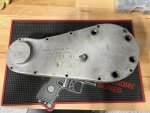
Koenig model 41 PTO
IMG_5296.jpg

Those stubborn cut-off bolts
IMG_5303.JPG

impact driver got stuck :(
IMG_5306.JPG

finally got then cut off. I think I killed my Dremel in the process (all the smoke came out)
IMG_5309.JPG

How am I supposed to get a wrench in there?!?!
IMG_5310.JPG

Dual battery monitor. I didn't want to drill anymore holes so I used a hole put there when it was owned by our VFD
IMG_5315.JPG
IMG_5317.jpg
 

Attachments

DeetFreek

Well-known member
221
358
63
Location
New Sharon IA
Me, I'd probably do some very fine finessing with a torch and cut the nuts off. And with the amount of heat that would be put through the bolts at that point may have taken some of the hardness away. And use a fresh Cobalt drill bit. Slow and a lot of cutting oil/ lube.
 

o1951

Active member
899
155
43
Location
Bergen County, NJ
Old wood handled carpenter's hammer! Yeah, I got one just like it, was my father's, along with other yesteryear things. I am going on 80 yrs old.
Re bolt residue. Need to remove temper so it can be drilled. Heat it to orange with your torch and hold for a bit. If that bracket wasn't there, I would go to yellow, but don't want to damage bracket. Let it cool as slowly as possible. I slowly reduce torch flame and gradually move it away. You will be able to drill it out with a sharp cobalt bit, and cutting oil. Go slow.

Re the nut. That is not the way we did stuff. Not even a washer! See if other members can tell/ show you the way factory mounted winch.
 

Maverick1701

Well-known member
1,433
181
63
Location
Lubbock, TX
Me, I'd probably do some very fine finessing with a torch and cut the nuts off. And with the amount of heat that would be put through the bolts at that point may have taken some of the hardness away. And use a fresh Cobalt drill bit. Slow and a lot of cutting oil/ lube.
Old wood handled carpenter's hammer! Yeah, I got one just like it, was my father's, along with other yesteryear things. I am going on 80 yrs old.
Re bolt residue. Need to remove temper so it can be drilled. Heat it to orange with your torch and hold for a bit. If that bracket wasn't there, I would go to yellow, but don't want to damage bracket. Let it cool as slowly as possible. I slowly reduce torch flame and gradually move it away. You will be able to drill it out with a sharp cobalt bit, and cutting oil. Go slow.

Re the nut. That is not the way we did stuff. Not even a washer! See if other members can tell/ show you the way factory mounted winch.

Thanks for the tips, y'all. I can't go too crazy with the heat since the frame is aluminum

I'm going to keep working it with heat cycles in hopes it I can get it soft enough to drill.....just need to grab some cobalt drill bits now.
 

o1951

Active member
899
155
43
Location
Bergen County, NJ
Thanks for the tips, y'all. I can't go too crazy with the heat since the frame is aluminum

I'm going to keep working it with heat cycles in hopes it I can get it soft enough to drill.....just need to grab some cobalt drill bits now.
ALUMINUM! ! I doubt you can get bolt remains hot enough without damaging aluminum. Aluminum is funny. You heat it, and it looks fine, then in a blink of an eye it is liquid.

The only thing I can think of is salt water bath electrolysis. When I restored a rusty relic, I used it to dissolve rusted bolts. 12 volt DC power supply is sufficient. I used to protect the metal I did not want exposed. The company that makes Kroil also sold a metal protector. It was a very volatile liquid that dried to a brown waxy coating like cosmoline. Paint or anything that forms a barrier will work. I liked the wax based product because paint thinner would clean it off.
 

DeetFreek

Well-known member
221
358
63
Location
New Sharon IA
Oh aluminum, that does make it much trickier! I like 51's method then, won't hurt the ally but will eat the steel. Alum (the baking additive) will do the same thing, but I can't be sure what it may do to aluminum. I'm a goldsmith and use alum to eat away broken bits that get lodged in gold.
 
Top
AdBlock Detected

We get it, advertisements are annoying!

Sure, ad-blocking software does a great job at blocking ads, but it also blocks useful features of our website like our supporting vendors. Their ads help keep Steel Soldiers going. Please consider disabling your ad blockers for the site. Thanks!

I've Disabled AdBlock
No Thanks