• Steel Soldiers now has a few new forums, read more about it at: New Munitions Forums!

  • Microsoft MSN, Live, Hotmail, Outlook email users may not be receiving emails. We are working to resolve this issue. Please add support@steelsoldiers.com to your trusted contacts.

Juan's M998 HMMWV

juanprado

Well-known member
Steel Soldiers Supporter
5,614
2,922
113
Location
Metairie/La (N'awlins)
Rear Bumper updates

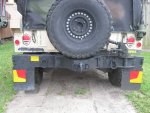
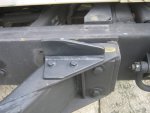
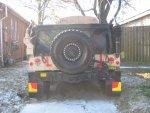
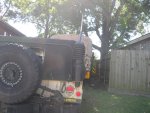
There was during the spring an ebay seller with a surplus store in Pensacola selling the pintle extensions very reasonable. Since my wife and daughter were going to Pensacola for a dog show, I struck a side deal and she picked it up for me. Some of the ebay sellers are asking crazy money for these :-(

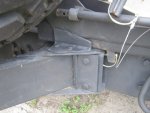
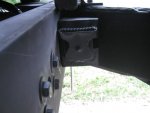
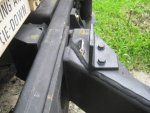
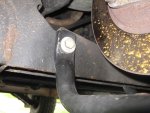
The tm calls for 5-3/4 bolts but I used 6 inch. I could not find anyone with the backing plates that go on the outside so GoldnEagle made me 2 out of his scrap pile. I chose to leave the bumper strengthening plate on anyway and bolted the pintle extension to the outside of it.

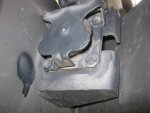
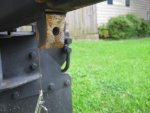
You lose the original bump stop bracket of the tire carrier with this set up so GoldnEagle made me a simple L stop bracket. Tapped the extension 5/16 and on the outside bolt also used a lock nut with a longer through bolt. With the arm down and resting, the weight does the trick and everything is solid and does not move. I had to shave and slightly angle the fitting on the bottom of the tire carrier that holds the lock down pin for clearance.

The wiring harness needs to be loosened from the body and slightly pulled forward to make enough room for the trailer plug with the extension. I wrapped the exposed wiring with wire loom tubing. I could not find the oe bracket reasonable as I was quoted $75 for a simple 45* bracket. Zev had a bracket in his scrap pile and I can not recall if it came from a dolly we scrapped or a m931 tractor? Turned it sideways and drilled the bolt holes and it fit perfectly. Tested to make sure a 90* would work and my m101 cable has plenty of room to hook up and slack.

Last year when I installed the airdrop, I could not find reasonable tear drop shackles as I was finding $90-120 each. Walker Wreckers in Ca on ebay is selling them for $39 each so I grabbed a pair and updated since I have an a2 bumper.
If anyone goes this route, I have like 18 extra castle nuts for them :)

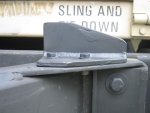
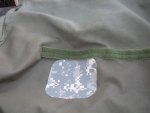
I had purchased multiple dilenation stickers from a Europe surplus dealer to use on my trailers a few years ago but took a set and installed on a thin sheet metal plate and sandwiched under the mud flap. In Europe, They have a hard plastic backing plate but I improvised. I like the reflective visibility at night for safety.
 

Attachments

Last edited:
juanprado

Well-known member
Steel Soldiers Supporter
5,614
2,922
113
Location
Metairie/La (N'awlins)
speedy stitcher

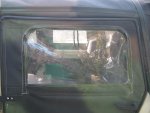
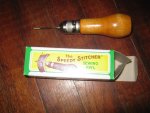
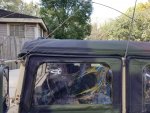
I had my hmmwv at a cub scout event Fri and one of the window zippers for the soft door let go. ( My son had partially fixed a 6 inch gap before so the thread was known rotten). My son had sewn the repair last time but he is in Idaho presently so My turn to use the speedy stitcher I got from Chief_919 at the Ga Rally.

I have almost zero sewing experience and this was a piece of cake. Very easy to do, just follow the instructions or many you tube videos. I decided to stitch the whole outside zipper on door. You must have patience and it is a bit tedious but results are easy and this thread is waxed and much thicker and better quality than OE. When finished it looks right and unless you know, it blends in perfectly. I suspect this is literally a lifetime repair. Only tips I can add is to use super glue on the final square knot. I found the wax thread would loosen and not get snug like real rope or non waxed string. Also pull through more material than you think you need to leave you plenty of tail to tie the final knot.

Keep band aids handy as needle is sharpened and as they say in forged in fire "It will Cut" don't ask me how I know..:tigger:
 

Attachments

juanprado

Well-known member
Steel Soldiers Supporter
5,614
2,922
113
Location
Metairie/La (N'awlins)
Front Differential Underbody protection cage

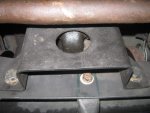
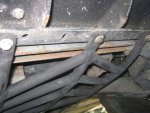
Trolling on ebay I picked up from Saturn, the front differential cage for the underbody protection kit for $55 shipped.

Only thing I am worried about around here is running over something. No mountains or rock climbing in my future, I am afraid. Just mud, water, swamps, alligators :)

The cage fits directly on the mile marker hydraulic winch cradle mount like mine. Holes are already pre-slotted and drilled on cradle. I would think AM General would predrill the C cross-member and all the other required parts as a selling tool for selling more underbody kits as bolt on ready but my logic does not apply.

Thanks to Ryanruck for posting the directions as it helped me a lot.
https://www.steelsoldiers.com/showthread.php?148974-Underbody-Protection-Kit
The passenger side bolt hole is easy to drill and no access issue to the front lip. I used the harbor freight step drill bit as those things are super nice to drill holes quickly.

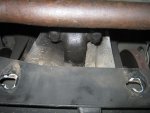
The center hole requires like the directions suggest to remove the center brace for the front differential. The center bolts to the rear lip of the C crossmember. Place transfer case in neutral to get proper alignment of driveshaft to top bolts.The top bolts with 15/16 heads required some umph but came loose. Bolts had yellow thread lock on threads which I believe is loctite 085 but I did not have any of that and it is not too common to find. When done; I reassembled with medium blue threadlocker. With brace off , center hole is easy.

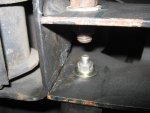
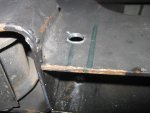
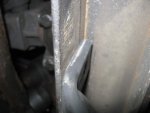
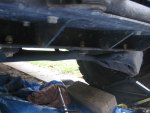
Driver's side is the bitzch. It bolts to the front lip. Just no way to do drill that hole from front without removing halfshaft, rotor, caliper and bracket. Way more than I wanted to do for this project. I decided to drill a hole all the way from back through the rear lip to the front lip. As directions suggest, drop the 4 bolts on the front sway bar to give you access for the drill to have room. I also turned the wheels to give me a slight bit more room and jacked up the left control arm upwards. It is a very tight fit and I could not get a straight shot. I used the step bit to drill a 1/2 hole in the rear lip and then used that hole's offset to drill straighter. I got the step bit 4 steps in but no more clearance. Switched to a 1/4 bit then 5/16. Drilling the hole to the recommended 3/8 bolt looked impossible and I could not hold the drill straight to do it for a wider hole. I compromised and used a 5/16 fastener. I also liked the idea that the bolt head was smaller as it awful close to the rotor. I hated to drill a hole in a cross-member with no purpose and the ocd in me put a 1/2 fastener with washers on each side in the access hole.
 

Attachments

Last edited:
1 Patriot-of-many

Well-known member
Steel Soldiers Supporter
2,186
86
48
Location
Zimmerman MN
Where did you get the red/yellow stickers, forget what they are called? My M1009 came with them, would like to put them on most vehicles.
 

juanprado

Well-known member
Steel Soldiers Supporter
5,614
2,922
113
Location
Metairie/La (N'awlins)
Where did you get the red/yellow stickers, forget what they are called? My M1009 came with them, would like to put them on most vehicles.
On Ebay from a Seller in Italy. Shipping is high but I ordered multiple sets to make it less painful.

One of the military surplus dealers in Europe also has it:
They come in 20x20 or 40x40( like my 5 ton). They also sell the hard plastic backing but I just subbed thin metal.

https://www.us-army-military-shop.de/Decal/Stencil/Decals/Delinator-Set::187.html
 

juanprado

Well-known member
Steel Soldiers Supporter
5,614
2,922
113
Location
Metairie/La (N'awlins)
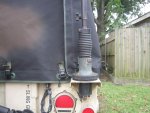
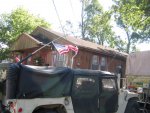
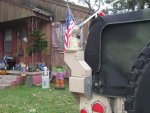
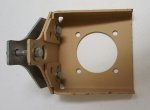
At-1011 antenna on a tilt adapter with a Harris 100-5154-01 base

Took some time to piece together this antenna mount, base, mast, and accessories.

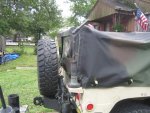
For now, It is mounted on my right rear but some of the hmmwv have this set up on the rear sides of the fender with 2 more antennas on the rear. It will probably stay for now until I can find a "bat" antenna as I have an uncommon swiss cheese tower for the back right but don't want to install it yet.

I found the Harris base & the heavy steel mount with heavy steel inner fender support on epay. Fellow ss members 86humv helped with the tilt adapter, Owlofdarkness with the tan At-1011 mast set up, and General Hood with the insulators! Thanks to all for helping me get the set up acquired.

Pretty straight forward. The heavy mount required the holes on the fender to be 3/8 so just a slight increase to drill. Uses the same pattern and hole for access. Heavy steel plate on inner fender for support. This set up is definitely not the ice cream cone spring flimsy mount that came off. The rear right loop for the cargo cover will not fit with the big base and needs to be removed.

The at-1011 is typically 4 section 16ft for vehicles or can be 32ft with 4 additional rigid tubes for fixed tripod mount.

There are at least 3 different Harris Rubber base insulators with different heights and 2 different top pieces depending if fixed antenna or with tilt adapter.

I have the tall base with the flexible top for the tilt adapter.
 

Attachments

Last edited:
171
5
18
Location
Chaska, MN
Thanks and Thank You for your Service!
All the best!
I didnt serve. This kit was all from my bud who did. He went as Captain America amd needed a drinkin bro/battle buddie. He lent me his kit including safety PT belt along with a woobie to use as a cape. Problem was he had not washed any of it since he was in Afghanistan. I smelled...

Sent from my SM-J700T using Tapatalk
 

RockHillWill

New member
18
0
1
Location
Rock Hill, S.C.
Good morning Juanprado.

I have spent the last hour reading this post. I have also purchased a 2-door 998 as a personal carrier and plan to convert it to an M1026/M1026. I already have the windshield, roof, turret, sponsons and rear deck. I have also purchased the airlift bumper and a Rhino spare tire carrier. Many of the things that I plan to encounter you have already completed and I am most appreciative of your postings. they have been VERY helpful. Thank you!
 

juanprado

Well-known member
Steel Soldiers Supporter
5,614
2,922
113
Location
Metairie/La (N'awlins)
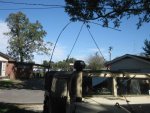
Driver's side antenna mount set up

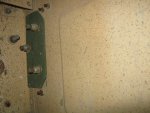
On the rear driver's side I have one of the hmmwv offset antenna mounts (thanks 86humv) with a AS-3900 base. On the inside of the side fender is a 3 bolt fender reinforcement plate A3046222. I bought mine at Flight Source/Equipment parts sales. It can be right or left. There is also supposed to be a rear inner fender 2 bolt plate but I could find no one with it. The 2 piece mount can be clocked right/left or rear facing as I have seen some picture of trucks this way.

The rear 2 bolts use the existing holes but the side 3 bolt plate requires the holes drilled. Also the rear cargo cover loop needs to be removed as there is no room for it.

Thanks to General Hood who swapped me a green antenna mast for a tan one. I had never seen a NOS tan unit- not just repainted.

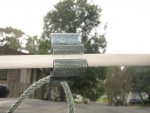
Lesson I would like to share. The military has at least 2 types of antenna clip hold down ropes. One is a simple c and clips on. I have broken one antenna on my 5 ton at the boy scout camp hung up on low lying branches and one on my hmmwv on a crappy myrtle in the city. Something has to give with this set up and the weakest part will fail. It will be your mast.

I found another type which is a dual C and U clip. This set up when using the U part allows the antenna to unclip free and hopefully not get fouled up/broken. Wish I had seen this first and might have saved me one top mast and one bottom mast on my hang ups. This is what I am using with the rope attached at 2 points. I mounted as another member had suggested a footsman loop on the outside b-pillar.
 

Attachments

Last edited:
juanprado

Well-known member
Steel Soldiers Supporter
5,614
2,922
113
Location
Metairie/La (N'awlins)
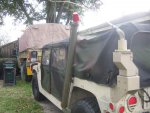
High Back Seat Repair

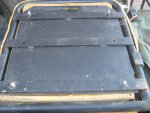
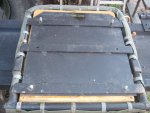
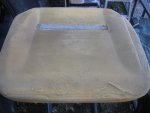
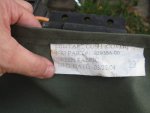
I dropped a part on one of my rear high back seats and ripped the cover. I unbolted the seat from the lid ( commander/ high back seat lids are thicker than the original) . The top cover back has hog rings. The bottom seat cover has round C clips that pinch the cover to the tubular seat frame.

Info on seat hardware and where to order here:
https://www.steelsoldiers.com/showthread.php?172957-High-Back-Seat-Parts

Thanks to MwMules for hooking me up with these tough cold setting patches typically for uniforms and 86humv for a care package of clips as some of mine were rusted and fell apart on removal. I patched seat and reinstalled. The C clips are easy to use and just snap on pinching the cover. The cover also has a velcro tab to hold it in place. Bolts holding seat cushions to L bracket are metric btw,
 

Attachments

juanprado

Well-known member
Steel Soldiers Supporter
5,614
2,922
113
Location
Metairie/La (N'awlins)
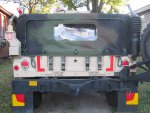
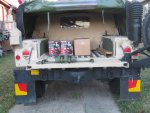
tailgate upgrade

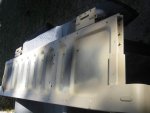
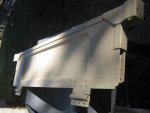
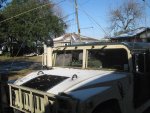
Picked up a new tailgate 12338981-3 in a mixed GL lot. Thanks to Garret~Jeepsinker and Wes~ Simp5782 for picking up and relaying it to me.

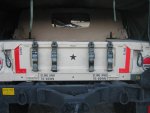
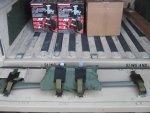
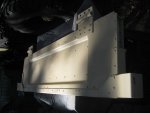
This tailgate is lined with extra holes on the inside to mount the plate that holds the max ax or the thicker heavier armor plate. Not sure what all the extra holes were for and could never find what model this tailgate is for. I did find some slant back pictures with 4 straps mounted on the inside but not in the same configuration and no ax holder.

86HUMV got me a inside plate, loops, and ax holder bracket. I picked up the straps off ebay. I did install and use rivet nuts on the outer holes to mount the plate to the tailgate. The extra holes did not seem to line up for the ax holder or 4 straps. I just measured and eyeballed the locations to coincide with the valleys in the tailgate and used machine screws with locknuts on the straps and ax holder.

On the outside, I installed the straps for the camo netting. These are some wide and real long straps. Kind of deceptive in pics until you put them in your hands. Picked up from Amtak. Typically used on slantbacks. I did not keep the original spacing so I could still use my cargo cover and install those loops. On the 2 outside straps, I mounted them towards the inside of the hinge not on the outside as designed as the loops would interfere. The outside loops are real big and not sure if there are used for anything else. The center hole on the hinge is not riveted so the hole can be drilled and the loop attaches to it and on the other side is a square spacer washer the same thickness as the hinge so the loops on the outside are level.

I also installed the foam insulation on the bottom of the tailgate which mine was missing and 2 strips on the sides. I added the red reflective tape L like on older mv's for extra visibility as I had picked up a roll from castlebravo. I also painted the bottom visible part of the body and lip of the bed which had worn and badly chipped paint and the nasty black rattle can to cover the bumper numbers. New sling/tie down decals and the universal star. I plan on getting black decals for the bumper numbers made.

The tailgate looks deceptively easy to install. Just 3 bolts on each hinge I thought... The 2 inside bolts are easy peazy. The outside bolt sits in a pocket next to the frame and real tight. I could not get a socket in there to grab the nut as the body mount bolt was in the way. Removed nut and washer and partially loosened the bolt. Still a very close fit and even with a 6pt deep socket could not do it so I switched to a 12pt shallow socket with success. Reused the 2 shims per side.

Came out great and the max ax is solid. All the extra gizmos add some weight to the tailgate. The foam seal should hopefully help keep water out. The cargo cover can still be used and connects with the outside loops. Not enough slack to use the center one but it not going anywhere.
 

Attachments

Top
AdBlock Detected

We get it, advertisements are annoying!

Sure, ad-blocking software does a great job at blocking ads, but it also blocks useful features of our website like our supporting vendors. Their ads help keep Steel Soldiers going. Please consider disabling your ad blockers for the site. Thanks!

I've Disabled AdBlock
No Thanks