aw113sgte
Well-known member
- 914
- 1,424
- 93
- Location
- La Crosse, WI
Steel Soldiers now has a few new forums, read more about it at: New Munitions Forums!

Would a heavy spring do the same job without being subject to CTE issues (of a solid spacer) and also accommodate and future wheel bearing adjustment inward?Wasn't a big fan of the split collar that came with the ECO hubs, mine is the one with an M5 screw. Considering if that clamp failed, the entire wheel would detach I started looking at another solution. This got kicked into high gear when I checked for wheel bearing tightness and I had play in both the left mid and rear wheels. All wheel bearings were tightened when ECO hubs were installed and verified "tight".
Here is my solution, an aluminum spacer that just slides in place and holds the stock inner gear in location. No way for the nut to back off now. The three holes are for gear oil to be able to flow freely from inside/outside.
View attachment 912294
View attachment 912274View attachment 912275View attachment 912276View attachment 912277
Yes a spring will likely work just fine too (with the stock gear). That said, finding one would be difficult in this size.Would a heavy spring do the same job without being subject to CTE issues (of a solid spacer) and also accommodate and future wheel bearing adjustment inward?
Yeah I was just thinking out loud. Sourcing a spring for that will be long winded. I've used some flat spring washers on my track loader for the track tensioner but those are 3" diameter and take significant tonnage to compress.Yes a spring will likely work just fine too (with the stock gear). That said, finding one would be difficult in this size.
Springs obviously compress so you still have a risk that it could compress enough to release the pin lock. Likely? No but something to be aware of. The CTE mismatch really isn't an issue we just have to give a little bit of clearance between parts. You could always make the spacers out of steel if you want the same CTE. Aluminum is just far easier to work with on machines I have.
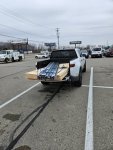
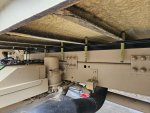
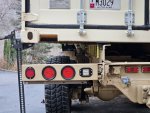
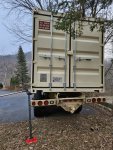
You might consider getting rid of at least half of the springs/bolts and installing some guides or link arms to keep the box from shifting to the side or front to rear under extreme forces.Installing and testing the spring compliance setup. Tough to see on the camera but jacking up the box lifts the frame a lot, I'll get the rest installed and test it when crossing up the suspension.
Using a link system does have it's place, however I don't see many benefits in this type of box setup.You might consider getting rid of at least half of the springs/bolts and installing some guides or link arms to keep the box from shifting to the side or front to rear under extreme forces.
686 lbfHow much total compression force will you have at maximum compression at each mount point.
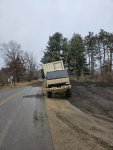
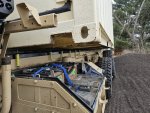
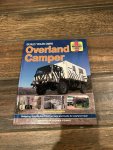
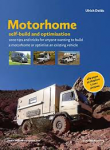
I have that first book, it's pretty well done. Yes those plates have their place and I plan to add them in time as an extra safety measure. They are much more important in applications where there are only a couple spring bolts and the tolerances between holes are high. In my setup, I had the advantage of drilling matched holes so at maximum they have .7mm of freeplay. Combined with tolerance stack-up and chassis movement, realistically there is no freeplay currently. Over time, it's possible it will develop free play and I have additional rail space for that addition - just haven't made those yet. Wanted to get the spring setup tuned first.If you look at what is typically done on spring mounted campers, there is always a solid bolted connection at either the front or most rear location and a feature that prevents slewing. Usually they are slide plates.
Below are two references:
View attachment 913450View attachment 913451
in fact, in many place it is illegal not to have those features.
If you were to swerve, your whole box could swing to the side and you will get a slide hammer effect, wich may overload your bolts. Also, the slewing action can zipper your bolts, that is why they always have a guide plate. I would seriously consider adjusting your design. What you have is fine for slow, but get moving fast, inertia may not play nice.
That's an interesting idea! I haven't ordered the major materials yet so I'll give it some thought.Since it appears you left a gap about size, maybe little less f M1079 between front of Habitat and rear of cab... would think one could install a rearward skirt width of cab, with fixed top and drop down bottom. extending from cab as far back toward the habitat as can go yet not interfere with cab tilt Flipped down bottom to allow it to lift past fixed passage attached to habitat. Sealed door on cab rear face.
Paired with this; a narrow as possible passage, centrally fixed skirt on habitat; extending toward cab as far forward as possible, yet not interfere with tilting cab. Gangway might be needed to slide out when using passage. Sealed door on front face of habitat.
Idea being with the cab skirt large enough, that as habitat moves about on it's flex mounts.... Habitat's smaller skirt structure would not contact the cab one. The length of both should allow for overlap of cab portion beyond the open end of habitat's skirt structure resulting in an open box (on cab) surrounding a smaller open box (on habitat). Sealed doors block out weather. Nothing needs to connect between the two but the gangway.. and it is only slid out/connected when crawling /sliding thru from one to the other.
Another possible advantage here is the skirt combo should cut out wind drag a good bit compared to just a crawl thru box in center of the gap.
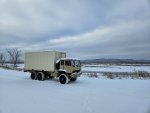
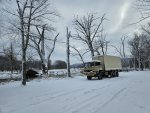
Must be due to my ABS module programming. The light stops blinking the second I hit HWY mode on CTIS.ABS blinking light during different CTIS modes isn’t something mine does. Never heard of that before. I wonder if the ABS is reporting any codes at that time.
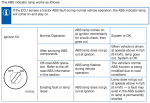
Ours does not come on when changing CTIS modes. Though we have seen ABS lit while off roading in SAND. I read this reference you shared to be normal though caused by "road conditions" not CTIS mode setting. Also it is referring you to the "off-road ABS information" nearby in the manual.Must be due to my ABS module programming. The light stops blinking the second I hit HWY mode on CTIS.
From the Wabco ABS troubleshooting manual:
View attachment 914567
There are no fault codes(checked with wabco abs software )I can literally stop that light blinking by switching to highway mode, the second I go to any of the other modes the light starts blinking again.Ours does not come on when changing CTIS modes. Though we have seen ABS lit while off roading in SAND. I read this reference you shared to be normal though caused by "road conditions" not CTIS mode setting. Also it is referring you to the "off-road ABS information" nearby in the manual.
You may also want to check your fault codes—
The link shows that listing sold in December and provides no information about what was sold.There are no fault codes(checked with wabco abs software )I can literally stop that light blinking by switching to highway mode, the second I go to any of the other modes the light starts blinking again.
I did verify ABS functions perfectly in highway mode, then in any of the other modes maybe I just turned off and it lets the wheels skid.
This is the module I now have https://www.ebay.com/itm/2045669784...REya4EHS9C&var=&widget_ver=artemis&media=COPY

