• Steel Soldiers now has a few new forums, read more about it at: New Munitions Forums!

  • Microsoft MSN, Live, Hotmail, Outlook email users may not be receiving emails. We are working to resolve this issue. Please add support@steelsoldiers.com to your trusted contacts.

M1008 Build

DIVE DIVE

Well-known member
217
778
93
Location
Chesapeake, VA
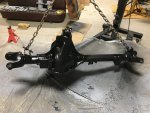
Got the front axle all painted. The odds and ends will get painted up tomorrow and then I’m waiting on some bushings in order to get the front springs mounted. I’m replacing the frame shackle eye bushings with Energy Suspension 3.2111. Eventually I’m going to be doing a 4” lift so I’m not going to worry about replacing the stock bushings on the actual front springs since the new lift springs will come with bushings. Last piece of the puzzle to get her back sitting on the front axle is that one wheel bearing that was bad. I’ll be picking that up from the parts store tomorrow.02F1BFF5-D119-4EA1-A457-55AF508CCAD8.jpeg
 
Last edited:

DIVE DIVE

Well-known member
217
778
93
Location
Chesapeake, VA
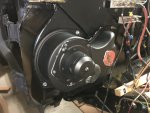
Finished up with the cabin fan shroud and got it all reinstalled today. I sand blasted it and then repainted it using a flat black. I removed the fan and resistor bank, cleaned them up and then used silicone adhesive and put them back in the housing. Then I used an exterior silicone to seal the housing to the firewall because on the outboard side the gap between the housing and the firewall was about 3/16”, so I needed something to bridge that large gap.C2A56AA4-EC6C-4BDB-9B9C-7DB7B5AB142F.jpeg
 

DIVE DIVE

Well-known member
217
778
93
Location
Chesapeake, VA
Today I started reassembly of the front axle. The paint was still curing but I’m tired of waiting. Assembled the steering knuckles to the kingpin and lower support bearing, set the studs and torqued all fasteners to 80 lb-ft with some red lock tite. Also installed new kingpin seals Yukon part YMSS1007 (30309) then greased everything up. Knuckles are nice and tight. I am going to be reinstalling an old set of axles that I had from my rock crawler take offs since I haven’t yet purchased the 35 spline upgrade. So until then, old stock shafts will be going in. It is important to make sure that the sealing surface on the inner axle near the differential is clean and free of any raised surfaces or corrosion. Likewise, the other critical surface on the axles is the portion just at the base of the stub shaft where the support needle bearing is for the stub shaft. These surfaces are unique in that they allow both radial and axial relative motion between the spindle and axle housings and the axle itself. It is also important to carefully inspect the splined portions as well. The spines also must be able to move freely within the lockout hub and the differential while under load.
 

Attachments

DIVE DIVE

Well-known member
217
778
93
Location
Chesapeake, VA
I was able to get the majority of the front axle reassembled today with the exception of getting the hubs back on. Should have her buttoned up tomorrow. Had to replace one inner bearing cup and one stub shaft needle bearing. Then, the spindle seals were replaced as well and I’ll need new o-rings for the lockouts as well but I’ve yet to source those. I’ll be temporarily reusing the old o-rings to keep any moisture out though.
 

Attachments

adf5565

Well-known member
375
687
93
Location
Tioga, PA
I was able to get the majority of the front axle reassembled today with the exception of getting the hubs back on. Should have her buttoned up tomorrow. Had to replace one inner bearing cup and one stub shaft needle bearing. Then, the spindle seals were replaced as well and I’ll need new o-rings for the lockouts as well but I’ve yet to source those. I’ll be temporarily reusing the old o-rings to keep any moisture out though.
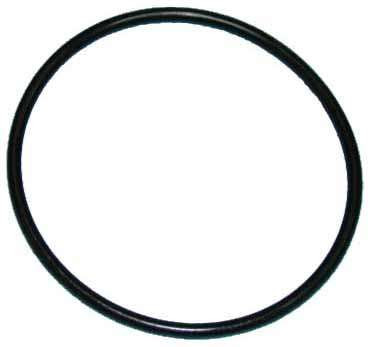
Good call on the o-rings, I completely forgot about those on mine and will have to get a set too. Are either of these the right ones?


DIVE DIVE

Well-known member
217
778
93
Location
Chesapeake, VA
Good call on the o-rings, I completely forgot about those on mine and will have to get a set too. Are either of these the right ones?

Not quite sure yet.

Looks like a -239 o-ring.

I personally wouldn't purchase either of these. It looks like the top one would work, but without the specs I wouldn't purchase. The groove in the cap tells me that its a AS568 -239 o-ring. I'm going to pick up a few of them from a local supplier here in Norfolk, VA. $1.89 each.

Talked to Norm at Chesapeake Bay Rubber & Gasket and he hooked me up with three -239 o-rings free of charge and they fit perfect!
 
Last edited:

DIVE DIVE

Well-known member
217
778
93
Location
Chesapeake, VA
Finished assembly of the drive hubs and packed and installed the hub/rotor assemblies. It is important not to over grease here. Pack the bearings well and lightly coat all other components. Over greasing can lead to trouble getting the hubs to lock and unlock. Then I was able to get the axle back under the truck yesterday. Op tested the hubs and locker after putting some oil in the differential. Everything seems good when spinning by hand after final assembly.
 

Attachments

DIVE DIVE

Well-known member
217
778
93
Location
Chesapeake, VA
Next…

The low hanging shock mounts will not be going back on. Similarly, I’ll be doing a u-bolt flip to gain some clearance there as well. Then the lowest hanging item will be the massive 14-bolt housing.
 

Attachments

DIVE DIVE

Well-known member
217
778
93
Location
Chesapeake, VA
Pre-cleaned, then tomorrow pressure wash.

Bought everything for 8k and then the guy gave me 500 back for the bad motor. Add all the paint and gaskets, seals, bearings and such and I’m 7,731 dollars into this truck so far. Not counting labor hours obviously ( which are over 250 at this point).
 

Attachments

DIVE DIVE

Well-known member
217
778
93
Location
Chesapeake, VA
Got the drums and backing plates cleaned up yesterday. I was going to do a disc brake conversion, but haven’t nailed down exactly how to retain a parking brake yet while converting to discs (without spending a fortune) so the drums are going back on for now.
Wheel cylinders are totally shot and will be getting replaced.
I was able to remove the whole shoe assembly in one piece by just removing the retainer pins and pivot pin from the backing plate, kinda neat-I’ve never done that before.
 

Attachments

DIVE DIVE

Well-known member
217
778
93
Location
Chesapeake, VA
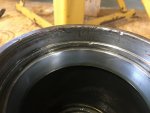
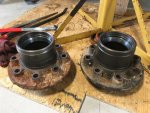
Rear hubs will be getting blasted and painted followed by new seals. Looks like a previous owner may have had some serious trouble getting the seals out at some point, so I’ll hand work that surface and use some RTV as well when I install the new seals.

Found a little bees nest in the driver side drum assembly when I took it off!

53FD7B93-F158-4EDF-82E6-6605DC8EF2B0.jpegA31D63EA-6083-453D-8735-4C1789A0A13E.jpeg468B6E7D-0288-46E5-AC3C-28DA4C478D04.jpeg
 
Last edited:
Top
AdBlock Detected

We get it, advertisements are annoying!

Sure, ad-blocking software does a great job at blocking ads, but it also blocks useful features of our website like our supporting vendors. Their ads help keep Steel Soldiers going. Please consider disabling your ad blockers for the site. Thanks!

I've Disabled AdBlock
No Thanks