• Steel Soldiers now has a few new forums, read more about it at: New Munitions Forums!

  • Microsoft MSN, Live, Hotmail, Outlook email users may not be receiving emails. We are working to resolve this issue. Please add support@steelsoldiers.com to your trusted contacts.

M1009 Little Red Riding Hood.

cucvrus

Well-known member
11,474
10,441
113
Location
Jonestown Pennsylvania
No pictures. But it did happen. I managed to get the fenders aligned and properly shimmed. I still have the body semi floating on the frame as the cab mounts are all loose. Next up I will be getting the hinges and hood reattached and aligned. Being that I had the body lifted from the frame all the body mounts must be loose until I get the hood aligned. I do know one thing. These old vehicles have terrible fitting body panels in comparison to the new vehicles. I am using all OEM Genuine GM sheet metal. I remember working back at the GM dealer in the 70's and 80's and the terrible fit and finish on all vehicles. Corvettes were some of the worse. Last night I spent 2 hours getting the fenders properly shimmed and tight. I could half fast it but I see to much of that. Good things take time. and my thought is as long as the M1009 is in my shop on jack stands the longer it will survive after the "Built in a Barn" process is complete. Many side jobs get in my way and work has been very busy now that some of the supply issues are being addressed. Last night I took my Wife on an expensive date. We went to the gas station and filled our vehicle with gas. Take Care and Be Safe. Be Nice to others.
 
Last edited:

rtk

Well-known member
Steel Soldiers Supporter
1,190
446
83
Location
Lockport N.Y.
No pictures. But it did happen. I managed to get the fenders aligned and properly shimmed. I still have the body semi floating on the frame as the cab mounts are all loose. Next up I will be getting the hinges and hood reattached and aligned. Being that I had the body lifted from the frame all the body mounts must be loose until I get the hood aligned. I do know one thing. These old vehicles have terrible fitting body panels in comparison to the new vehicles. I am using all OEM Genuine GM sheet metal. I remember working back at the GM dealer in the 70's and 80's and the terrible fit and finish on all vehicles. Corvettes were some of the worse. Last night I spent 2 hours getting the fenders properly shimmed and tight. I could half fast it but I see to much of that. Go things take time. and my thought is as long as the M1009 is in my shop on jack stands the longer it will survive after the "Built in a Barn" process is complete. Many side jobs get in my way and work has been very busy now that some of the supply issues are being addressed. Last night I took my Wife on an expensive date. We went to the gas station and filled our vehicle with gas. Take Care and Be Safe. Be Nice to others.
Yup , a good time at the pumps !!!! this fuel issue affects EVERYTHING in the supply chain !!!! stay safe , be well Bon k
 

cucvrus

Well-known member
11,474
10,441
113
Location
Jonestown Pennsylvania
I worked on my project last night for a few hours. I scuffed and clean a pair of hood hinges and painted them. I will need to lower the front end from the stands to get the hood installed. The M1009's at a nice height to work on but a bit high for paint and reassembling the body. I will try and get some pictures as soon as I think the camera has dried out. I have hood springs and other parts to get cleaned, painted and ready to install. Slowly but surely. It only gets older and rarer every day I have it captured in the barn. Because I know that this week another 2-3 CUCV's will fall victim to hackers and scrappers. Normal days 26 vehicles are scrapped every minute in the US. That is over 12 million every year in USA alone. That is faster then they are currently being built. Take Care. Think about that un-needed modification or part replacement.
 

cucvrus

Well-known member
11,474
10,441
113
Location
Jonestown Pennsylvania
1655281760575.png
After being in the Susquehanna River for 2 weeks this is what I found on my camera. The camera was found and so was Nemo. Win, Win.
I spent most of last night fixing the unknown left door dent from last year. I also installed the painted hood hinges.
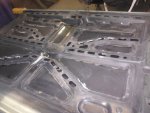
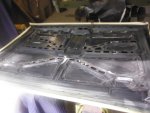
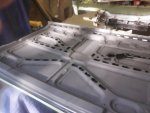
DSCF8566.JPG After that I lowered the truck on the jack stands and placed the hood upside down on the sawhorses. I scuffed and blew out all the dirt and maple seeds from the inner structure. That hood understructure was a mouses home for many years before I had it in the barn. I am amazed at the great condition of the hood all around. The edges are all clean and rust free. I am going to spray the underside satin black as it came from factory. I had sprayed a few flat black but that does not match the factory sheen. Most time I prefer the base color of the vehicle I am painting. Tan truck gets tan under the hood, green gets green under the hood. I am sticking with factory on this to keep it real and unmodified. Then I will roll out the 20" rims and the reverse lift kit and slam it down to the ground for a spark show. Take Care and have a Great Day. More progress as it happens. DSCF8565.JPG
I did use some body sealer and adhesive to attach the inter structure. It will look like new when painted. Grey was the only color I had, and I didn't want to waste it. Take Care.
 

Mullaney

Well-known member
Steel Soldiers Supporter
Supporting Vendor
7,769
19,877
113
Location
Charlotte NC
View attachment 870456
I hope this Built in a Barn unit is doing well in Germany. I hope the repairs came out great from the accident it was involved in. Take Care and Be Safe.
View attachment 870457
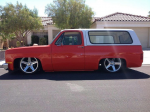
This picture showed up on my Wife's Facebook as a 2 year reminder of completion. The Goodyear MTR tires make the final touch. Take Care. Thank you for the continued positive support.
.
That is (was?) a good looking Built In A Barn truck!
.
 

german m1008

Well-known member
Steel Soldiers Supporter
890
1,332
93
Location
Rhein-Main Area, Germany
View attachment 870456
I hope this Built in a Barn unit is doing well in Germany. I hope the repairs came out great from the accident it was involved in. Take Care and Be Safe.
View attachment 870457
This picture showed up on my Wife's Facebook as a 2 year reminder of completion. The Goodyear MTR tires make the final touch. Take Care. Thank you for the continued positive support.
Thanks for asking. A lot has happened,
current pictures can be found here.


cucvrus

Well-known member
11,474
10,441
113
Location
Jonestown Pennsylvania
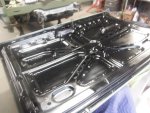
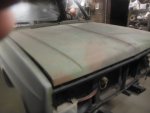
Not much to report. I did some final scuffing and cleaned the hood with the DX330 wax and grease remover. I painted the hood after taping the edges and left it in the shop while I went out and mowed grass and worked on my trailers. I was out till dark. Long day. Off to rest and back at it again today. DSCF8569.JPG DSCF8578.JPG That is wet paint. It will tone the sheen down a bit when it dries. Take Care and Be Safe.
 

Sezzo

Well-known member
141
296
63
Location
Bamberg (Germany)
Painted the underside of the hood again. Now I think it is too flat. I should have undercoated it with Rusfree. View attachment 871448
I am stuck in one place and spinning my wheels here. Back in the day I bought semi flat black paint and it was a perfect match. I think matt black should be the same. But NOOOOO.
No project without setbacks. Just keep going, keep calm and have fun. If you have no fun right now just take a break and continue when you feel it’s right.
 

cucvrus

Well-known member
11,474
10,441
113
Location
Jonestown Pennsylvania
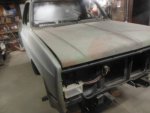
I have the hood back on again. Not permanently but for fit and finish purposes. It aligns well and fits evenly. I don't have the latch in place at this time but am pleased with the alignment. More later. DSCF8629.JPG DSCF8630.JPG That is about the nicest OEM hood on a CUCV I have ever seen. And next month this truck will be 39 years old. Like fine wine it improves with age. Have a Great Day.
 
Last edited:
ezgn

Well-known member
650
1,039
93
Location
Lake Elsinore Ca.
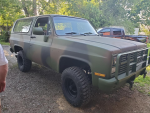
View attachment 733436View attachment 733437View attachment 733438View attachment 733439View attachment 733440View attachment 733441Been a while since I started my hidden treasure. It is a 1984 M1009 with 12,674 miles on it. Been under cover stashed for 20 years. I cleaned it really well and removed everything so it did not sit with dirt and critters living in it. I have it since about 1996 I think. If I had it to over again I would have stored it as it was. It has original paint on the body and doors. I used the fenders and hood in preparation of just using new parts. I am in the process of putting batteries in it and moving it outside to gain access to a CUCV M1028 cab a member is coming for. No helpers today but with the help of my Kubota I should be able to pull this off. View attachment 733442New set of defect damaged batteries and I will post more later. Have a great day. Stay cool and dry. Still have a complete 4 inch lift kit for an M1009. Moving quickly.
It's good to have a project that you're excited and energetic for after all the time you have spent on vehicles. This sounds like one that you're really going to enjoy.
 

cucvrus

Well-known member
11,474
10,441
113
Location
Jonestown Pennsylvania
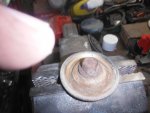
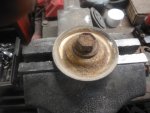
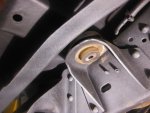
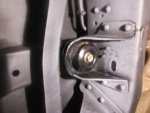
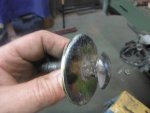
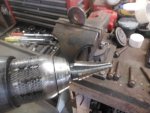
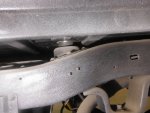
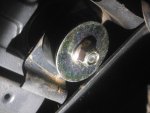
I am going to complete my job that I started last year. I started at the right front cab mount. My advice is to remove the old bolts and clean the threads very well in the cab. Use a tap or a new bolt and grease and oil. Run it in and out of the captured can nut till you can thread it with your fingers. If it is tight do not force it. You will get better results with an impact getting them loosened. This is the right front. DSCF8697.JPG I used a jack to lift the cab sligjtly. Not much, just slightly. I jacked on the flange of the under-body floor reinforcement. DSCF8698.JPG I over lubed all the caged nuts and fasteners every chance I could get. DSCF8699.JPG I also blew lots of compressed air up the holes and cleaned out fine sand and grit. Second one on the body from the front of cab. Same thing. Cleaned lubed and blew air. DSCF8700.JPG DSCF8701.JPG The center cargo floor mounts will be a real treat to remove. I had to grind the weld from the head of the carriage bolt and remove the bolt. DSCF8703.JPG I replaced the mounts and washers. Be aware that the washer provided in the kit are not compatible with the stock carriage mounting bolts. DSCF8704.JPG The square on the head of the carriage will not fit thru the supplied washer. I think they assumed you would be replacing that bolt. That was no problem. I secured the washer in the vise and used a step bit to neatly trim the hole out to the correct size. I love these step bits they make perfect holes in metal. DSCF8705.JPG DSCF8706.JPG Perfect fit. DSCF8702.JPG And the center cargo mount on the right side is in place. Now I must get the rear one in place. I will show that is the next post. I am breaking for lunch. Be Safe.
 

cucvrus

Well-known member
11,474
10,441
113
Location
Jonestown Pennsylvania
I also used a long Snap-On pry bar to adjust and get the body centered on the mounts. DSCF8707.JPG I used a ratchet strap on the rear frame to hold the body over while I replaced the right rear mount. That mount took me 2 hours to get in but now I am a pro at it. Live and learn. No cursing took place only loud rock music and lots of ice water. This is the right cargo center mount looking from underside up. DSCF8708.JPG This is the left with all the upper new mounts in place. DSCF8709.JPG This is the rear mount with everything in place. I was able to use all OEM cab bolts as this M1009 only has 12K miles on it and has been in my barn since 1996. Snug and dry as a bug in the rug. This is the right rear mount all up and in place. Keep in mind when you use the Energy suspension cab mounts you will need to remove the bracket and caged nuts that hold the rear bumper braces. No big deal. But I can tell you I would either do this with the fuel tank removed and or the rear bumper removed. It makes it very easy. DSCF8710.JPG Good Luck on your Projects and Stay Safe. I will post more later. I know someone will learn something from this information.
 
Top
AdBlock Detected

We get it, advertisements are annoying!

Sure, ad-blocking software does a great job at blocking ads, but it also blocks useful features of our website like our supporting vendors. Their ads help keep Steel Soldiers going. Please consider disabling your ad blockers for the site. Thanks!

I've Disabled AdBlock
No Thanks