banditt1979
Well-known member
- 273
- 738
- 93
- Location
- Cincinnati, OH
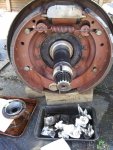
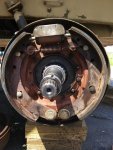
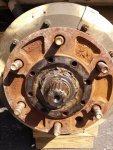
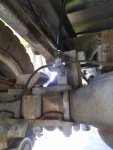
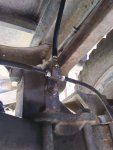
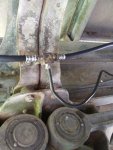
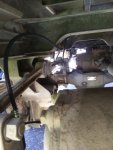
Since I had some alone time this afternoon without child to entertain, I started studying the air tanks. My original thought was to remove the inboard tank but realized if I could remove the outboard tank I could probably just lift the inboard tank out of the way to get to the brake line clamp. Worked out exactly like that, removed the old frame line, bent up a new one similar to it, reused the clamps and got the new frame line installed, not too bad at all. The 3 way junction block that it connects to twisted off of its bracket last week so I tried some JB Weld, that didnt work so I guess its a spider web of zip ties after I get the rubber lines installed. Which will be either tomorrow or Saturday, then start pulling wheels for hub service and wheel cylinder rebuild. Little by little its coming together. If I was single and no children I would already be driving this beast, some folks at work are pestering me to bring it in.
")